How to Record Gameplay Videos.
Making a primitive screenshot – by pressing the Print Screen key and pasting the contents of the clipboard into Paint – is probably something everyone knows how to do. Some games can even take screenshots by themselves.
However, to record video, you will need a third-party utility. The most appealing one seems to be Fraps.
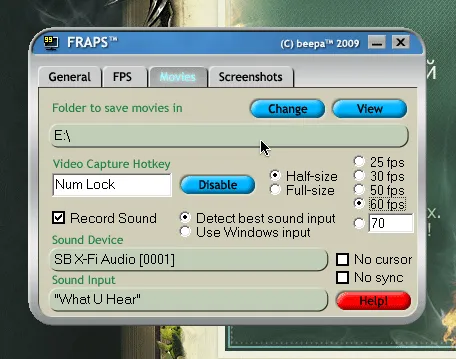
Setting it up is not particularly complicated – you just need to choose a location to save the raw video (you need at least 5 GB of free space, preferably 20).
I prefer to assign the video recording key to Num Lock – it’s really helpful, as you can always check if the video is being recorded by the lit LED.
The video should be recorded at half the screen (the exception being a small monitor with powerful hardware), and the number of fps is determined experimentally; I consider 60 to be the optimal choice for weaker computers.
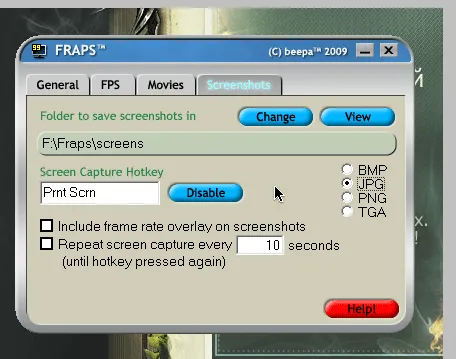
There’s no need to explain the screenshot settings, they’re even more transparent:
Important: before you start recording video, turn off vertical synchronization.
So, by pressing Num Lock and capturing the desired moment in the game, press this key again to stop the recording.
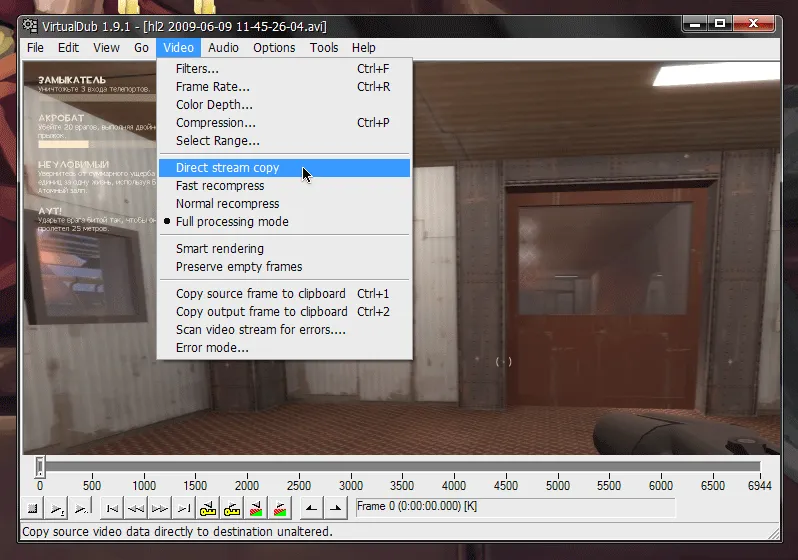
Now the most interesting part begins – working with the raw video. Don’t try to open it with regular players, and don’t faint from its size.
To cut out unnecessary fragments before compressing the video, I recommend VirtualDub – the best low-level video editor I’ve encountered (this program is absolutely free, by the way).
Once you open the file, the first thing you should do is select the direct stream copy option – we don’t need to compress the video right now, we just need to cut out the excess.
Some also compress video with VirtualDub, but in my opinion it doesn’t do it as quickly and as well as other utilities. Its strong point is different – the program cannot be made to "lag" even with 30 GB raw video devourers.
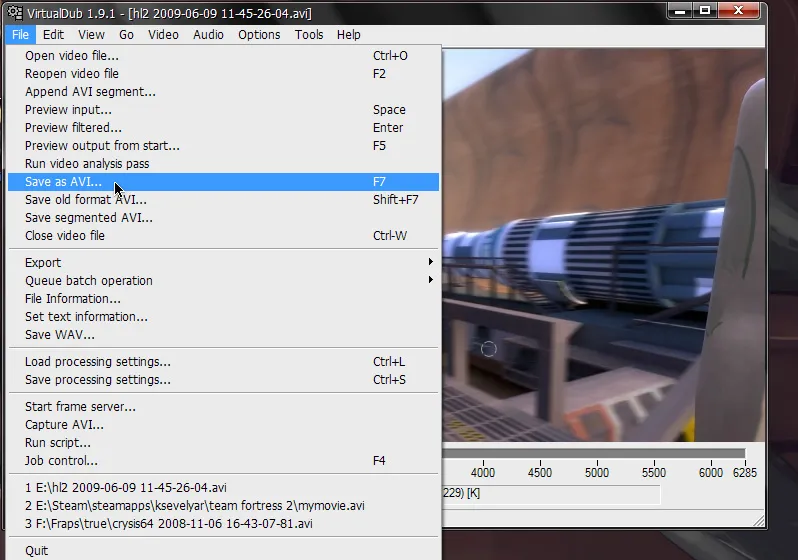
Now, highlight the unnecessary chunks with the mouse by moving the slider while pressing the home and end keys on the keyboard. Delete them by pressing del.
You can more precisely position the slider using the arrow keys on the keyboard.
Additionally, this program has two useful features – saving a single frame from the video and saving the audio track from the video. They are available in the "File" menu.
Once you’ve cut out the parts that ooze dullness, go to the "File" menu and save the video:
Now it can be compressed. The main thing I want to emphasize is the codec; I highly recommend using X264.
Previously, I used XviD and DivX codecs. However, now I can say without hesitation - le roi est mort! Vive le roi!
There are quite a few utilities for this, but I prefer the simple, free, and very high-quality Xvid4PSP. Don’t be scared by the name - its capabilities go beyond xvid or psp.
Launch the program, open the video and set the following settings:

The "save" button adds the file to the queue, and the "encode" button starts the video recompression process.
Now it can confidently be uploaded to YouTube or further worked on using a high-level video editor – to add effects, subtitles, titles, transitions, etc.
If you find this post interesting – I’ll write a sequel, where this part will be described in more detail :)