Lessons on Redstone Logic in Minecraft. Lesson One: Repeater / Diode / Delay
In today's lesson, we will explore the new feature Beta 1.3, which I mentioned in passing last time. This time, we won't gloss over it, but will examine it thoroughly.
Part Zero. Repetition is the mother of learning.
Last time, we were boosting the signal with a clever setup using two inverters. However, I honestly misspoke, saying that this was a retro device. In Beta 1.3, Notch has given us a new component of Redstone Logic that can indeed be used to amplify signals. It is referred to by three names - Repeater / Diode / Delay.

Let's figure out how it works.
Part One. Diode.
Although the first mode was labeled Amplifier, to understand how the component functions, we should start with the principles of the Diode mode.
Do you catch the connection? (c)
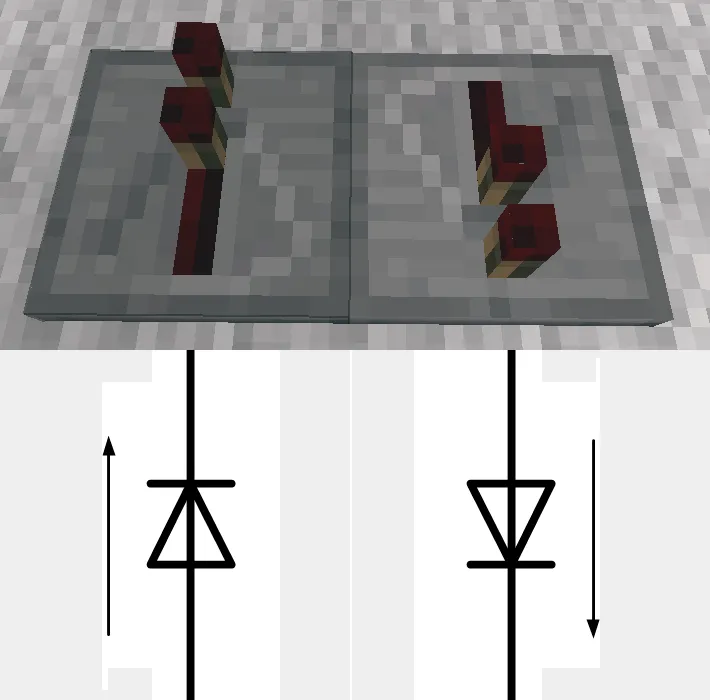
Indeed. The triangle on the component is not engraved there for no reason. For electronics enthusiasts and simply for those who studied well, there’s not much to explain here. However, if you are not familiar with the secrets of this electrical element, there’s no need to rush to the nearest library and grab a hefty tome. It's simple: the signal flows in the direction indicated by the arrow in the diagram. To make it even simpler – towards the apex of the triangle (from now on, I will refer to this as the diode's apex or output, and the opposite side as the base or input). If the signal comes from the other side, the diode remains in the off state:

In this diagram, both signals are moving from right to left. In the lower case, it enters the base of the diode, while in the upper case – its apex.
Now let's discuss how to connect wires to the diode. The wire must enter the base and not run parallel to it:
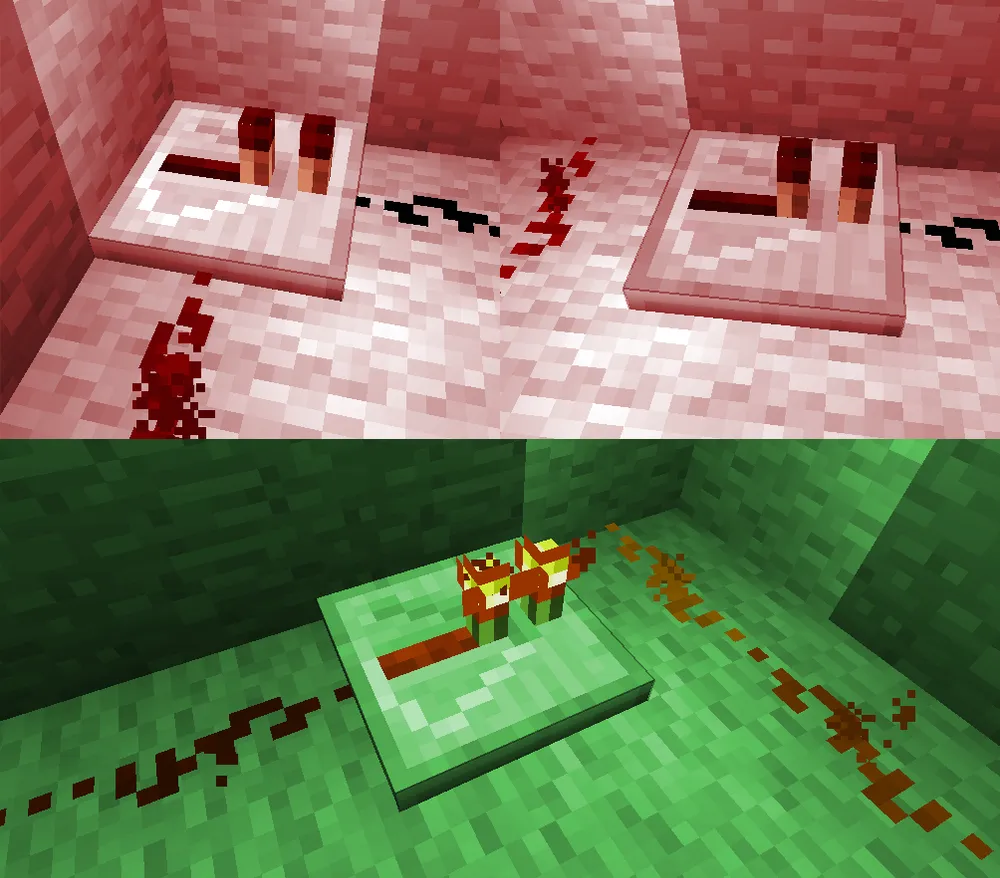
As with other components in the circuit:
However, you can connect a wire to a door from the side. The diode will not tolerate such treatment.
But the output wire could care less how you connect it. You can plug it in or just lay it nearby; the result will be the same: the signal will calmly travel along the wire.
Part Two. Repeater.
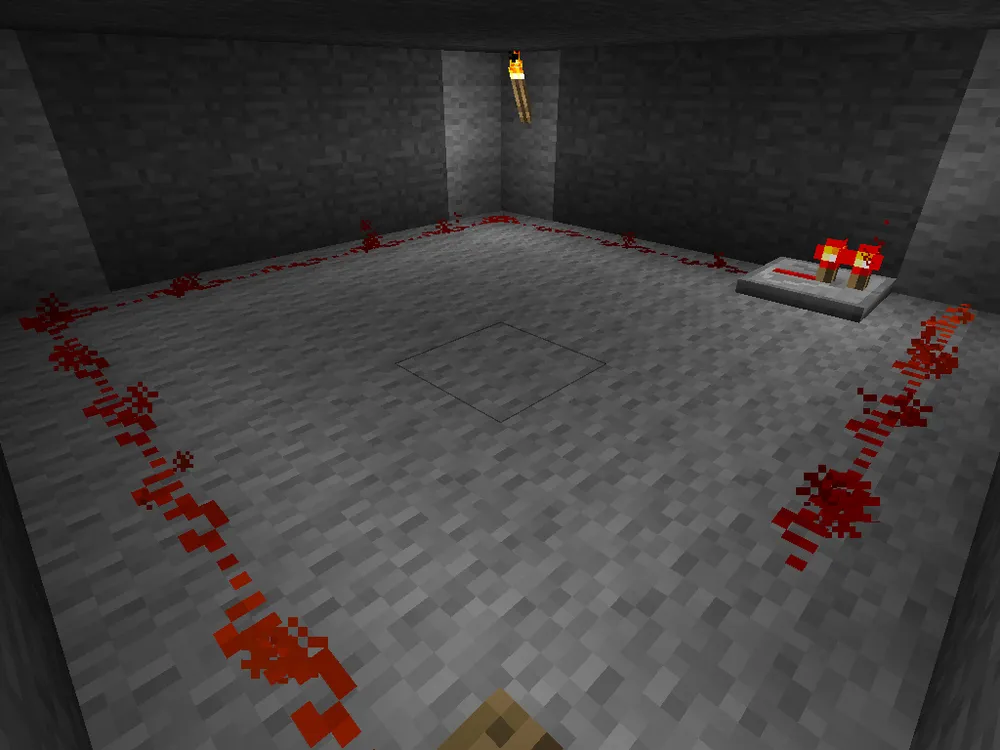
Let's return to our testing room from the initial lesson. On the floor, we had a rather sad picture:
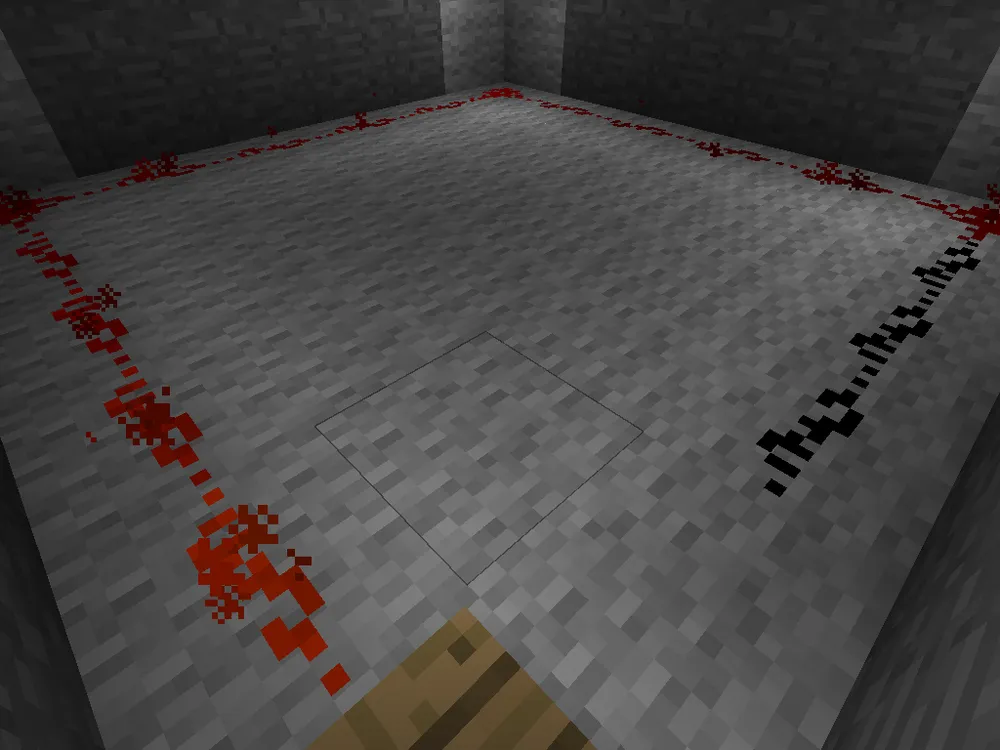
The Fifteen Rule. A visual demonstration.
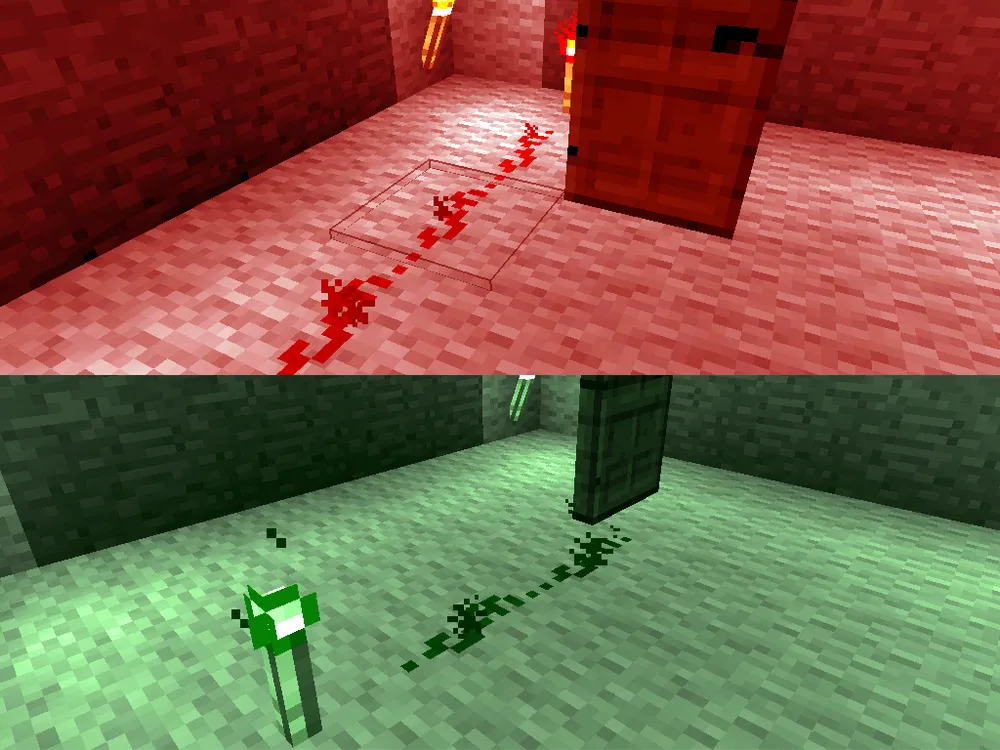
And here's what we get by installing a repeater:
That is, the repeater, receiving a fading signal at the input, repeated its value at the output, resetting the count of fifteen blocks, just like the configuration with two inverters did.
In fact, there is a tremendous saving in space and height. However, it ends up being more expensive, as crafting consumes the same components of Redstone Logic as with the two inverters, plus three stone blocks. You have to pay for compactness.
Part Three. Delay.
The most interesting mode, in my opinion. Try right-clicking on the component, and you will see how the distance between the torches changes:
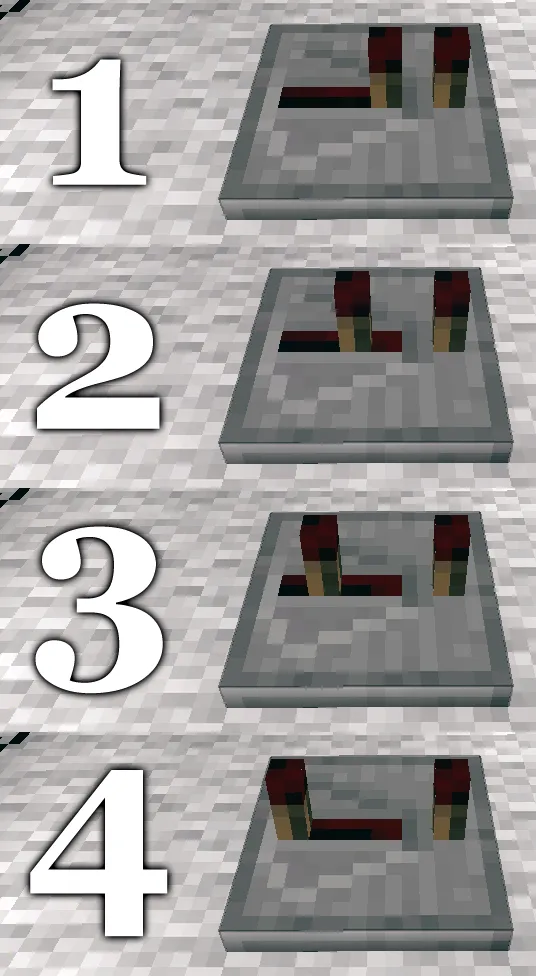
The greater the distance between the torches (see the picture), the longer the delay of the signal on this component will be. To find out the delay time, simply multiply the distance between the torches by 0.1 seconds. So, if your delay element looks similar to the element number 3 in the diagram, its delay will be 0.3 seconds.
Want to create a delay of 0.6 seconds? No problem. Just connect another delay of 0.3 seconds to the output of the element. You can add another one at 0.4 and get a full one-second delay.
For demonstration purposes, I recommend crafting a note block. Its principle of operation is somewhat similar to others in the circuits: the signal comes into the note block, and the block plays a note. The note can be adjusted by right-clicking. This is a brief summary, and I think I will dedicate a separate lesson to note blocks, given their relation to Redstone Logic (we will be writing DragonForce – Through the Fire and Flames =D).
So, you crafted it. Now, if you have a musical ear, this circuit should be enough for you to feel the difference:
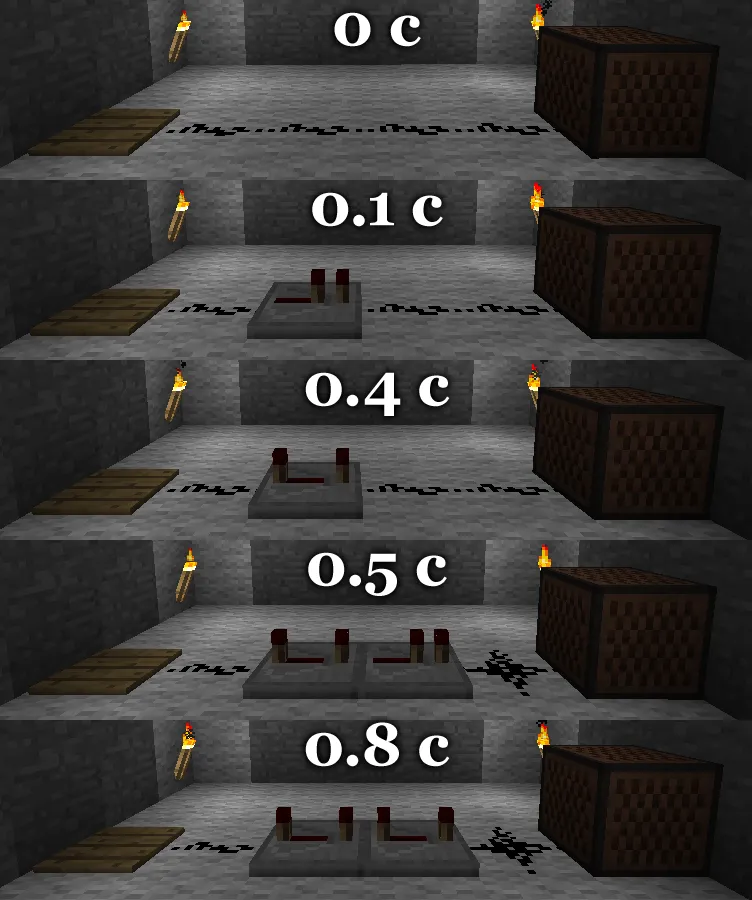
For further confirmation, I suggest you experiment with this circuit:

Don't mind the plus-shaped wire that stands after the amplifier; it works as it should.
Set two blocks to two different notes. One to high, the other to low.

Step onto the button and listen to the created musical sequence. Even in the picture, you can see that the blue note is lower than the orange one, meaning it came out later. The great power of the delay element.
With that, allow me to take my leave.