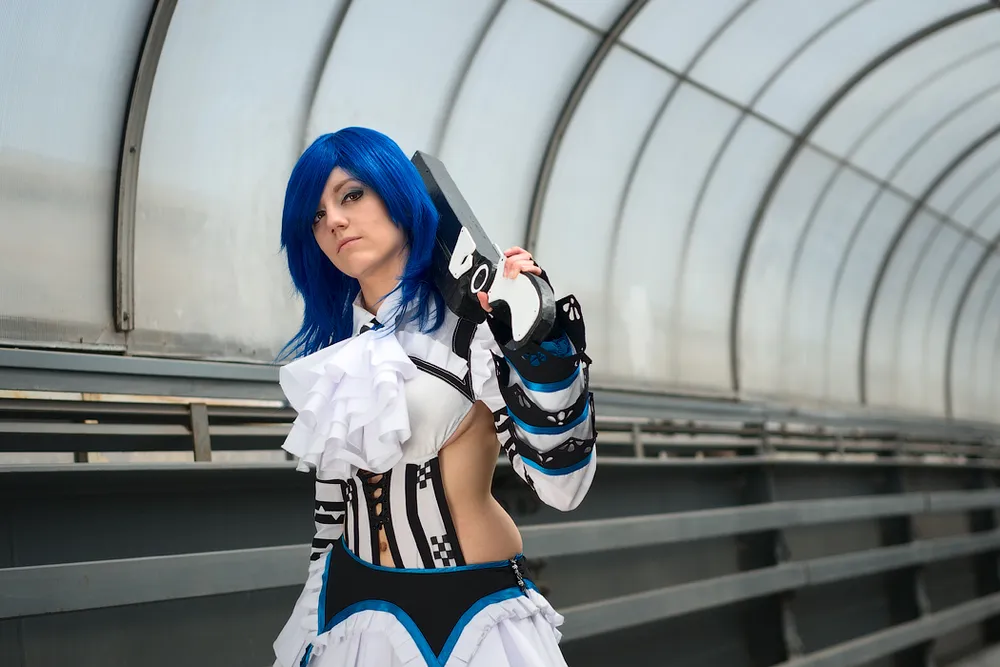
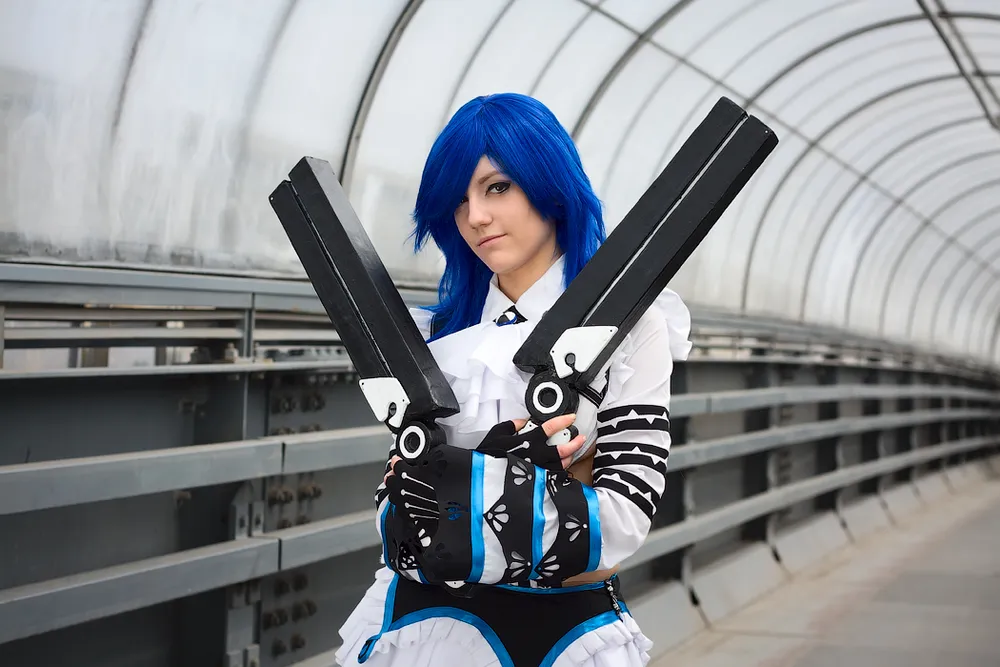
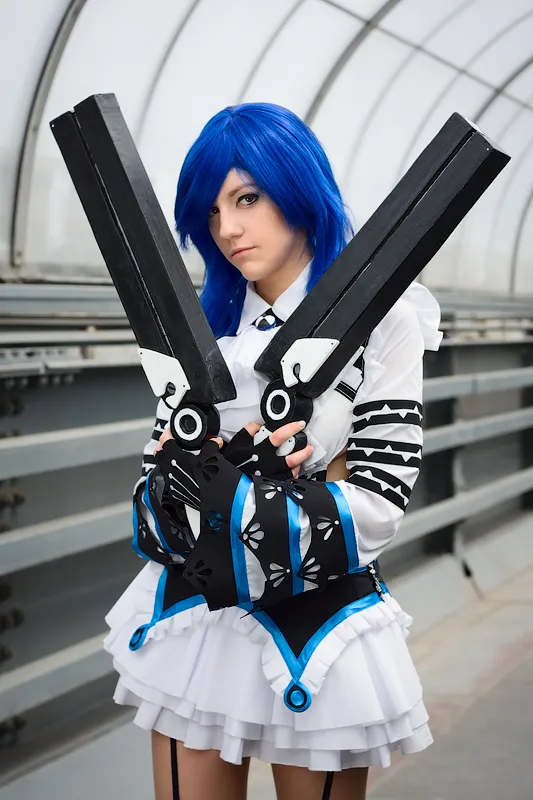
My cosplay of S4 League
Oh, and it’s been a while since I last showed up here. But Strelok89 gave me a good kick, then cheered me up, and I decided to talk about how cosplay is made, so to speak, from the primary source. Which (by random coincidence) I happen to be.

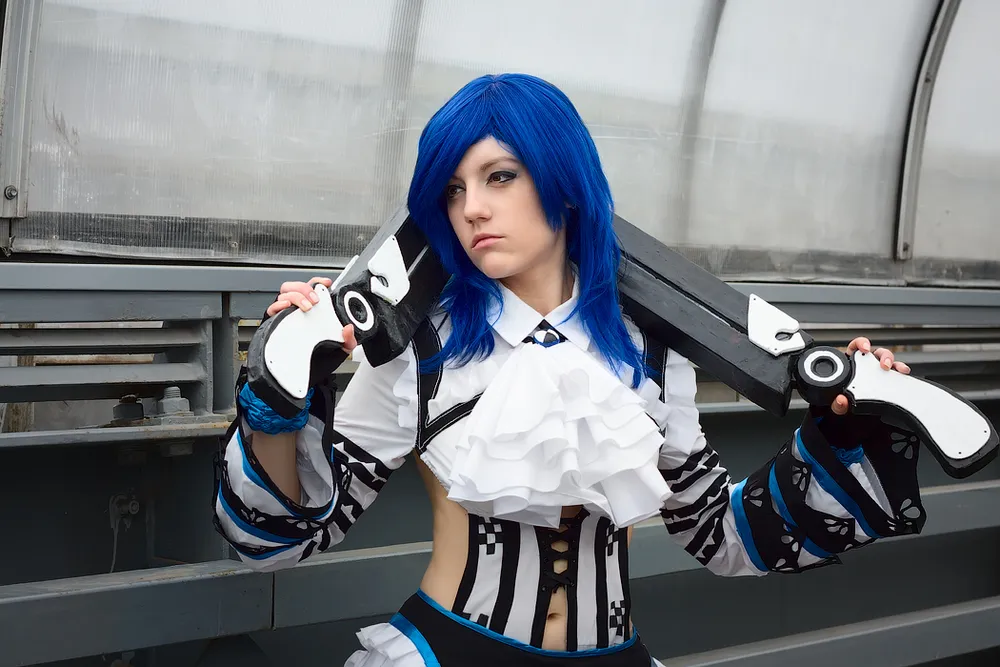
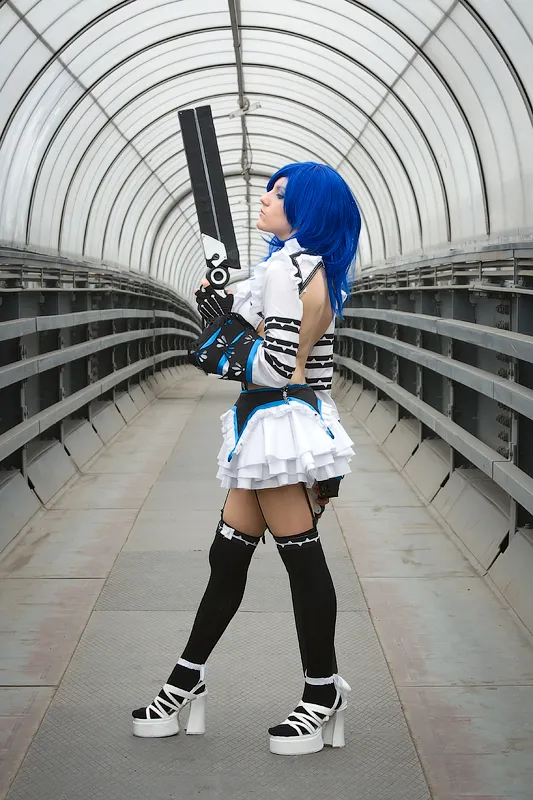
It all starts with that moment when you’re struck by a crazy idea to step into the shoes of a character you like from a movie/cartoon or a game. Thoughts fill your head: "What if I were like that, would I be cooler?" The girl I tried to portray can leap over her head while simultaneously shooting huge pistols, probably the size of her leg. Unfortunately, I can't learn to do that, but I’ve tried to at least look the part physically.
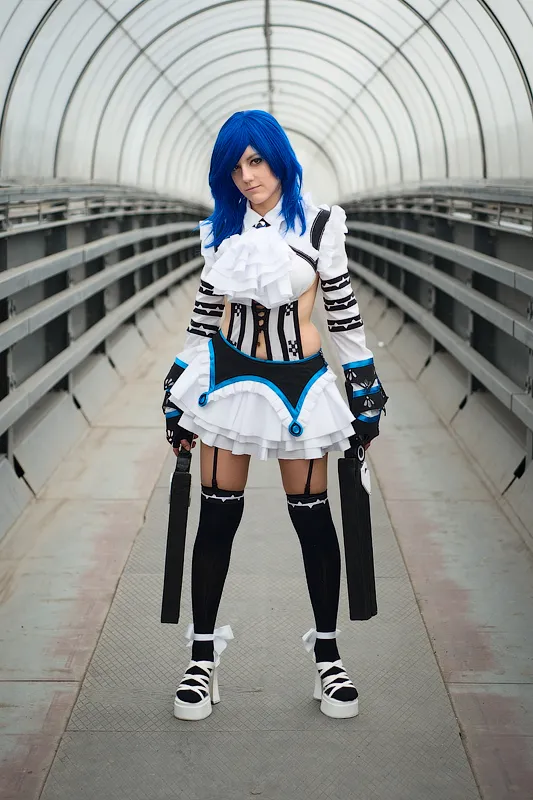
The very first thing to think about is: "Do you even need it or not?" If the answer is yes, you need to be sure that the character suits you in terms of skin color, hair, nose shape, and other features. For example, the white hair makes me look like a representative of a well-known minority, so I chose a blue shade instead. Then we choose the most suitable material. In this case, for such a skirt and jabot (that anxious thing on the chest), a light, thin, yet shape-holding fabric was needed. You should also think ahead about which buttons/elastics you’ll use. I struggled for a long time trying to figure out how to make the costume snug around the waist while also allowing me to walk comfortably. Although 'comfortably' is stretching it: my breasts were popping out every 20 minutes . By the way, I found a way out by tying strips to garters. In general, no matter what you say, to do cosplay you need to have a flexible mind. Honestly, talking about pattern making and sewing, overlocking and fittings isn’t very interesting for me, and probably for you to listen to either.
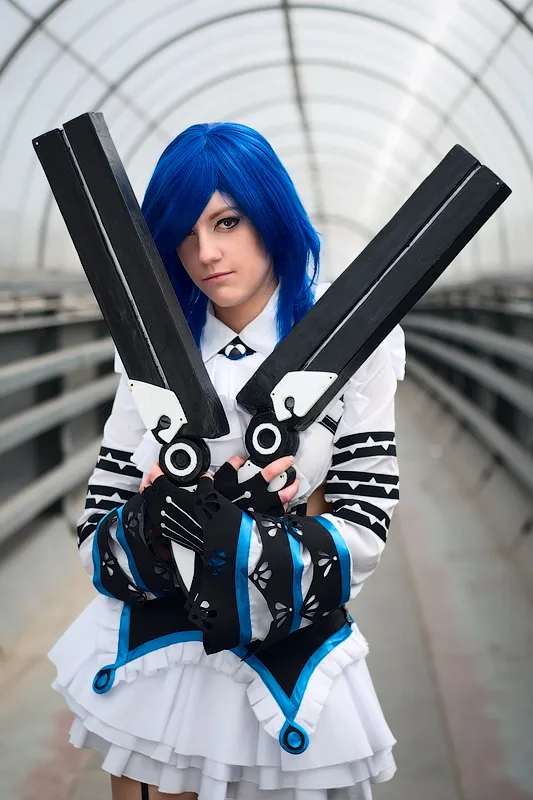
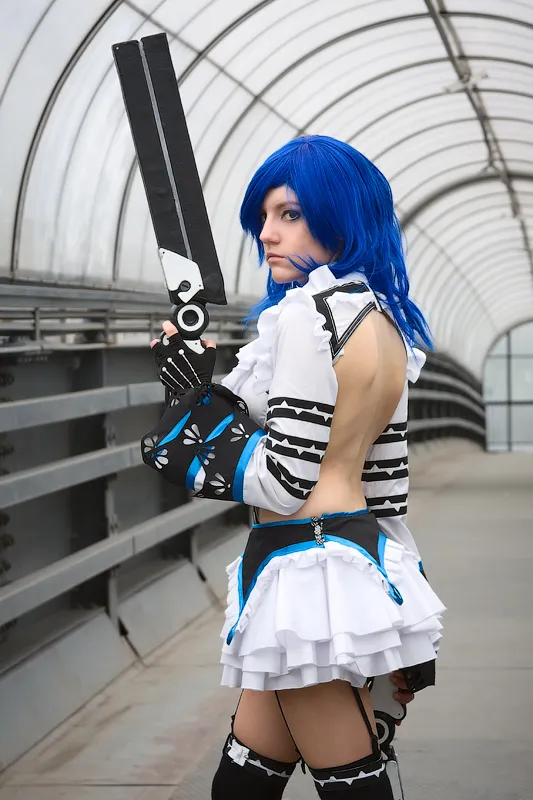
I love making things by hand, so the most enjoyable part for me was crafting the pistols. With such an unusual shape, they made my brain sweat quite a bit for about a month and a half. Quite thoroughly. I spent two weeks thinking through the details and sketching, mentally going through various options: particle board, fiberboard, wood, cardboard, oilcloth, and other delights. The solution I found was relatively simple and a bit strange.
The most interesting thing is that this text can help in making nearly any large pistol.

So we will need:
- sculptural cardboard (thick cardboard),
- instant glue,
- sandpaper,
- mounting foam,
- PVA glue,
- newspapers,
- acrylic paints,
- spray paint cans,
- and various building tools such as scissors, rulers, and pencils.
All of this and much more can be easily found in art stores and on construction markets.
Let’s start with sketches of our future weapon. It’s very important to think through all the small details in advance so that you don't waste extra time and nerves later on redoing things.

We make the barrel. I took a simple parallelepiped as the base. From geometry lessons in school, we know that we need 4 rectangles (very long, in this case). For two pistols, four parallelepipeds are required. Two in a pair. Later we will fill the barrels with mounting foam to give them sturdiness and a bit of weight. For a noble effect, it’s better if the weapon looks heavy.
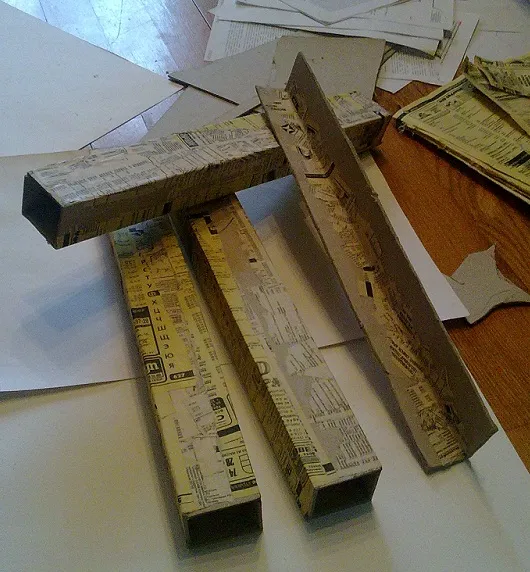
We connect two parallelepipeds with such connectors to get a "full-fledged barrel":

We make a "circle" connecting the handle and the barrel. I don't know how else to name it. In the game, this thing allows the pistols to rotate during reloading, but we have a long way to go for that. So I wasn't too concerned and gave the thickness of the "circle" using the same cardboard in 6-8 layers. The inner layers of the circle form with embellishments (they will allow us to connect the handle and the barrel), while the main ones are just round, and the round ones with a hole serve to resemble the original. Everything needs to be sanded carefully, then glued, pressed, and sanded again. Then primed using regular PVA.
We cut, glue, and sand:

I ran into some problems with the handle:
a) it became too heavy if I made it entirely from layers of cardboard, b) I ran out of cardboard, so I made it easier: I cut out four handle shapes. Two as the base, two as the decoration, and filled the cavities between them with mounting foam. I later cut off the excess foam after it dried.
Those very "circles"

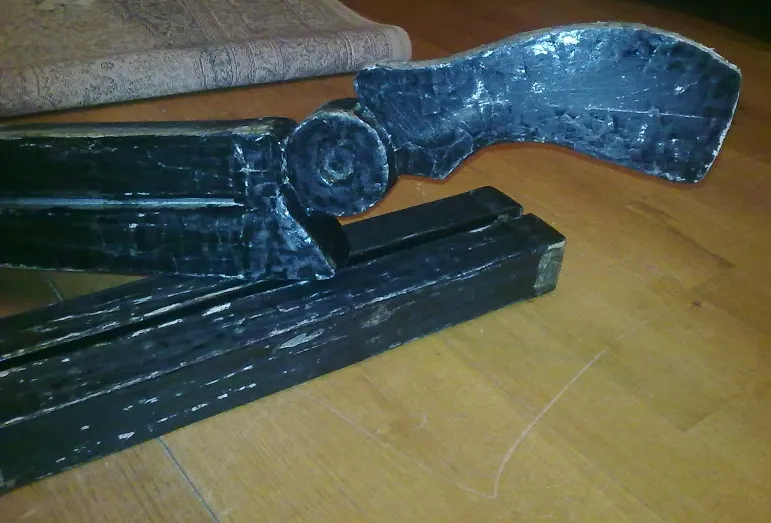
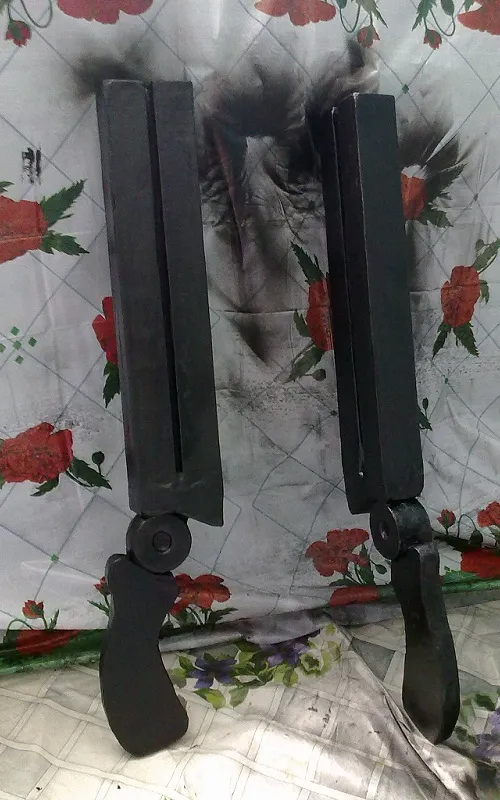
In the end, we have three separate parts: the handle, the barrel, and the circle. Don't forget to cover all uneven parts with papier-mâché and sand them well. Everything must be perfect! We bond the handle to the barrel using foam! It turns out that the foam quite effectively holds together medium-weight objects, just make sure not to cut off too much.
Preliminary painting allows us to notice all imperfections and also see my bedroom floor. :)
And now, finally, we begin painting! It is essential to paint in a well-ventilated area (you’ll see that written on any spray paint can), covering all nearby surfaces with newspapers and whatever else you can find. The paint should be applied evenly, then wait about an hour and paint again, letting it dry (to avoid drips), turning it over and repeating the procedure. I finished the little details with acrylic paint. Carefully with a thin brush. And it seems that’s it. The melee weapon is ready; it turned out to be quite convenient for whacking passersby :3


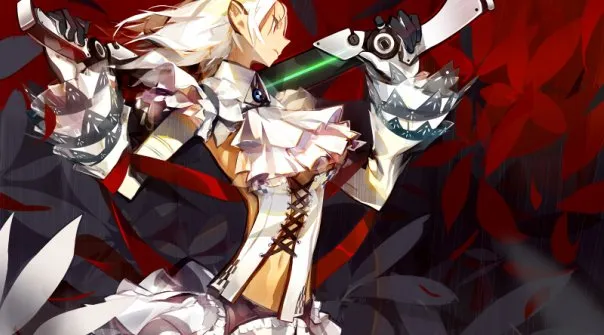
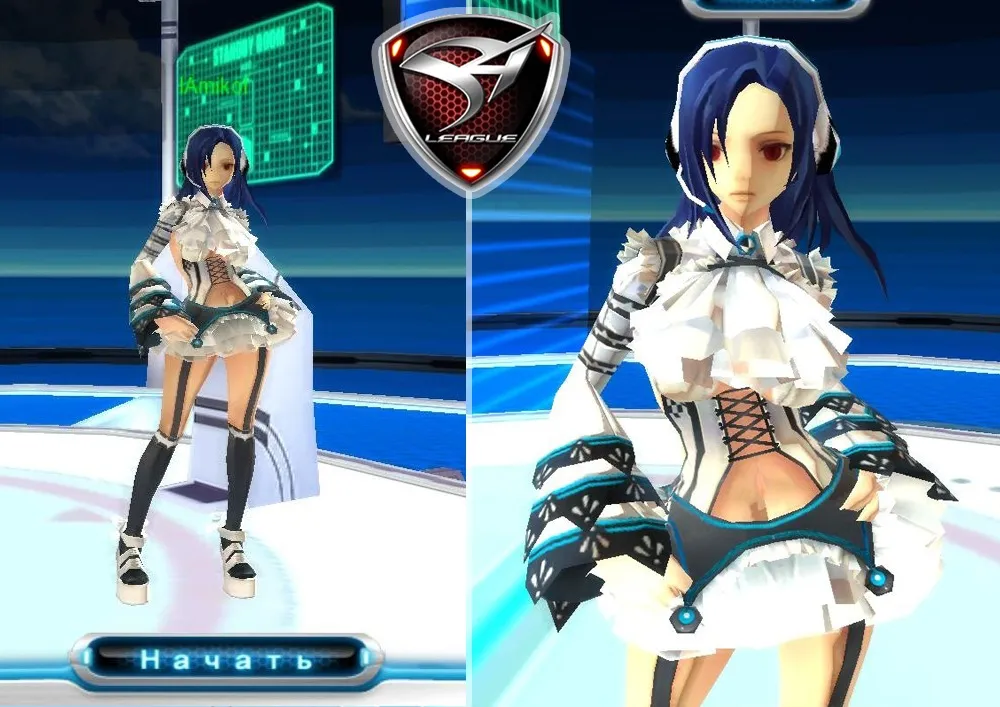
I’m attaching images of the original characters that I based my cosplay on. The first is the official art, and the second is a screenshot from the game. For obvious reasons, they differ :) I tried to take a little from both.
I’ll wrap it up here.
Amiko ♪\(*^▽^*)/\(*^▽^*)/
Proofread by: Nyashka fr4ntic