
Diablo III Walkthrough. Act I: "Tunguska Meteorite"
So, the game is complete, let's figure out what’s what.
Despite the rather linear progression, many have questions about what and how to do things. I also periodically get pestered in private messages about how to achieve certain achievements. So the question of whether to write a guide or not has resolved itself.
Well, rather than a full walkthrough, it's more of a brief description of all the story quests along with several side quests and events. Writing just about how to complete a certain number of locations seemed frankly boring to me, so I was stalling as much as I could. \_
Ready? Then let’s go!
CAUTION! SPOILERS AND A LOT, A LOT OF WORDS!
STORY QUESTS
In total, you will be offered to complete 10 quests in Act I. Only the 4th and 9th quests may pose some challenges; the others won't cause any problems.

Small town with bad karma.
- Caution! Falling stars! Caution! Falling stars! - blares the siren across New Tristram [New Tristram].
After a moment of silence and looking around:
- Caution! Heroes approaching! Caution! Heroes approaching!
You already understood this is about you. All the protagonists of [Diablo III](/games?search=Diablo III) have their reasons to follow the star, and each of them is ready for battle. Throughout the game, we discover what this star embodies, how it relates to the upcoming End of Days [End of Days], and we’ll also meet some once-perished old acquaintances. So, the star..
QUEST I. THE FALLEN STAR [THE FALLEN STAR]

● Issued by: Captain Rumford [Captain Rumford]
● Location: The Old Ruins [The Old Ruins]
● Reward: experience and gold
● Task: kill the Wretched Queen [Wretched Queen]
● Additional task: kill 3 Wretched Mothers [Wretcher Mother]
● Even zombies have mothers. Rock-a-bye, who’s our big mommy in Tristram?..
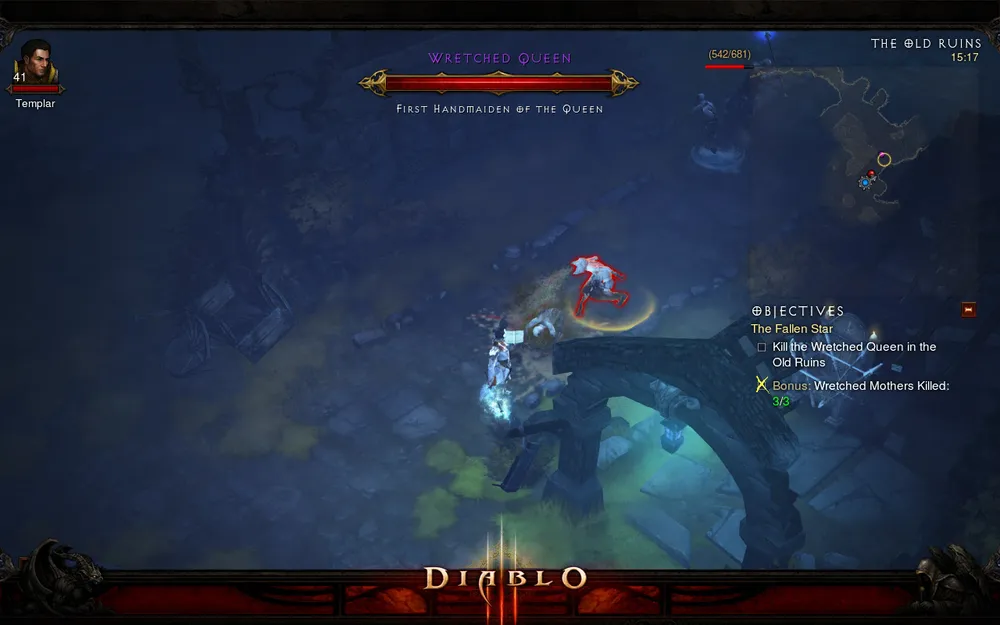
Did the lady eat something rotten for breakfast?..
The very first quest of the Act, by tradition, differs in its incredible difficulty of completion. We start on the outskirts of New Tristram. Quickly destroying the first zombies and chatting with Captain Rumford at the gates. According to him, if zombies were satisfactorily dead before, after the falling star, they have gone crazy and are charging straight from the old cathedral. He suggests talking to Leah [Leah], stating that she is the only one who survived during the meteor's fall (or whatever it was). Leah is waiting for us at the local inn with the picturesque name "Slaughtered Calf Inn" [Slaughtered Calf Inn] (really, better than the Rising Sun Tavern or the Blue Oyster Bar \_..).
She briefly tells us that the town is holding on by a thread (while helping to destroy a few turned people right there in the tavern), so we should hurry to save it before New Tristram becomes a fantasy branch of Raccoon City along with the survivors. Captain Rumford echoes Leah's words, only the militia’s strength is lacking, so we will be saving everyone. He claims he’s the last survivor in uniform, so way over there is Old Tristram, go, my friend, and sort out what and how when you're there.
Between us and the Old Ruins lies a few dozen zombies, artistically placed along the Old Tristram Road [Old Tristram Road]. Among them, we need to find three Wretched Mothers, who are.. ahem.. vomiting out new zombies. In the Ruins, we will face their Queen, the local mini-boss. Dispatch her quickly and head to the portal at the gates. Rumford is happy and rewards us with experience and gold.
I have just one question: the town is separated from the road by a bridge. What prevented them from destroying the bridge if the undead were pressing so hard? Well, whatever.
QUEST II. LEGACY OF CAIN [THE LEGACY OF CAIN]

● Issued by: Leah [Leah]
● Location: Leoric's Passage [Leoric's Passage]
● Reward: experience and gold
● Task: save Deckard Cain [Decard Cain]
● If this were a dramatic movie, then saving the old man from the dungeons would cost 15 healthy heroes and a dog.
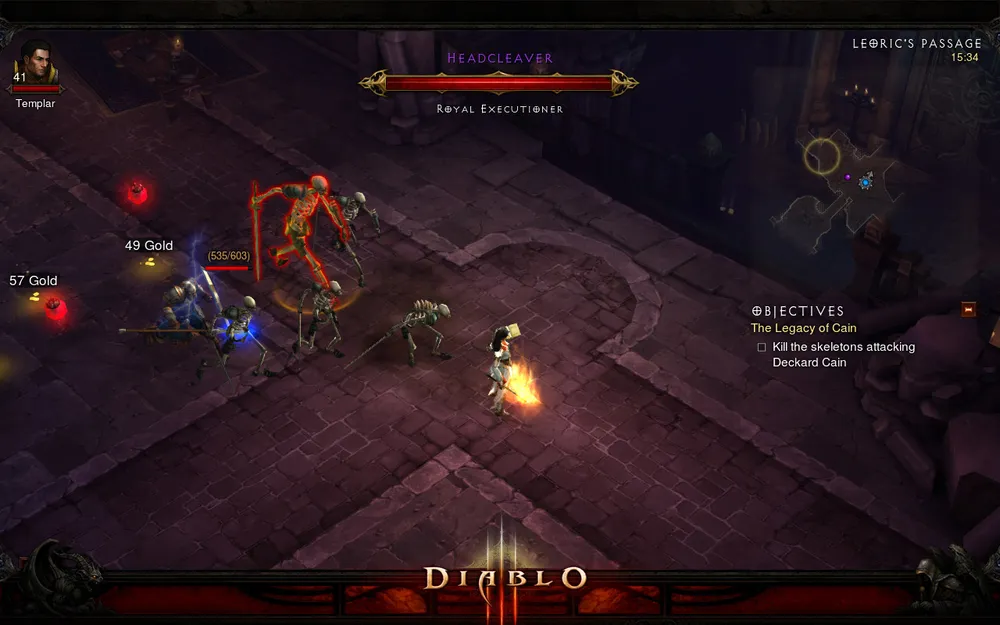
We won’t give up grandpa, we need him ourselves!
This is practically a remake of the corresponding quest from [Diablo II](/games?search=Diablo II): "Rescue of the Righteous Cain. Rebirth". After saving the town from zombies, Leah will believe in better and will say that she feels it in her bones that her uncle is still alive (successfully survived the meteor on the noggin). But first, we will need to unlock the cathedral doors since Captain Daltyn's retreating squad closed them with a key, so that grandpa never crawls out of there to hold back the undead. The militia fought off zombies all the way to Adria's Hut [Adria's Hut], and the key should be there. Since Adria is Leah's mother, she comes along to lament her miserable childhood with her uncle.
In the hut, we find not only a secret hatch and a cauldron but also Captain Daltyn and several zombies. The captain is a full jerk, I tell you, and in every sense. We kill him, receive the key and Adria's diary, reading how "Last night, Aidan came to my chambers" and head to the cathedral via that same road.
In the cathedral itself, there's a huge blue hole gaping, into which we bravely jump. To our surprise, we land without fractures, go through the first level of the cathedral, making new friends, and bump into Leoric's Passage. Upon entering, we see Cain, inexplicably sprightly for his age, dashing away from Leoric's skeletons, whose ghost is just standing nearby and instructing the skeletons to bring him grandpa's bones. In true kung-fu master tradition, Cain brandishes his staff, so we have no choice but to join in. We free grandpa from a pack of skeletons headed by "Headcleaver" [Headcleaver], and we escape through a breach in the wall, which the kind old man opens for us. Leah is extraordinarily pleased to see her chatty relative return, while he scolds her for the signs she supposedly doesn’t see.
Returning to town, grandpa talks so much that you might want to "rescue" him back.
Important! On the first level of the cathedral, be sure to look carefully and search for the Black Mushroom [Black Mushroom] (its location is randomly generated), as it will come in handy later.
QUEST III. A SHATTERED CROWN [A SHATTERED CROWN]
● Issued by: Cain [Cain]
● Location: Chancellor's Tomb [Chancellor's Tomb]
● Reward: experience and gold, loyalty from the Blacksmith [Blacksmith]
● Task: find and restore Leoric's crown
● Additional task: find the blacksmith's apprentice
● ... And the skeleton's soul is kept in his son’s armor... Gifts of Death, part one.
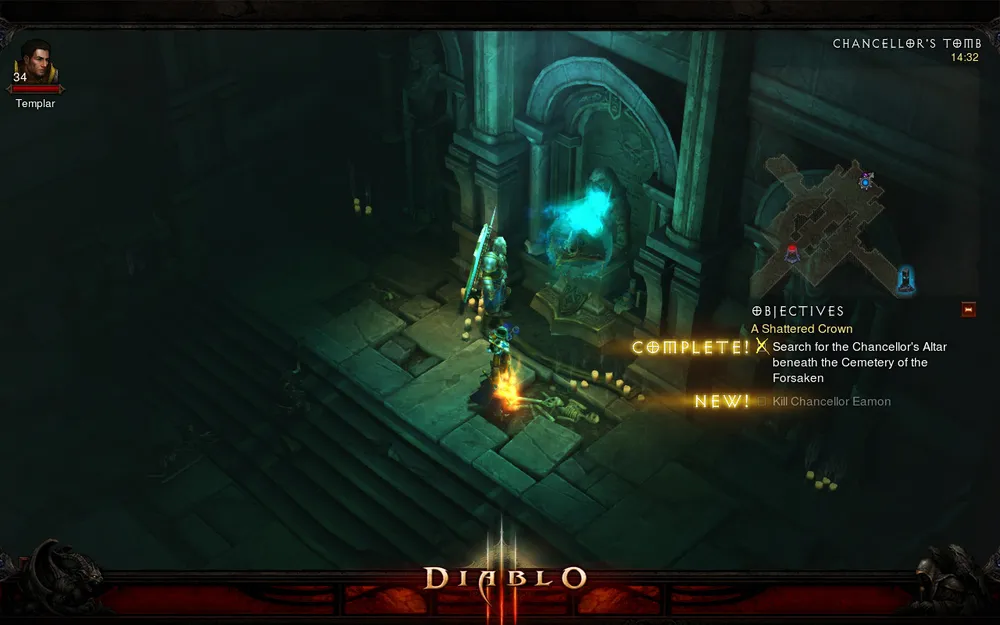
It’s always like that; touch someone else’s - and a malicious spirit shows up right away!
"Is that not Leoric flying by?" - "Accidentally, it is. We need to find his crown to finally put him to rest". A crown it is. Although ducks with eggs and needles, Koсhey will still get his due. For the crown, Uncle Cain sends us to the local blacksmith Haedrig Eamon [Haedrig Eamon], who knows where the regalia went. But the blacksmith is too busy with his wife slowly turning into a zombie at the local "sanatorium".
- Don’t worry, we’ll help! - says your hero, and we briskly march down to the Cellar of the Damned [Cellar of the Damned], where we kill a bunch of locals and the blacksmith's loving wife, who wanted to eat his brains.
After the breakup, Haedrig will tell us that the crown lies in the tomb of his grandfather, the royal chancellor, and the entrance to it is located at the Cemetery of the Forsaken]. We exit through the northern gate of the city and head through the Weeping Hollow [Weeping Hollow] until we reach the cemetery. On the way, don’t forget to look for Haedrig's apprentice: the boy will be found dead next to the blacksmith’s wagon. Upon arriving at the cemetery, we open a portal and look around: before us are three identical but different inside Defiled Crypts [Defiled Crypt]. One of them is empty, another one awaits a random event (more on that later), and the third (multi-leveled) is exactly what the doctor ordered.
Upon reaching the second level of the correct crypt, we fight with a necropolis boss [Manglemaw], and on the third level, we reach the pedestal with the crown. We won’t be able to take it right away: at first, the spirit of the chancellor will do everything to hinder us. But later we finally take the crown and use the teleport to head back home. The blacksmith will hit it with a hammer several times, returning it with the verdict, "Check it out! Good as new!". After that, the quest will be completed, and the blacksmith will become our personal weapon master.
QUEST IV. REIGN OF A BLACK KING [REIGN OF A BLACK KING]

● Issued by: Cain [Cain]
● Location: Crypt of the Skeleton King [Crypt of the Skeleton King]
● Reward: experience and gold, loyalty from the Templar [Templar], achievement
● Task: find and put to rest Leoric, and afterwards find the fallen star
● If you place the crown on the remains of the dead tyrant, he will rise, and you can even talk to him and play dice. Gifts of Death, part two.
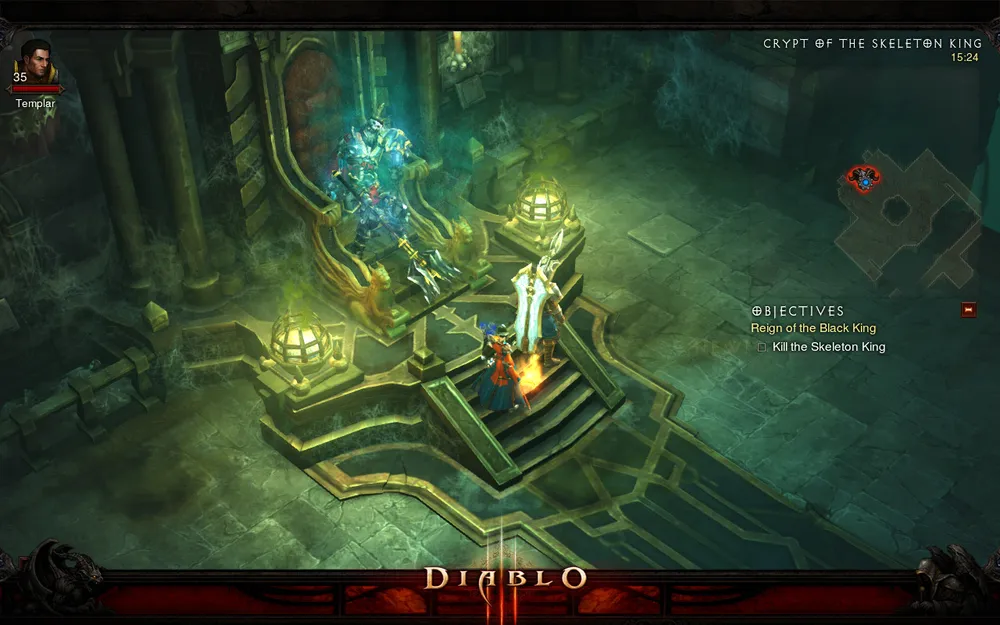
Dude, wake up, we came to beat you up...
After receiving the crown from the blacksmith, we talk to Uncle Cain. He’ll tell us that Leoric has pretended to be dead more than once, and that before, he terrorized these lands to the brink of annoyance. Cain will give us a direct lead to the Tristram Cathedral, under which lie the remains of the king. He is the one standing now between us and the fallen star, so Leoric is 100% doomed in the near future.
We return through the portal to the Cathedral Garden [Cathedral Garden] and head downstairs, into Leoric's Passage. Our path leads to the second and then to the third level of the cathedral, where we find several cultists conjuring something over an unknown-to-science man. Once we wipe them all out, the man, filled with gratitude, will follow us. He will ask us to return his gear (it’s nearby, in a chest guarded by three cultists), after which, having returned his armor, he suddenly transforms into a templar. Without him, we can’t proceed to the fourth level of the dungeons. To get the support of the warrior, we need to kill the defector Jondar [Jondar], an ex-templar and traitor. Once we do this, our companion will clear the way for us down to the fourth level of the cathedral and from there, after wandering through the maze - into the Royal Crypts [The Royal Crypts].
On our way, we come across a sword, clicking on which allows us to recreate the scene of the king’s death by the sword of his knight leader - Lachdanan [Lachdanan]. But we didn’t come here to watch cartoons, so we hasten forward. Leoric meets us again at four stone pillars, then disappears, having activated them, and we become surrounded by skeletons. After dispatching these critters, we look for the entrance to the Crypt of the Skeleton King and, after dealing with the undead, we place the crown on the remains of Leoric. Voila! - The King turns out to be quite lively!
Leoric is the first act boss. He attacks with his mace and occasionally summons skeletons. He can also transform into a ghost and disappear, but overall, fighting him doesn’t pose a problem. Just don’t get hit by the hammer, destroy the life orbs from the skeletons if needed, and everything will be just fine. After Leoric’s death, you will receive your first quest achievement. Behind the throne of the defeated Leoric will be the entrance to the Desolate Chamber [Desolate Chamber], where our shining star awaits.
Achievement
The Mad King's End [The Mad King's End]
In total, there are 4 achievements available, one for each difficulty level, each unlocking an element of the banner.
Descending below, we find that the "star" is actually a man who, to top it all off, remembers nothing. He mumbles something about a warning and a sword, so we lead our patient to Cain.
QUEST V. SWORD OF THE STRANGER [SWORD OF THE STRANGER]
● Issued by: Cain [Cain]
● Location: Khazta Den [Khazta Den]
● Reward: experience and gold
● Task: find the Glowing Sword Shard [Glowing Sword Shard]
● Now, dear Cain, form the word "Eternity" from the three sword shards...
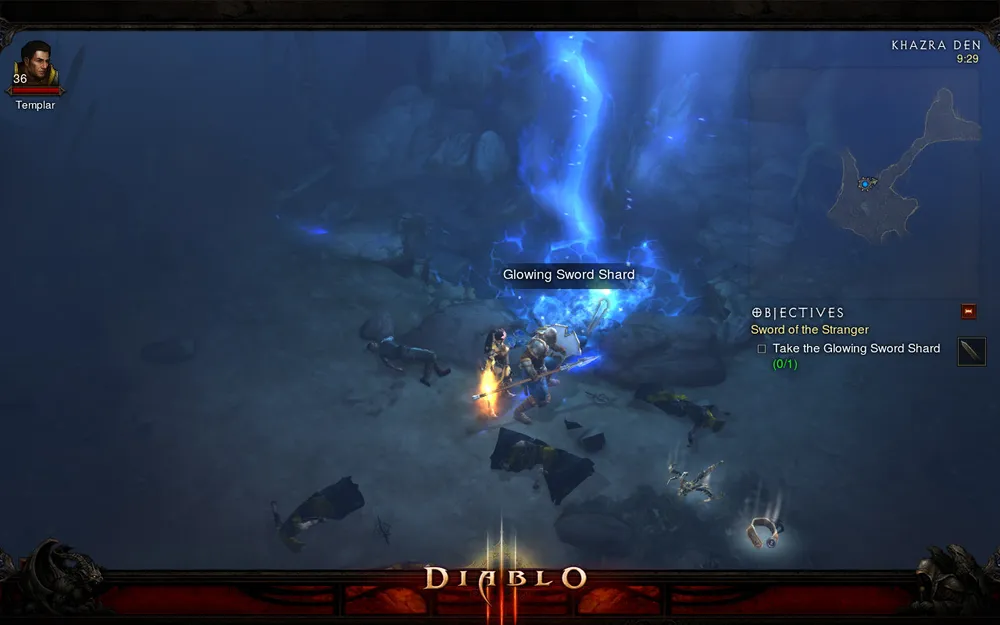
It shines and glimmers. And nearby lie the corpses of cultists..
A strange thing! The patient remembers neither his name nor surname but knows exactly that he had a sword that broke into three pieces when it fell. Fantastic, indeed! We must find those pieces. Someone is bound to step on them with bare feet next. The stranger is echoed by Cain: he suddenly awakens his inner doctor and confidently states that if we restore the sword, then our star’s memory will return.
The first shard sends us to the Khazra (that is, goats). They seem to have gotten angrier lately than the undead, so the shard is definitely with them. Hence, directly from the Cemetery of the Forsaken, we set off for the Fields of Misery [Fields of Misery]. The entrance to the Den is among the Fields; it’s hard to miss. After wandering through the dungeon and considerably reducing the headcount of the horned cattle, we bump into a gang of rascals who have organized some ritual festivities around the shard.
After a closer conversation with them, we find out that a powerful witch Maghda [Maghda] and her coven are also looking for the sword shards. Why - it’s unclear, but the lady puts forth unreasonable demands for us to back off, thus doubling the shred’s value. We send the lady packing, grab the shard, and take it back to Cain. Grandpa will be pleased.
QUEST VI. THE BROKEN BLADE [THE BROKEN BLADE]
● Issued by: Leah [Leah]
● Location: The Drowned Temple [The Drowned Temple]
● Reward: experience and gold, loyalty from the Scoundrel [Scoundrel]
● Task: find the Glowing Sword Shard
● ... We continue collecting shards. It’s lucky that the Stranger didn’t fall with a vase.
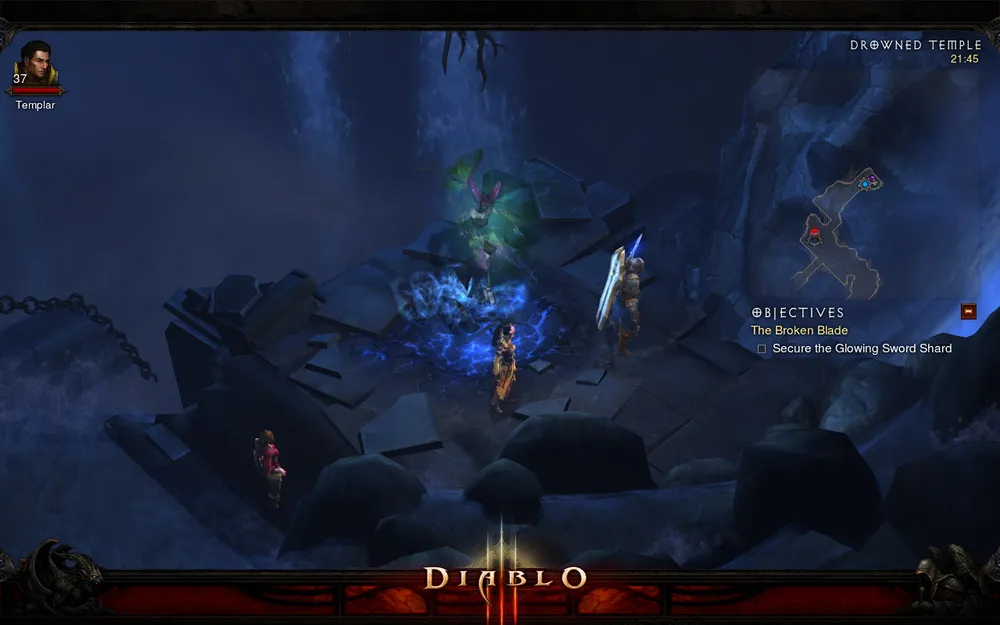
Maghda is intensely selling us on the blade...
Strongly inspired by the first piece of the sword, Cain and Leah puzzle over Maghda’s words. The witch blurted that the second shard could only be found by traversing the ancient path, to which Sherlock and Watson respond: "That’s about the temple nearby the Rotting Woods!". So Leah joins us to point the way and shoot at monsters with her bow.
Our path leads through the Old Mill [The Old Mill], where a strange-looking guy asks us to help save his girlfriend from an ambush of bandits, who are about to steal some kind of relic from her. After teaching the rascals a lesson with our help, the scoundrel bushily promises to marry the girl and have a bunch of kids, after which he quickly disappears from the mill along with us and his obligations. +1 to the hooligans on the team. And we find ourselves at the temple.
At the entrance stands a certain Alaric [Alaric], the keeper of the temple and other dungeons. He will say that only a nephalem can pass.
- There are none among us, - says my heroine.
- We will see about that, - replies the guard. - But for now, go fetch some keys from a couple of tombs nearby!
To get inside, we need to find two Fires in the Tombs of the Rotting Woods and place them on pedestals.
Beacon of Honor [Beacon of Honor] can be found in the Warrior's Rest [Warrior's Rest], while Beacon of Light [Beacon of Light] is in the Crypt of the Ancients [Crypt of the Ancients]. Both dungeons are guarded by mini-bosses, but they generally pose no problem. We return to the temple and open the passage to the dungeon, leading us to the shard.
Before we can grab the second piece of the sword, we need to battle Alaric's brothers, who will try to prevent us from reaching our goal. As one might expect, they won’t succeed. We grab the fragment, listen to another one of Magda’s threats, and return to Cain.
QUEST VII. THE DOOM IN WORTHAM [THE DOOM IN WORTHAM]
● Issued by: Stranger [Stranger]
● Location: Wortham Chapel Cellar [Wortham Chapel Cellar]
● Reward: experience and gold
● Task: find the Glowing Sword Shard
● ... the third shard is the most troublesome.
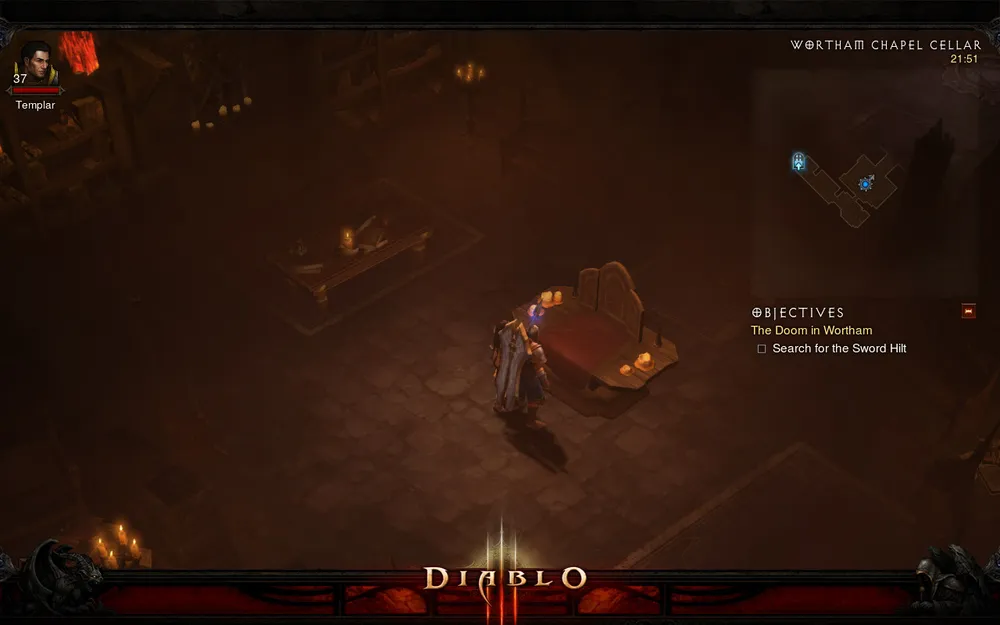
It’s just like that - you search and search, and someone already beat you to it..
For the last shard, following Leah's lead, who will accompany us again, we set off to the village of Wortham. The ferryman will take us there, but upon arrival, we will see burning ruins and panic, as well as advancing cultists. Have they lost all fear! After killing the enemies who set the ambush in the center of town, we chat with the priest.
He will tell us that they found the blade recently, but they would have been better off not finding it. Now it is guarded by someone named Virgil [Virgil] in the basement of the chapel, and we should better grab it as soon as possible. However, downstairs we will find only Virgil's corpse and no hint of the shard. Apparently, Magda has been at work! Burning with righteous rage, we head back to New Tristram to Cain...
And see there an ambush from the coven and the witch. Magda demands that Cain restore the sword, but Grandpa is resisting with all his might. When the hag begins to torture him, Leah can’t hold herself back and in a surge of rage.. destroys the cultists holding her. Stunned by such force, Magda disappears, taking our unknown star with her. Cain then restores the cursed sword through sheer will to ensure it belonged to an angel. With these words, the most well-read NPC of the series departs, leaving the hero and Leah alone with their plans for revenge.
QUEST VIII. TRAILING THE COVEN [TRAILING THE COVEN]
● Issued by: Leah [Leah]
● Location: Leoric's Manor [Leoric's Manor]
● Reward: experience and gold
● Task: destroy the cultists in the mansion
● If the coven doesn’t come to our paws, then we go after the coven.

Leoric had quite the estate. What was he doing in the crypt?..
- So we had no sword, now there’s no angel. Now we have to run around all of Sanctuary collecting them!.. - something like this would be said by the hero, making their way through Wortham after Magda and her cultists, who have long deserved a thorough beating. Well, we have a long way ahead of us. After passing through the village and the surrounding cliffs, we finally get to the Caverns of Araneae [Caverns of Araneae], which suspiciously has plenty of spiders, which is a hint. And sure enough! In the Chamber of Queen Araneae [Chamber of Queen Araneae], we find a young girl permanently tied up in webs. She says she was left here to be eaten by Khazra and will be very upset when the spider herself comes for lunch.
Well, that’s our job. Queen Araneae - the second mini-boss of the act, causing us far fewer problems than Leoric. So we easily deal with her and then free the captive. Her name is Karyna [Karyna]. She'll say she saw cultists dragging someone into Leoric's estate through Khazra lands. Perhaps with the aid of their shaman’s staff we can get through the barricades.
We will find the staff in Karyna’s wagon in the Southern Highlands [Southern Highlands]. However, the goats won’t become friendlier and won't hit us any softer. Therefore, we will have to force our way into Leoric's estate using strength, magic, and some foul language. At the entrance, we will once again be stopped by the penultimate group of cultists, and in the estate itself, we take care of the last group on our way down, losing count of how many we’ve dispatched.
QUEST IX. IMPRISONED ANGEL [IMPRISONED ANGEL]
● Issued by: Wounded Man [Wounded Man]
● Location: Cells of the Condemned [Cells of the Condemned]
● Reward: experience and gold, achievement
● Task: destroy the Butcher [Butcher] and find the angel
● Looking for a man of angelic appearance without harmful habits...
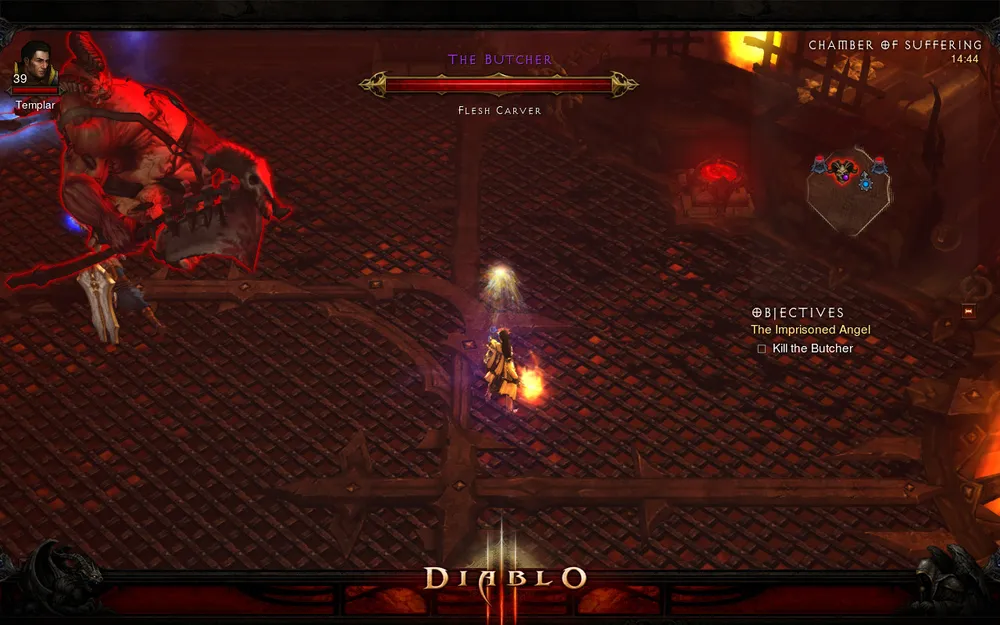
Fresh meat, huh?
After the cultists have turned to dust, we can converse with the rescued wounded man. He saw the remnants of Magda's coven dragging the stranger with shining eyes down into the torture chamber, so following the Halls of Agony [Halls of Agony] and Highlands Passage [Highlands Passage], we follow them all the way to the Cursed Hold [Cursed Hold]. Here we meet the ghost of Queen Asylla [Queen Asylla], who was once Leoric's wife. Her insane husband condemned her and her people to torture and torment, and she will ask to free the prisoners.
Fending off the encroaching undead, we must free the souls of six prisoners by putting their remains to rest. But before moving on to the final confrontation, we need to obtain the key from the Warden [Warden], who gets angry and wreaks havoc each time we free a prisoner. This scoundrel is waiting for us in the center, and it’s best not to get hit by him. But we didn’t travel this far just to die at his hands. So we put the villain to rest and through the 3rd level of the Halls of Agony reach the Chamber of Suffering [Chamber of Suffering]. Incidentally, on the way you might glimpse the scene of Queen Asylla’s death at the hands of Leoric and Lazarus [Lazarus]. Meanwhile.. Welcome to the lair of the first act boss - the Butcher!
The Butcher is a huge, fat mass distinguished by remarkable agility. He can pull you to himself with a hook, pound you with a cleaver, charge at you with the grace of an elephant, breathe fire on you, and even set the floor on fire. There will be two healing packs on the small platform; this will help you. I can offer only a few surface-level tips: don’t stand in the fire, dodge the charges and hooks, and if necessary, heal in time. For defeating the demon, you’ll receive your second quest achievement.
Achievement
Butchered! [Butchered!]
In total, there are 4 achievements available, one for each difficulty level, each unlocking an element of the banner.
After the Butcher, the gang of cultists surrounding the angel will seem like a pile of losers. We return the sword to the stranger, and he remembers that he is Tyrael [Tyrael]! So there you have it. We are invited to discuss this pressing moment in the city.
QUEST X. RETURN TO NEW TRISTRAM [RETURN TO NEW TRISTRAM]
● Issued by: Tyrael [Tyrael]
● Location: New Tristram
● Reward: access to Act II
● Task: discuss what has happened
● Is something bothering you? Want to talk about it?
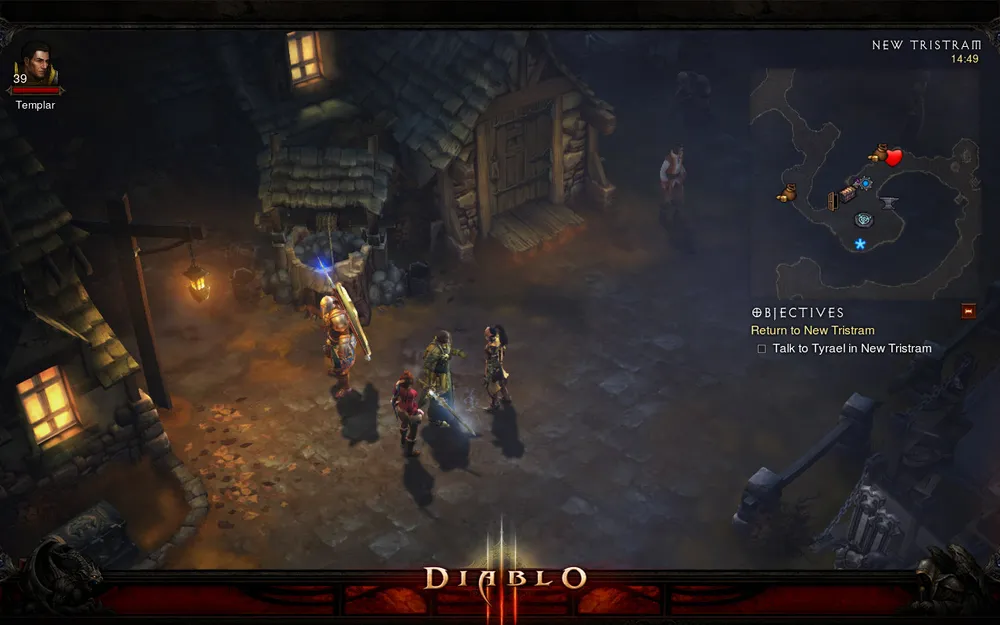
And then we will go and destroy everyone again!
The final task differs in volume and complexity. We teleport home, discuss campaign plans (that is, our journey east to deal some blows to Belial [Belial]) with Leah and Tyrael, and chat with the caravaner about setting off to Caldeum [Caldeum].
Done, we have completed Act I!
RANDOM QUESTS
Random quests can be generated in various ways, and within a single game, you won’t be able to collect them all. However, while replaying the game, you can catch new events and earn achievements for several of those that you haven’t had before.
ACHIEVEMENT QUESTS
For each of the following six events, there is an achievement, and the name of the achievement coincides with the title of the event.
EVENT I. JAR OF SOULS [JAR OF SOULS]

● Triggered by: click activation on the Jar of Souls
● Location: Defiled Crypt [Defiled Crypt]
● Reward: experience and gold, achievement
● Task: survive against enemies for 1 minute
● The Jar of Souls is not a jar of pickles. Getting your hands in there has consequences..
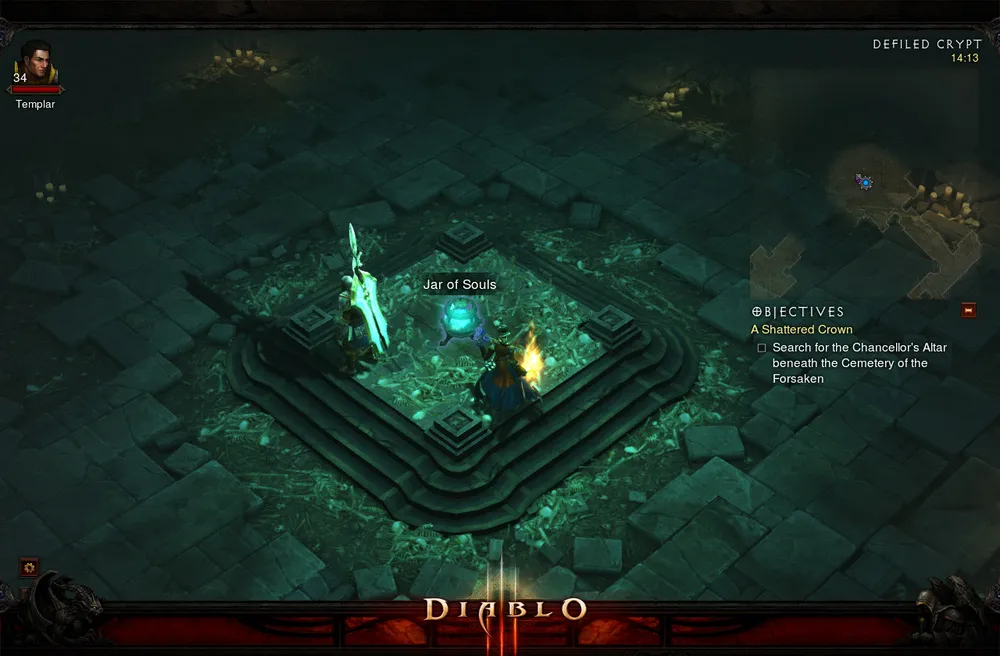
Put your finger in - and you’ll get a bunny..
We set off to the Cemetery of the Forsaken [Cemetery of the Forsaken] (see Quest III). There are three Defiled Crypts there. One will lead us to the tomb of the blacksmith’s ancestor, where we’ll find Leoric’s crown. The second one is comparatively small and has nothing special. But in the third, at the "intersection" of two corridors in that event can occur. Once you activate the Jar of Souls in the middle of the room, the doors will slam shut, and skeletons will begin attacking you for 60 seconds, with more and more being generated each second. Your task is not to bite the dust.
This is where players often get the biggest mass murder bonuses. I recommend not killing them all at once, but rather waiting until there are many skeletons and then hit them with a powerful AoE skill. Survive the allotted time and take down a ton of enemies; you will receive the well-deserved reward and achievement.
EVENT II. MATRIARCH'S BONES [MATRIARCH'S BONES]
● Triggered by: Lady Dunhyld [Lady Dunhyld]
● Location: Defiled Crypt [Defiled Crypt]
● Reward: experience and gold, achievement
● Task: find the remains of Lady Dunhyld and return them to her tomb
● Those darn tomb raiders! No, Lara, we’re not talking about you!..
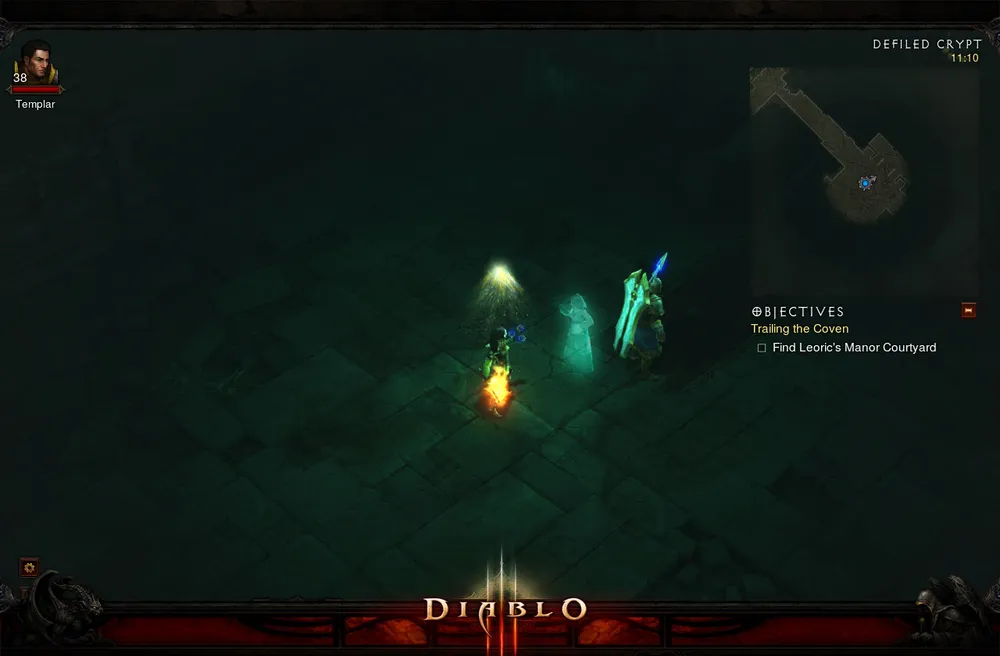
"Three tape recorders, three foreign film cameras!.. A suede jacket.. three.. jackets..."
To find this event, we once again head to the Cemetery of the Forsaken. The ghost of Lady Dunhyld generates in the same crypt as the Jar of Souls (which means if you’ve already had one of these quests, the second one gets automatically blocked and only can generate in a new game). The lady will explain that her sarcophagus was defiled by robbers and her remains were taken away. And now her husband (by the way, also dead) is raving. Shall we help the lady rest in peace?
There are three urns nearby. Click on each (and battle the vengeful m’sieu Dunhyld three times) and return her ashes to the couple’s sarcophagus located nearby. And they lived happily ever after.. until they died. We receive our reward and achievement.
EVENT III. CARRION FARM [CARRION FARM]

● Triggered by: beleaguered farmer [Beleaguered Farmer]
● Location: Forsaken Grounds [Forsaken Grounds]
● Reward: experience and gold, achievement
● Task: destroy 4 Plague Nests [Plague Nest]
● A tomato, maybe?
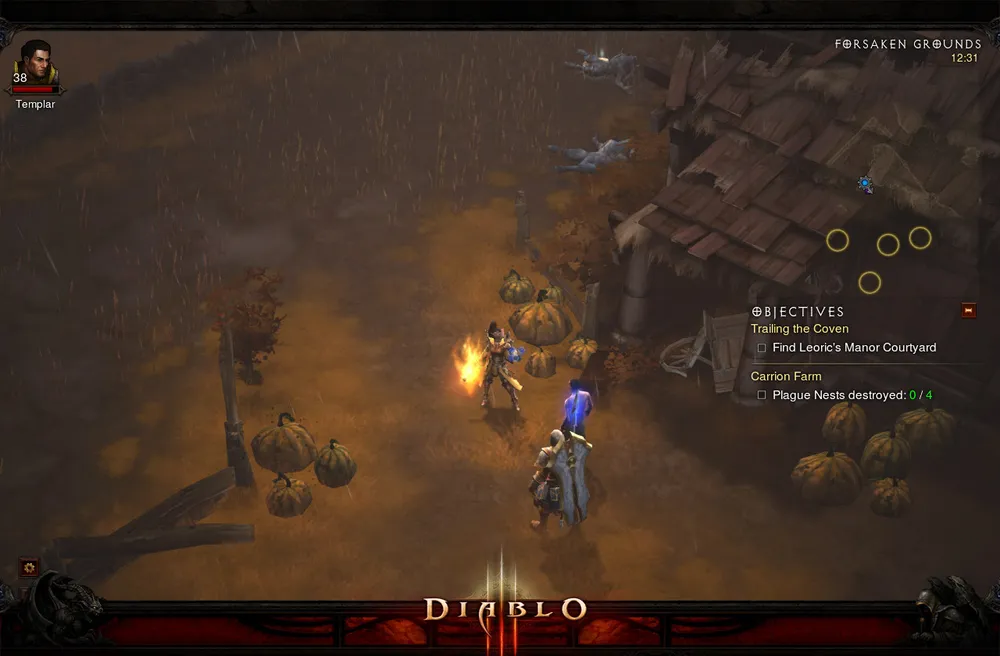
"You kill monsters for me.. and I’ll give you a pumpkin for Halloween.."
The Forsaken Grounds is a small location randomly generated within the Fields of Misery [Fields of Misery]. The farm is surrounded by foliage and other fences, with an entrance located at the northern tip. The farmer complains to us that monsters have attacked the farm and are breeding and multiplying there. And he can’t leave - his family has nothing left. He asks us to help and cleanse his grounds of the evil. Thankfully, he’s not asking us to hoe the garden.. Completing the quest won’t take much of your time: sequentially clear four nests from which "birds" fly out and then head to the happy farmer to collect our reward.
Interestingly, if we return to the fellow later, will we get a basket of vegetables for free?..
EVENT IV. ETERNAL WAR [ETERNAL WAR]
● Triggered by: activation upon clicking on the Nephalem Monument [Nephalem Monument]
● Location: The Festering Woods [The Festering Woods]
● Reward: experience and gold, achievement
● Task: fend off an attack by ghosts
● We hated you, we hate you, and we will hate you. And it makes no difference that we are dead!
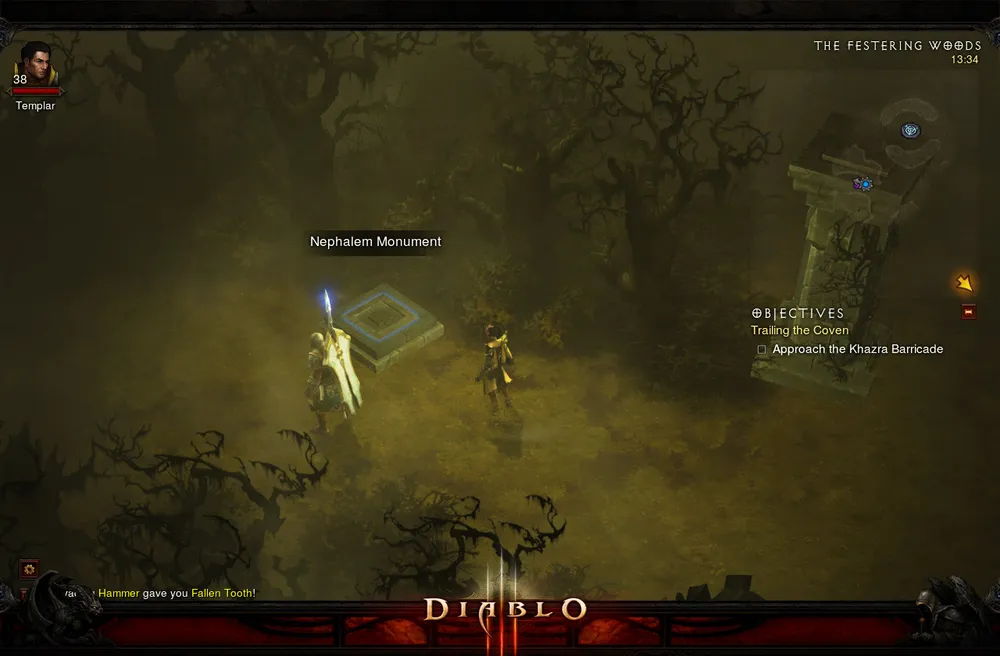
That’s The Column.
This is one of two quests that can be completed in the The Festering Woods. Like the Jar of Souls and the Matriarch's Bones, only one of the two quests generates in the game. For some reason, the Eternal War quest appeared to me far less frequently than to my colleagues. Be careful; the quest is quite easy to overlook since the monument does not stand out, and is located south of the portal. Clicking it will trigger a column to rise from the ground along with ghostly swordsmen. They’ll say something about "We're cut off! Kill the bastards!", and then the undead will attack you, which you need to defeat. The enemies are the spirits of our fallen Nephalem, so we have a double reason to put them to rest.
After defeating the undead, we receive the achievement and reward.
EVENT V. LAST STAND OF THE ANCIENTS [LAST STAND OF THE ANCIENTS]

● Triggered by: activation upon clicking on the Memorial Stone [Memorial Stone]
● Location: The Festering Woods
● Reward: experience and gold, achievement
● Task: fend off an attack by the undead
● Nearby the stone on a rise lie skeletons. To click or not to click - that is the question. Click!

Monument, "Get 100 enemies per click".
Similar to the previous one, this task generates within The Festering Woods. The Memorial Stone is located on a slight rise south of the portal, with steps on each side leading to it, artfully strewn with skeletons. Clicking on the stone will summon undead (not those on the stairs, others), and at the end, a skeleton boss will appear with reinforcements. Leah will later say that this is likely someone from Alaric's people. And we don’t care, even if it’s the devil himself!
Having triumphed, we receive goodies and another tick in the "Maniac!" column.
EVENT VI. REVENGE OF GHARBAD [REVENGE OF GHARBAD]

● Triggered by: ghost of Gharbad [Ghost of Gharbad]
● Location: Ancient Pyre [Ancient Pyre]
● Reward: experience and gold, achievement
● Task: kill Gharbad
● Take a goat, a mummy, and a bundle of firewood. Mix. What do you think, will anything useful come of this?..
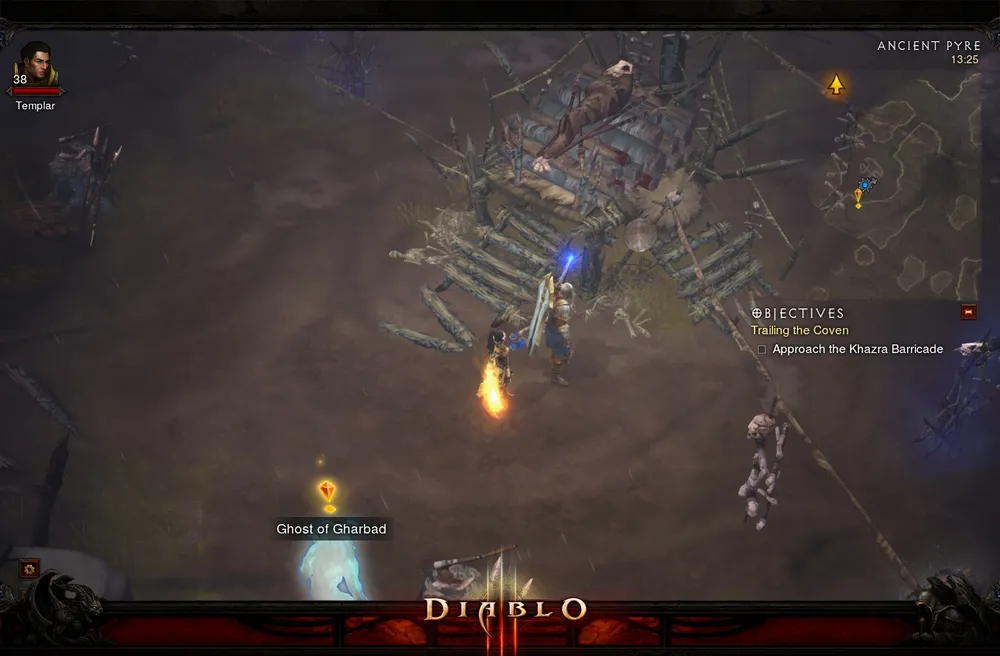
He’s so cute when mummified...
Remember how in Diablo on level 4 of the Dungeons [Dungeons] we once saw a cute shy little goat who asked us not to kill him, but then alas, he suddenly attacked us with a club? Yes, that’s the one!
We head to the Southern Highlands [Southern Highlands]. We need to find the pyre with a mummy carefully laid upon it (this location doesn’t always generate, and even if it has, there’s no guarantee the mummy will be there). If we’re lucky, the mummy will be in place, and a ghost of Gharbad will be on standby nearby. Having perished, he became quite sinister and no longer resembles the charming goat of yore. He’ll ask you to smash two shamanic totems, promising power and other perks in such a menacing voice that it’s immediately clear he will betray you at the first opportunity. Once you smash the totems, the ghost will transform into a giant goat. With a clear conscience, we kill him.. again. So who can still be trusted after this?
By the way, if in Diablo the monster was called Gharbad the Weak [Gharbad the Weak], in the third part, he is named Gharbad the Strong [Gharbad the Strong]. Just an evolution!
QUESTS WITHOUT ACHIEVEMENTS
QUEST I. THE FAMILY OF RATHE [THE FAMILY OF RATHE]
● Issued by: ghost of Willa Rathe [Willa Rathe]
● Location: 2nd level of the Decaying Crypt [Decaying Crypt]
● Reward: experience and gold
● Task: put the members of the Rathe family to rest
● If your family is digging something fiercely, check to see if they’re ghosts and additionally, vicious ones..
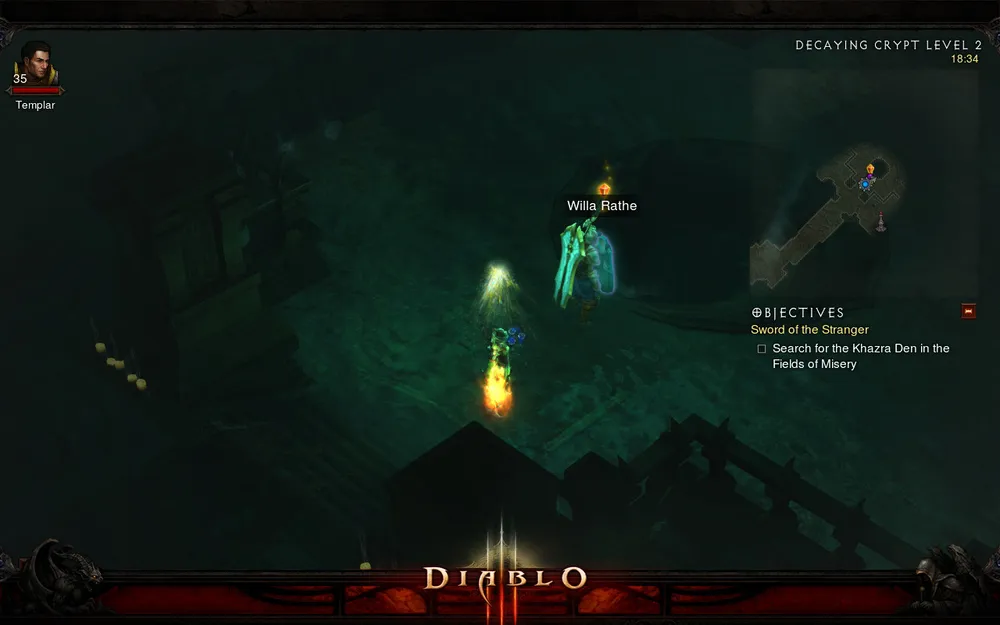
Ghost of Willa doesn’t seem to portend anything bad at first.
While wandering through the Fields of Misery, it can be beneficial to deviate from the main story line and search the crypts. Often you can find something intriguing. In the Decaying Crypt on the second level, the ghost of Willa Rathe awaits us, who complains about the curse on her family. She knows that their souls cannot find peace and are constantly digging something. The ghost will ask you to help put her family to rest. As if on cue, the family dashes out from around the corner and attacks you.
After destroying Willa’s undead relatives and summarizing that no family is without three freaks, we receive thanks and a reward from the ghost.
QUEST II. THE PRECIOUS ORES [THE PRECIOUS ORES]
● Issued by: miner Tashun [Tashun the Miner]
● Location: 2nd level of the Lost Mine [The Lost Mine]
● Reward: experience and gold, merchant
● Task: find the Vein of Metals [Vein of Metals] and Pure Gemstone [Pure Gemstone]
● Popular belief: helping a merchant find ores brings money.
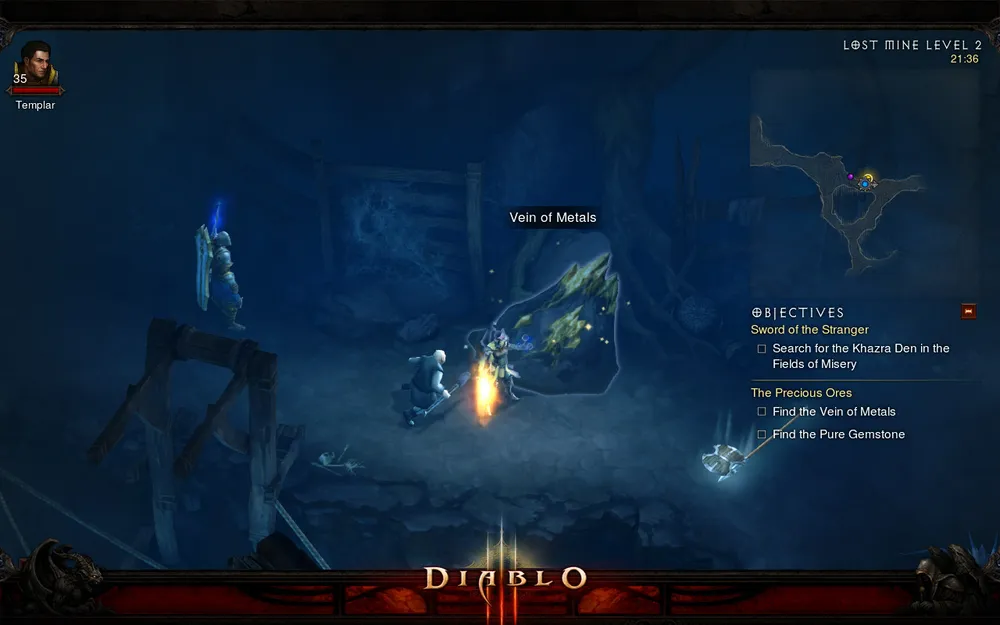
And here’s the ore!
This intriguing task can be found by straying from the main road and exploring the dungeons. Specifically, in the Lost Mine, you may meet a merchant who threatens to sell you items at a good price in exchange for help in finding ores and gemstones. By the way, they are nearby in the same dungeon, so it won’t be hard for you to find both the vein and the stones. The monsters will be pesky, though..
Once we stock up on stones and ores, we receive our reward along with the merchant’s greeting. We can even sell some items to him right away, if you have a lot piled up.
QUEST III. THE APOTHECARY'S BROTHER [THE APOTHECARY'S BROTHER]
● Issued by: apothecary Rike [Rike the Apothecary]
● Location: Highlands Cave [Highlands Cave]
● Reward: experience and gold, healing potion
● Task: find and rescue the apothecary's brother from the cultists
● If nasty cultists have dragged your brothers away somewhere, call on a hero, he’ll stand for you, give out a whop and some smacks.

This is the brother under the antidote, and soon there’ll be an ambush.
Another task for those fond of wandering through untrodden paths. Among Leoric's Hunting Grounds, you can find this cave where an apothecary named Rike awaits you. He’ll say that cultists have kidnapped his brother and ask for help in locating him. We find the brother in the same cave, very close to the ambush of the wretched enemies. We put the intended murderers to rest and receive a well-deserved reward.
QUEST IV. A REPUTATION RESTORED [A REPUTATION RESTORED]
● Issued by: weaponsmith Kyr [Kyr the Weaponsmith]
● Location: Highlands Passage [Highland Passage]
● Reward: experience and gold, merchant
● Task: kill Dargon [Dargon] and a pack of cultists
● Don’t deceive weapon merchants. It leads to testing the goods on yourself.

And here are the enemies...
Right at the exit from the 2nd level of the Halls of Agony, we will encounter a certain Kyr, who appears to be a weaponsmith, standing above the corpses of enemies and saying something about "You’ll learn how to mess with the big leagues!". He will ask us to put down traitor Dargon and a few cultists to clear the trader’s name.
The cultists and traitor Dargon are located nearby, you just need to cross the bridge - and we’ll immediately fall into their kind hands. For obvious reasons, this meeting ends sadly for them, unlike us.
QUEST V. THE SACRIFICIAL HERMIT [THE SACRIFICIAL HERMIT]
● Issued by: alchemist Rodger [Rodger the Alchemist]
● Location: Wortham Bluffs [Wortham Bluffs]
● Reward: experience and gold
● Task: deliver a potion to the crazed hermit [Crazed Hermit]
● If a madman asks you to throw him out the window, maybe it’s really worth helping?
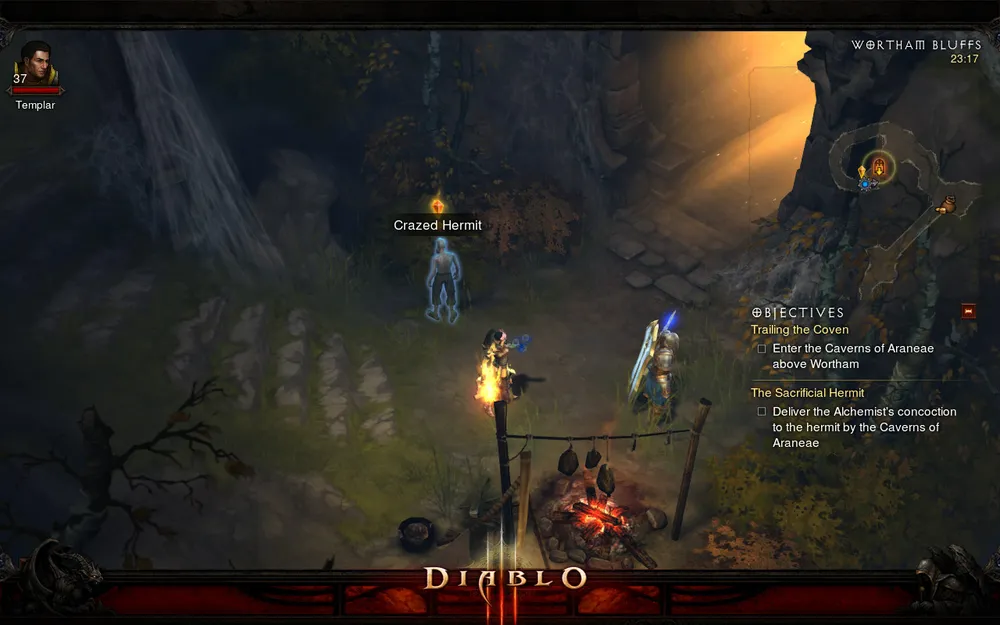
And what was stopping the alchemist from taking a few steps himself?
Following the coven of Magda, we meet an alchemist on the bridge. He asks us to deliver a potion to a local psycho, claiming it will make his blood sweeter. Given that this is not even the most insane thing we might be asked, we take a few steps down the path and deliver the potion to the crazed hermit.
Interestingly, we will meet him again nearby the lair of the spider. Such are the happenings in ward number 6.
THIS IS INTERESTING
● Issued by: nobody
● Location: Development Hell [Development Hell]
● Reward: achievement
● Task: kill the unburied Jay Wilson [Jay Wilson]
● Curses against developers are pointless - they are already THERE..
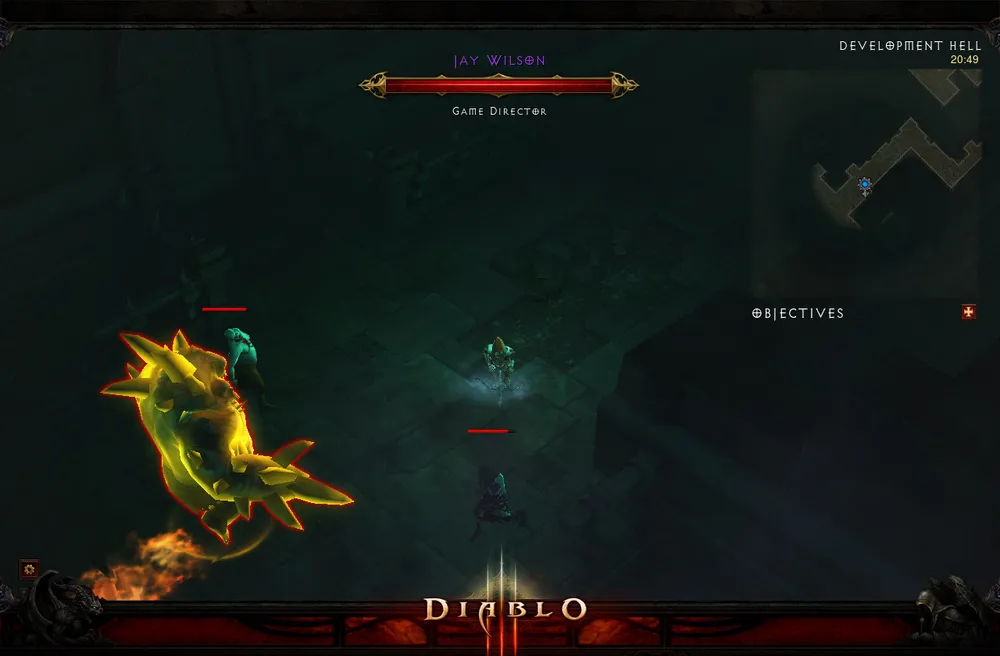
Turns out, [Diablo III](/games?search=Diablo III) was developed by the undead...
The game has a special location called Development Hell. Access to it opens from our favorite Cemetery of the Forsaken. If you’re lucky, by breaking into the Defiled Crypt, you’ll find this wonderful location there. The place is roamed by zombie developers, whom you can feel free to unleash your displeasure upon for everything you didn’t like about the game. For bad builds, for server lag, for graphics.. well, you get it. At the end of the level, you can, of course, kill Jay Wilson himself, who will appear as an unburied.
- Jay, we don’t like lag on servers!
- Y-y-y-y-uh-uh-um!
- And the game’s difficulty is cheap!
- Ry-y-y-y-y-y-o!
- And overall, you’re not very good..
- Rum? :'(
Having dismantled the main dish into pieces, we earn moral satisfaction alongside the achievement "Smash! Jay, Smash!" [Smash! Jay, Smash!]. In short, you are guaranteed a kilogram of unrefined enjoyment.
Since I haven't been able to complete the entire game thoroughly yet, it's possible that there are more events and quests in the game that generate randomly. If you find one, please write about it in the comments, and I’ll supplement the post. Also, if you find inaccuracies or suggestions, let me know.
For now, that’s all; next up is Act II, where we are heading after Tyrael and Leah. There seem to be some Lords of Hell running around.. we should check it out..
Discuss, criticize, express outrage, praise. You know what to do. :)
Thank you for your attention. ;)