
Terraria Walkthrough
In Terraria, there is no mandatory action order for players. However, in some locations, it makes sense to go only when you have gear of the appropriate level.
This guide describes what gear is required for each location and in what order they are recommended to be completed. If you are a complete beginner, first read this guide.
Also, due to the large volume of this guide, detailed boss fight tactics have not been included, although the most important information about them is here.
Surface World
Biome: Forest

Enemies

Green Slime
Blue Slime
Purple Slime
Pinky
Enemies Drop

Gel
Valuable Resources

Copper
Iron
Mushroom
Daybloom
Valuables in Chests

String
Blowpipe
Spear
Wooden Boomerang
Glowstick
Throwing Knives
Recommended Gear

Starting Gear
Recommended Health

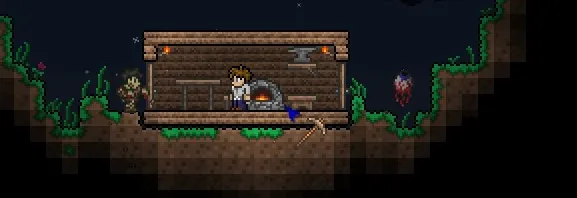
In all new worlds, characters start the game in the forest. The monsters here are the weakest.
First, build a shelter to have a place to hide at night. Start by gathering resources: wood or stone. If you want the Guide to stay in your building at night, build walls and a door, table, chair, and torch.
If the building is finished and night has not yet fallen, explore the surroundings. When you find iron, make an anvil. When you find copper, you can use it with the anvil to make a copper hammer, copper bow, and copper armor.
If there is no copper or anvil, at least make a wooden sword and wooden bow.
Biome: Night
Enemies

Zombie
Demon Eye
Evil Bunny (only on Blood Moon night)
Bride (only on Blood Moon night)
Enemies Drop

Handcuffs
Lens
Black Lens
Bunny Hood (only on Blood Moon night)
Cylinder (only on Blood Moon night)
Recommended Gear

Iron Armor
Recommended Health

Zombies and demon eyes appear at night in all surface biomes. They are noticeably stronger than the monsters you can encounter during the day in the forest.
New characters are advised to hide at night, as the night monsters are too dangerous for them. Some prefer to venture out at this time to farm money from monsters. But they risk encountering multiple monsters at once and dying.
Several zombies typically line up one behind the other, so it seems that there is one zombie. But as soon as you open the door to kill it, you realize your mistake.
Many players dig at night. It’s safer in caves than in open space since fewer monsters wander in there, and they are easier to handle. However, new monsters can appear in the air and fall on the head of the digging character. To avoid this, do not dig in deep mines, the tops of which extend beyond the screen.
After some time into the game, any night instead of the usual moon, a blood moon may rise. This means that more monsters than usual will come that night. New players are advised not to go out during such a night.
Building a Base
After building a temporary shelter, you should focus on creating a full-fledged base. This usually takes from one in-game day to a week, depending on the complexity of the project.
However, it is not necessary to build the entire base at once. It is beneficial to focus on digging first to gather a sufficient amount of stone in your inventory. It’s important to build rooms for the Guide, Merchant, and Nurse, as well as places to store your items and create new ones.
Exploring the Surface World
On the surface, you can find copper and iron ore. Try to collect as much as possible, as this will allow you to create better gear and tools for your character before they start digging.
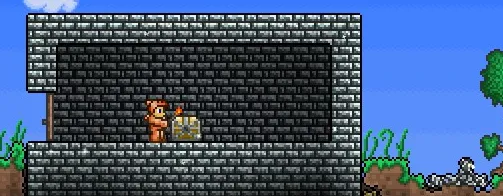
Sometimes, near the entrance of a cave close to the surface, you can find a chest containing useful items for a beginner character. Chests can be found in all surface biomes, but treasures in them are generated according to one table, and all their options are described in this guide in the "Biome: Forest" section.
At the initial stage of the game, it is recommended to always stay in the forest and not venture into other biomes. You will go there later.
Underground World
After building a house, it’s time to start digging. There are many digging techniques, each with its own advantages and disadvantages. For example, a straight shaft going deep will speed up the descent to deeper layers.
Another popular method is exploring natural caves and tunnels. If the cave system ends in a dead end, exploring the walls with a burning torch often reveals that another cave is nearby. With this method, you will find more treasures, but getting back to the surface will be tougher.
Many players combine the two methods mentioned.
Biome: Dungeon
Enemies

Blue Slime
Red Slime
Yellow Slime
Pinky
Medusa
Giant Worm
Enemies Drop

Gel
Glowstick
Fart in a Jar
Valuable Resources

Copper
Iron
Silver
Gems
Glowing Mushroom
Shimmering Root
Valuables in Chests

Warding Bracelet
Magic Mirror
Angel Statue
Cloud in a Bottle
Hermes Boots
Enchanted Boomerang
Jester's Arrows
Recommended Gear
Starting Gear
Recommended Health
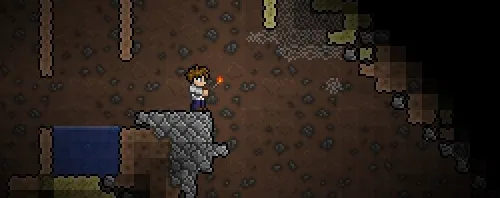
The Dungeon is the first of the underground layers. It can be distinguished by the texture of the back wall (see above image).
This layer contains copper and iron ore. Silver and gold ores are found here too, although more rarely, mainly at the bottom of the layer. Rarely, you may find glowing mushrooms in this layer.
Your main goal at this stage is to mine copper and iron. Before descending to the next layer (caves), equip yourself with full iron armor and make silver weapons. It is also recommended at this level to find and collect two or three crystal hearts, which increase the maximum health of your character. To collect a heart, first, break it with a hammer, and then use the small heart that drops from it.
When you reach the caves, it's time to build the fourth house, where the Demolitionist will settle. Around this time, it is recommended to acquire a mining helmet (unless you have already found glowing mushrooms, in which case the helmet can be replaced with light potions).
Biome: Caves
Enemies
Black Slime
Mother Slime
Slimelet
Pinky
Giant Worm
Skeleton
Bat
Medusa
Piranha
Dead Miner
Tim
Enemies Drop

Gel
Fart in a Jar
Hook
Wizard Hat
Robot Hat
Valuable Resources

Copper
Iron
Silver
Gold
Demonite
Gems
Glowing Mushroom
Shimmering Root
Lava
Valuables in Chests
Warding Bracelet
Magic Mirror
Angel Statue
Cloud in a Bottle
Hermes Boots
Enchanted Boomerang
Jester's Arrows
Recommended Gear
Iron Armor
Recommended Health
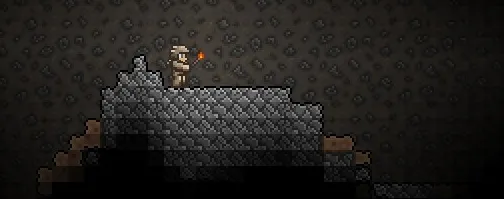
Caves are the second of the underground layers. It can be distinguished by the texture of the back wall (see above image).
This layer frequently contains copper, iron, gold, and silver ores. Glowing mushrooms are regularly found.
Your primary goal at this stage is to create silver weapons and armor, then gold weapons and armor. Try to find a hook and as many crystal hearts as possible (at least three or four).
Characters with poor gear should be cautious here. Don't even attempt it until you have made iron weapons and armor. And regardless of what gear you have, it is recommended to bring as many potions as possible, including several iron skin potions.
At this stage, do not dig too deep. The next layer after the caves is the Underworld, one of the most challenging game locations. You may encounter monsters that live there, and they are difficult to defeat even for well-developed characters. If you see fire imps, do not dig deeper. It is best to stop digging down as soon as you start encountering the first pools of lava.
Returning to the Surface
When you have gold gear, you can explore locations of medium difficulty. You can find ingredients for alchemy and other useful items in them. At this stage, it is recommended to build houses for all the NPCs, of which there should be seven.
Biome: Desert

Enemies

Vulture
Antlion
Enemies Drop

Antlion Jaw
Valuable Resources

Cactus
Waterleaf
Recommended Gear

Gold Armor
Recommended Health
There is almost nothing useful in the desert, just ingredients for potions. The monsters there aren't too scary, and you can deal with them even with iron gear.
Biome: Jungle

Enemies

Piranha
Grabber
Tropical Bat
Jungle Slime
Doctor Bone
Enemies Drop

Gel
Hook
Robot Hat
Archeologist Hat
Valuable Resources

Moonlight
Recommended Gear
Gold Armor
Recommended Health

The jungle is one of the most challenging surface biomes. Do not go there without gold gear.
Biome: Ocean

Enemies

Shark
Pink Jellyfish
Crab
Enemies Drop

Glowstick
Shark Fin
Diving Helmet
Valuable Resources

Coral
Valuables in Chests

Breathing Tube
Fins
Trident
Recommended Gear

Gold Armor
Water Breathing Potion
Recommended Health
In the ocean, you can find ingredients for potions and chests with unique contents. For new characters, the ocean may be too difficult, as they do not yet have the water breathing potion that is brewed from waterleaf.
Biome: Corruption
Enemies
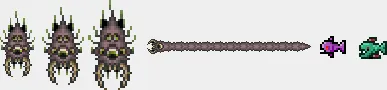
Little Soul Eater
Soul Eater
Big Soul Eater
Soul Devourer
Evil Goldfish
Piranha
Enemies Drop

Rotten Chunks
Worm Tooth
Hook
Robot Hat
Valuable Resources

Horrible Mushroom
Dead Grass
Demonite
Loot from Shadow Orbs

Ball O' Hurt
Star Bracelet
Musket
Light Sphere
Evil Thorn
Recommended Gear
Gold Armor
Recommended Health
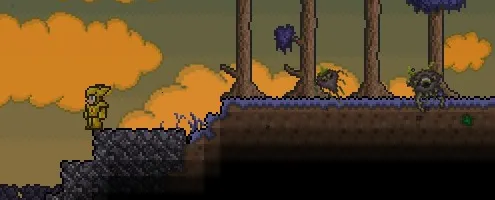
The Corruption is a challenging location to navigate, as soul eaters often attack in large groups.
But there are many treasures here. In the shadow orbs, useful items await you, and in the ground, deposits of demonite. Just keep in mind that to mine it, you need at least a gold pickaxe.
Floating Island
Enemies

Harpies
Enemies Drop

Feather
Valuable Resources

Silver
Gold
Valuables in Chests

Shining Red Balloon
Star Fury
Lucky Horseshoe
Recommended Gear

(This is an iron skin potion)
Recommended Health
Meeting with harpies can end fatally even for a well-dressed character. Harpies do not inhabit islands located in the middle third of the map.
Each floating island has a house made of gold, silver, or copper that can be dismantled for bricks. Chests on floating islands are always locked. To open them, you need a key from the Dungeon. But you can find floating islands in advance and return later for the chest.
Eye of Cthulhu
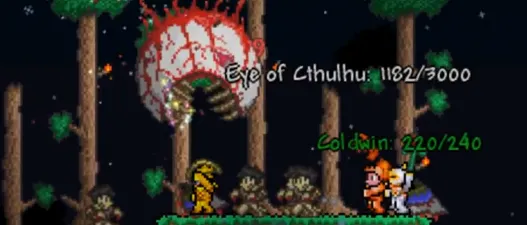
The Eye of Cthulhu is a boss that appears when the following conditions are met:
• The Eye of Cthulhu has not been defeated in this world
• At least one player has 10 or more heart containers
• Four or more NPCs have settled in houses
If all three conditions are met, each night the chance of the Eye of Cthulhu appearing is 1/3. Many players prefer to summon the Eye of Cthulhu before these requirements are accomplished. To do this, you need to create a suspicious-looking eye and use it at night.
To prepare for the encounter with the Eye of Cthulhu:
• Buy shurikens from the Merchant
• Build an arena for the fight
Boss
Eye of Cthulhu
Health
2800
Damage
15 in phase one
25 in phase two
Defense
12 in phase one
0 in phase two
Minions

Cthulhu's Servant
Health 8
Damage 12
Defense 0
Drops from Boss

Demonite
Cursed Arrow
Corrupt Seeds
Recommended Gear

Gold Armor
Iron Skin Potion
Hunter Potion
Recommended Health
Melee weapons are better not to use in the fight against the Eye of Cthulhu. Limit yourself to a bow, shurikens - in general, everything that shoots or can be thrown.
In phase one, the Eye of Cthulhu summons minions and charges at players. When it has less than 1400 health, it transitions to phase two. In the second phase, the Eye of Cthulhu does not summon minions but moves faster and deals more damage.
If you have gold gear and enough potions, the fight with the Eye of Cthulhu should not be difficult. After defeating the Eye, you can move on to fighting the Eater of Worlds.
Eater of Worlds
The Eater of Worlds appears when you break the third Shadow Orb. You can also summon it using Worm Food, but it is not advisable to do so, as useful items (Evil Thorn, Ball O' Hurt) are dropped from Shadow Orbs that will help you in the fight against this boss.

Boss
Eater of Worlds
Health
Head 65
Body 150
Tail 220
Damage
Head 22
Body 13
Tail 11
Defense
Head 2
Body 4
Tail 8
Drops from Boss

Demonite
Piece of Shadow
Recommended Gear
Gold Armor
Iron Skin Potion
Hunter Potion
Recommended Health

The Eater of Worlds consists of 50 segments. If one segment is destroyed, each of the two remaining parts turns into a separate worm.
The Ball O' Hurt is effective against the Eater of Worlds, especially when attacking along the worm, as it passes through the worm and hits many segments at once. Also, use the Evil Thorn by shooting it into the ground beneath your feet before the worm surfaces. Both of these weapons can be obtained from shadow orbs. The best tactic would be to alternate them, allowing mana to regenerate while you strike the worm with the chain above ground.
It is not recommended to fight the Eater in confined spaces. You risk being pinned against the wall where your grave will remain. If the Eater of Worlds awakens when breaking another orb, get to the surface as quickly as possible!
With each broken Shadow Orb, there is a chance that a meteorite will drop somewhere. If you receive the message that it has fallen, make an Obsidian Skull and go search for it. Keep in mind that you need at least a gold pickaxe (or dynamite) to mine the meteorite.
Biome: Meteorite Landing
Enemies

Meteorite Fragment
Valuable Resources

Meteorite
Recommended Gear

Shadow Armor
Obsidian Skull
Dynamite
Recommended Health
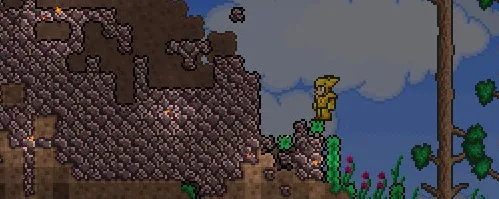
Meteorite fragments keep appearing if there are more than 50 meteorite blocks in the area. It is recommended to mine the meteorite blocks as quickly as possible, and the easiest way to do this is with dynamite. A few sticks of dynamite will clear the area without waiting for the first fragments to appear.
Dungeon
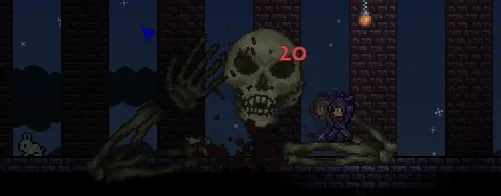
When you have collected shadow gear along with some meteorite items, it's time to explore the Dungeon. It is located at the right or left edge of the map. To access it, you must defeat Skeletron. To summon Skeletron, talk to the old man standing at the entrance at night.
Skeletron
Boss
Skeletron
Health
Head 4400
Arm 600
Damage
Head 32
Arm 32
Defense
Head 10
Arm 10
Recommended Gear

Shadow or Meteorite Armor
Iron Skin Potion
Recommended Health

Chains and ranged weapons are effective against Skeletron. The key to a successful strategy against Skeletron is to keep your distance! If you have a sufficient stock of potions, the fight with Skeletron should not present difficulty.
After defeating Skeletron, you can freely enter the Dungeon.
Biome: Dungeon
Enemies

Evil Skeleton
Big Skeleton
Small Skeleton
Fiery Wheel
Cursed Skull
Dark Mage
Chain Ball
Dungeon Slime
Enemies Drop

Bone
Golden Key
Valuable Resources

Dungeon Bricks
Valuables in Chests

Water Scepter
Blue Moon
Cobalt Shield
Gun
Magic Missile
Muramasa
Shadow Key
Recommended Gear

Shadow or Meteorite Armor
Recommended Health
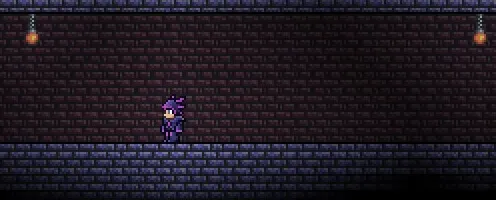
In the Dungeon, monsters appear very quickly, so it may be challenging to advance deeper. Many parts of the Dungeon are filled with damaging spikes. Items that increase movement freedom - such as the "cat" or cloud in a bottle - are recommended.
Take everything you can from the Dungeon because you will need these items to pass through the following locations. Among the bookshelves, you may find the Water Bolt spell. Break books with a hammer, and sooner or later, you will obtain it. There are also enough crystal hearts here to max out your character's health (the cap is 400).
Biome: Underground Jungle
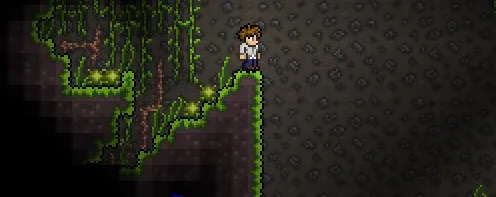
After passing through the Dungeon, you can head into the Underground Jungle. To find it, dig down from the Jungle on the surface.
Enemies

Hornet
Big Hornet
Small Hornet
Man-Eater Plant
Tropical Bat
Piranha
Enemies Drop

Stinger
Vine
Hook
Robot Hat
Valuable Resources

Moonlight
Jungle Spores
Jungle Rose
Gift of Nature
Valuables in Chests

Beast Claws
Wind Bracelet
Staff of Regrowth
Recommended Gear

Shadow Armor, Meteorite Armor, or Necromancer Armor. Weapons found in the Dungeon are also recommended.
Recommended Health

This is one of the two most challenging locations. Do not go there without proper gear. Hornets attack in swarms, just like soul eaters in the Corruption, and shoot poisoned stingers.
In the jungle, you can find many of the best items in the game or components to create them (like the Whip and Jungle Armor).
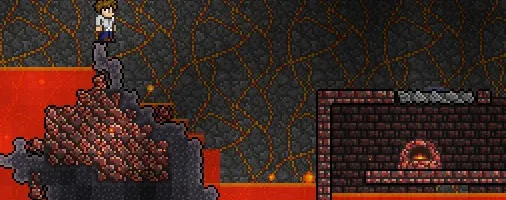
Biome: Underworld
After exploring the Underground Jungle, it’s time to descend into the Underworld. It is located at the very bottom of the map along its entire length. To get there, dig down from the caves.
Enemies

Lava Slime
Hellbat
Fire Imp
Demon
Voodoo Demon
Bone Serpent
Enemies Drop

Plumber Hat
Demonic Scythe
Voodoo Doll
Valuable Resources

Hellstone
Fireflower
Valuables in Chests

Dark Lance
Fireflower
Sun Fury
Hellfire
Recommended Gear

Meteorite Armor, Shadow Armor, Necromancer Armor, or Jungle Armor. Weapons found in the Dungeon are also recommended.
Recommended Health

The Underworld is one of the two most challenging locations. It will be tough for you even if you have the best gear. Definitely have an Obsidian Skull because hellstone burns (just like meteorite).
In the Underworld, you can find many of the best items in the game or components to create them. Look for shadow chests and open them with a shadow key found in the Dungeon. The best weapons available in the game are found in these chests.
That’s all. But keep an eye on updates to the game; the developers will surely come up with something else!
Thanks to Kiichi for the edits related to boss fight tactics.