
Creating and Setting Up a Separate TF2 Server
This is an old guide. New one - on my blog.
What is the difference between a dedicated server and an integrated one in Steam? It provides much more possibilities (such as plugins), but is more complex to configure. A wide, unlimited channel will also be required.
Here and now, you will see bones, muscles, tendons, and other gears of Dobroserver.
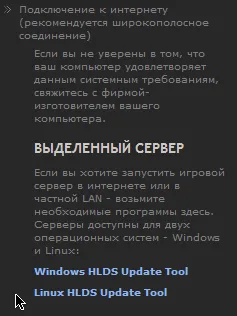
Follow the link http://store.steampowered.com/about/ and download the Windows HLDS Update Tool
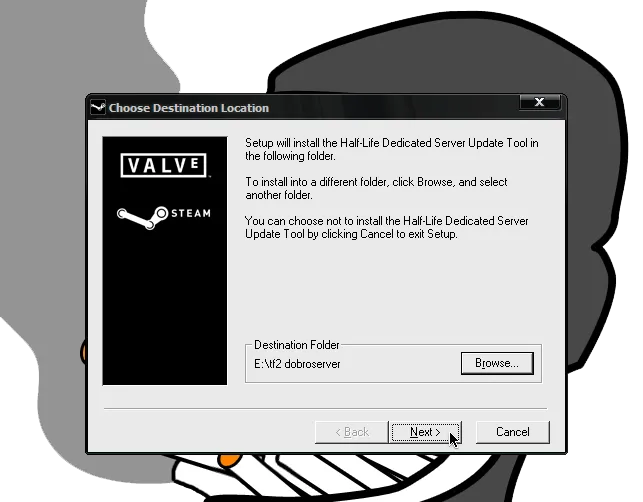
Install HLDS in the folder of the intended server:
Select Europe as your region:

As a result, 4 files will appear in your folder:

Click on HldsUpdateTool.exe and wait for the utility to update itself (the window will disappear when everything is done).
Now you can install the tf2 server. Create a text file in the server folder and change its type to .bat (the name doesn’t matter, but I usually use hldsupdatetool.bat), open it in Notepad and add the following two lines:
hldsupdatetool.exe -command update -game tf -dir . -verify_all
pause
It’s quite simple; these commands will install the tf2 server in the same folder. The parameter -verify_all first checks the server directories for the necessary files and only updates old ones/downloads missing ones. This is useful if the connection was interrupted, and you don’t want to download everything again or for updating the server in the future. The pause command is needed to prevent the hlds window from closing after the update is completed, so we can see the process without looking at the log.
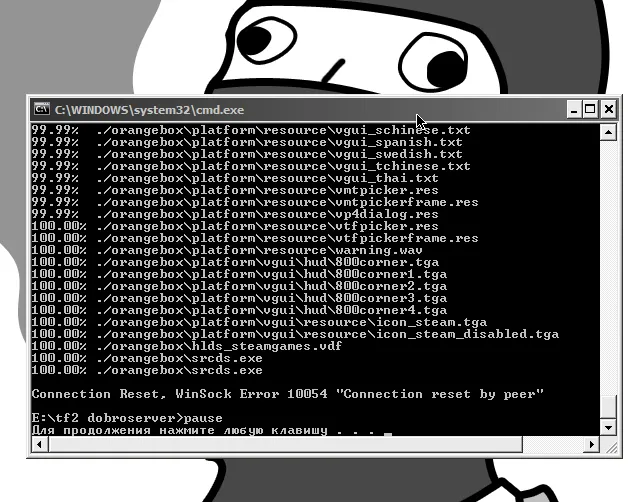
Now use the "double-click the left mouse button" spell on the created .bat and you can go do business to come back in 2.66 GB:
Go to the orangebox folder, now you need to create a bat file to launch the server. The name doesn’t matter again; let it be start.bat:
@echo off
cls
echo Protecting srcds from crashes...
title srcds.com Watchdog
:srcds
echo (%time%) srcds started.
start /wait srcds.exe -console -game tf -tickrate 66 -secure +maxplayers 24 -port 27020 +map cp_dustbowl
echo (%time%) WARNING: srcds closed or crashed, restarting....
goto srcds
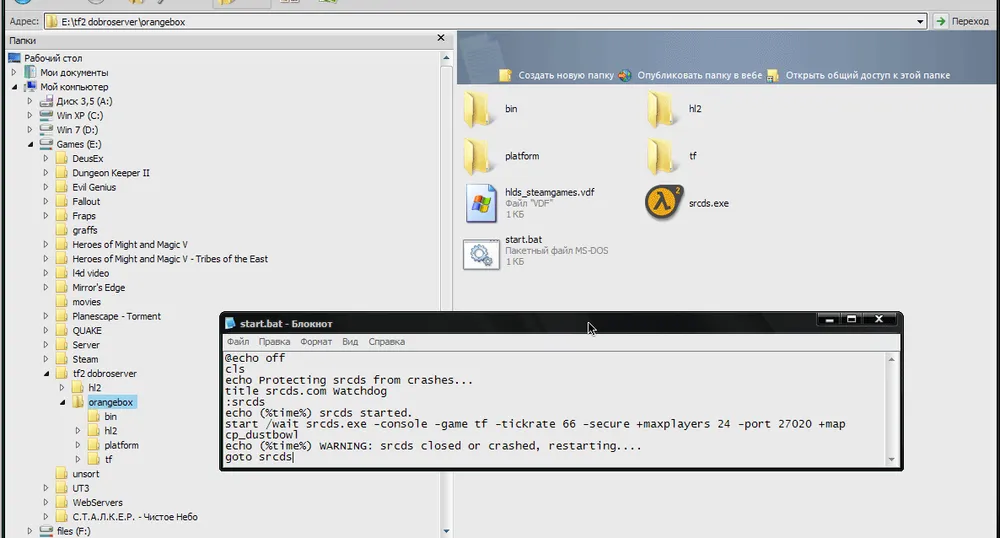
Of these settings, two are important - the maximum number of players and the default map.
Double-clicking this file will launch the server. However, we don't need to do this yet, just create a shortcut to it that leads to the desktop. Of course, you can choose not to do this and crawl around with a flashlight in your mouth in the file manager every time you need to start the server.
Motd.txt
The contents of this file are visible to the user when they join the server. It can be just text or html.
You won’t be able to insert a video into your welcome page, but you can certainly add a picture:
</p> <p>body {background-image:url(http://imagefiles.ru/images/1a0809wmw.gif);</p> <p>background-position:bottom center;</p> <p>background-repeat:no-repeat;}</p> <p>Such a compact solution is achieved through cascading styles, but that's a whole different story. To set your own image, simply replace this path http://imagefiles.ru/images/1a0809wmw.gif with yours.

Maps
In addition to logically adding a custom map to the folder tf2 dobroserver\orangebox\tf\maps, you will need to include it in the map list; otherwise, you won't be able to select it. The list is called mapcycle.txt and is located in \tf2 dobroserver\orangebox\tf.
Recording Demos
Of course, every player can record a demo, but it will only include themselves. This issue is resolved by source tv - create a file autoexec.cfg in the folder tf2 dobroserver\orangebox\tf\cfg and add the following commands:
tv_enable 1
tv_autorecord 1
The first command enables source tv, and the second enables automatic demo recording (in tf2 dobroserver\orangebox\tf).
Basic Configuration
Create a file server.cfg in the directory tf2 dobroserver\orangebox\tf\cfg and place the following lines in it:
hostname dobroserver
tf_weapon_criticals "0"
mp_timelimit "30"
sv_alltalk 1
sv_allowdownload 1
sv_allowupload 1
The name, disabling random critical hits, the time for each map, blue and red can hear each other, maps can be downloaded, and the server loads sprays.
Adding Administrators.
First, you need to find your steam id, go to any server and type "status" in the console.
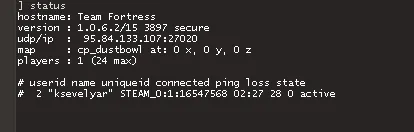
Open the admins_simple.ini file located in \orangebox\tf\addons\sourcemod\configs
And add the following line:
"STEAM_0:1:16547568" "99:z"
This makes me a level 99 server administrator, with access to all possibilities. The number 99 is not random; an administrator cannot ban or kick another administrator whose level is higher than theirs. You can read more about the flags here, but in most cases, you only need one admin with maximum capabilities.
MetaMod
One of the tastiest things on the server is the SourсeMod plugins; however, to install them, you first need to install MetaMod and the SourсeMod itself.
After you download the latest version, unpack the archive into tf2 dobroserver\orangebox\tf
Create a text file in the directory \tf2 dobroserver\orangebox\tf\addons and place the following lines there:
"Plugin"
{
"file" "E:\tf2 dobroserver\orangebox\tf\addons\metamod\bin\server.dll"
}
Save the file as metamod.vdf:

Sourcemod
To install, you will need to download and unpack it into orangebox\tf\
There are more settings here; however, before changing them, make sure everything works.
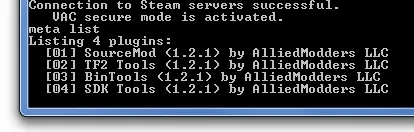
Start the server and type meta list in the console.
If you see something like this, you can continue:
Interface
Start the game, open the console and type the following command:
bind "f12" "say !admin"
Now, when you press the "F12" key, provided you have added yourself as the server administrator, a convenient menu will appear through which it is very easy to punish manage the server.
The menu itself can also be modified in any way, but that’s a separate topic for a long conversation - perhaps I will tell you about it later.
Plugins
Plugins are .smx files that are placed in the folder \orangebox\tf\addons\sourcemod\plugins, and configuration files for plugins are usually located here: \orangebox\tf\cfg\sourcemod.
In this section, I will describe the most useful plugins in my opinion with setup examples if required and explanations for installation if it differs from the norm.
Allows you to set a limit on the number of players of one class.
Settings are located here: \orangebox\tf\addons\sourcemod\configs file MaxClass.txt
"MaxClassPlayers"
{
//Default config if the map tree is not found
"default"
{
//When there are 1 to 50 players in the server
"1-50"
{
//Team2 = red AND team3 = blue
//set to 0 if you want this to only work on one team
"red" "1"
"blue" "0"
//Put -1 for no limit, 0 for disallowed, and any other number to set the limit
"scout" "3"
"sniper" "3"
"soldier" "3"
"demoman" "3"
"medic" "3"
"heavyweapons" "3"
"pyro" "3"
"spy" "3"
"engineer" "3"
}
//When there are 1 to 50 players in the server
"1-50"
{
//Team2 = red AND team3 = blue
//set to 0 if you want this to only work on one team
"red" "0"
"blue" "1"
//Put -1 for no limit, 0 for disallowed, and any other number to set the limit
"scout" "3"
"sniper" "3"
"soldier" "3"
"demoman" "3"
"medic" "3"
"heavyweapons" "3"
"pyro" "3"
"spy" "3"
"engineer" "3"
}
//When there are 6 players in the server
"6"
{
//Team2 = red AND team3 = blue
//set to 0 if you want this to only work on one team
"red" "1"
"blue" "1"
//Put -1 for no limit, 0 for disallowed, and any other number to set the limit
"scout" "2"
"sniper" "2"
"soldier" "2"
"demoman" "2"
"medic" "2"
"heavyweapons" "2"
"pyro" "2"
"spy" "2"
"engineer" "2"
}
//Anything that is not set will be -1 (no limit)
}
}
Detailed information about how you died.
The file killersinfo.phrases should be placed in \orangebox\tf\addons\sourcemod\translations
If you want to see the metric system on your server, save the file killersinfo.sp, not killersinfo.smx.
.sp files are source files; they can be edited, but to use them, they must be compiled, which is quite simple.
Open the killersinfo.sp file in Notepad, find the line #define METRIC 0 and change it to #define METRIC 1, and save the file.
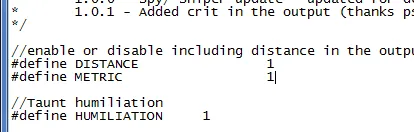
Now copy it to the folder \orangebox\tf\addons\sourcemod\scripting and run the file compile.exe located in the same folder. Finally, copy our killersinfo.smx from \orangebox\tf\addons\sourcemod\scripting\compiled to the familiar directory \orangebox\tf\addons\sourcemod\plugins
You can add or set a time until the end of the round.
Enables a mode with only "melee" weapons.
Allows you to set the respawn time for the red and blue teams.
The plugin is configured by adding commands to server.cfg:
mp_disable respawntimes 1
sm_respawn_time_enabled "1"
sm_respawn_time_blue "3.0" //Attackers
sm_respawn_time_red "3.0" //Defenders
A very useful plugin whose essence is clear from the name.
This plugin automatically kicks players whose ping exceeds the specified limit.
Allows any player to be switched to another team.