
Half-Life 2 Weapons
The Arsenal of the Half-Life universe may not be vast, but it is effective, somewhat intricate, and unconventional. Alongside mundane items like pistols and assault rifles, we encounter brilliant creations such as the zero-point gravity manipulator (simply known as the gravity gun), organic pheropods used to attract and control antlions, as well as the famous and quite unconventional crowbar - a unique symbol of the game and its main protagonist. Almost all types of weapons have a primary and an alternative shooting mode, the combination of which allows you to inflict deadly wounds even on numerous and technologically superior foes. There are also "non-playable" types of weapons that we can observe during gameplay, but cannot obtain through normal means (the electroshock baton of the patrol, the Alyx gun, the Alliance sniper rifle). However, let’s go through everything in order.
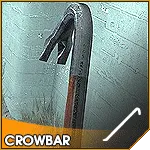
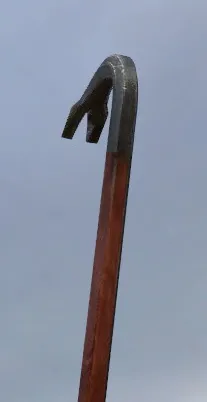
Crowbar
First encountered: Chapter 2, A Red Letter Day
Damage: 10
Alternative attack: No
Description: A metal rod with a chisel-shaped working end, bent and split. Usually used as a lever.
Usage: This is the first real weapon you will encounter, and it’s not much different from what you used during the Black Mesa incident. You can whack enemies with the crowbar (especially effective against Headcrabs if the swing coordinates with the monster's jump); it’s also useful for breaking wooden obstacles and other objects you don’t want to waste ammo on. Use the crowbar to bash solitary zombies or cops or in tight spaces (like ventilation ducts).
Targets: Headcrabs, city police, and soldiers (attack Alliance troops only if you have no other option)
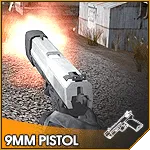
9mm Pistol
First encountered: Chapter 3, Route Canal
Damage: 5
Ammo reserves (in magazine/in stock): 18/150
Amount of pick-up ammo: 20 (small box) / 100 (large)
Alternative attack: No
Description: A silver-black 9mm pistol approved by the Alliance, holding 18 rounds in the magazine.
Usage: This is a precise weapon, your first ranged weapon, much more useful than it seems at first. Despite its low damage, it can fire as fast as you can pull the trigger — a vital feature allowing for up to three shots per second if your reflexes are fast enough. The faster you shoot, the less accurate your hits become, so take into account the distance to your target when deciding on your shooting speed.
Targets: City police, scanners (especially at a distance), barnacles, headcrabs, and battles with one or two enemies at a time.
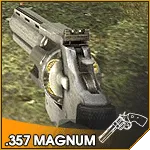
.357 Magnum
First encountered: Chapter 4, Water Hazard
Damage: 40
Rounds (in magazine/in stock): 6/12
Amount of pick-up ammo: 6
Alternative attack: No
Description: A heavy six-shot revolver with very powerful manually loaded cartridges.
Usage: Six shots, long reload time, and no alternative attack may deter you. Don’t pay attention to these drawbacks: this weapon can kill a bipedal enemy with a single shot even at a distance. Guaranteed instant death with a headshot. For a single kill at close or long range - nothing is better than the magnum. If you have great agility, use the magnum to shoot flying grenades back at the enemy. This is the best weapon for such tactics, as due to the power of the shot, grenades fly back with incredible force. Use a "shoot-and-run" tactic with this weapon, popping out of cover to kill an enemy and immediately retreating to relative safety.
Targets: City police and soldiers, all types of zombies, especially fast zombies (only with a headshot).
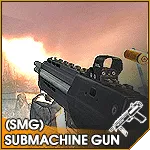
SMG
First encountered: Chapter 3, Route Canal
Damage: 4 per bullet (fires about 13 bullets per second)
Rounds (in magazine/in stock): 45/225
Amount of pick-up ammo: 45 (small box)/225 (large)
Alternative attack: Yes
Damage: 100
Rounds (in magazine/in stock): 1/3
Amount of pick-up ammo: 1
Description: A compact but powerful submachine gun with a built-in grenade launcher, approved by the Alliance.
Usage (main): A rapid-fire all-purpose weapon, this is your primary artillery in any combat situations until you acquire the Pulse Rifle. The submachine gun has a very high rate of fire but deals medium damage, making it best suited for shooting at short and medium distances. Watch your ammo count: many have a tendency to fire too long bursts. Use short and precise bursts. The main rule: the faster the enemy, the shorter and more precise the bursts should be. Shoot the zombie until it drops; with a headcrab — use very short bursts to conserve ammo. This weapon is also perfect for circular strafing.
Targets (main): Any confrontations with troops (human-sized and smaller), antlions, groups of three enemies or fewer.
Usage (alternative): The alternative attack of this weapon throws a grenade in an arc. The grenade explodes on impact with a target. This is a very useful "panic button" in a rapidly deteriorating situation (for example, when supporting from ambush) to take out two or more enemies that are close to each other or to clear enemies when you are out of ammo.
Targets (alternative): Groups of enemies, such as those coming out of doors or in small rooms. When carefully aimed, used to take out snipers in windows.
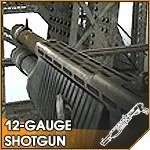
Shotgun
First encountered: Chapter 6, "We don’t go to Ravenholm"
Damage: 56* (8 per pellet, x7 pellets per shot)
Number of rounds (in magazine/in stock): 6/30
Number of pick-up rounds: 20
Alternative attack: Yes
Damage: 84* (12 per pellet, x7 pellets per shot)
- — varies depending on distance
Description: A pump-action shotgun that fires pellets.
Usage: An indispensable close-combat weapon — the Father Grigori's shotgun. It has an incredible stopping power that no other weapon can compare to (except maybe the Magnum, which requires greater precision). However, at a distance, the power quickly wanes: it can be an excellent weapon to wipe out headcrabs and zombies at point-blank range, but it does not perform well at medium and long distances. Besides regular firing, you should try its two additional modes.
The first is an alternative attack, slower, using twice the ammo, but much more powerful. Use it on strong single enemies that have managed to get close to you. The second mode is firing after you’ve run out of ammo in the magazine. If you continue shooting with an empty magazine, ammo will be loaded one by one, manually, to make a single shot. This takes half a second per round, which is much slower than temporarily stepping out of combat and fully reloading. Use this mode only when facing immediate danger and when you can’t switch to the Magnum.
The shotgun can also use the "shoot and run" tactic: peek out from cover, shoot, and hide back. Or peek out, let the enemy notice you, hide again, and shoot once they come into view. Reload only if there are no enemies nearby; you’re better off switching to another weapon than reloading the shotgun in the heat of battle.
Targets: Headcrabs on zombies, headcrabs, any enemies at close range (6 meters or closer).
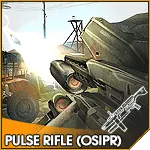
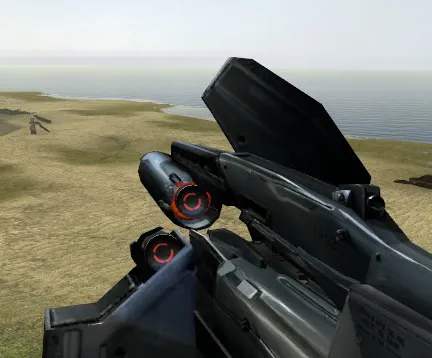
Standard Overwatch Pulse Rifle (OSIPR)
First encountered: Chapter 6, "We don’t go to Ravenholm"
Damage: 8 per bullet (approximately 10 rounds per second)
Number of rounds (in magazine/in stock): 30/60
Number of pick-up rounds: 20
Alternative attack: Yes
Damage: 100*
Number of rounds (in magazine/in stock): 1/3
Number of pick-up rounds: 1
- — instant death to the enemy after hit by an energy ball
Description: A dual-purpose pulse rifle with an additional device to launch energy spheres, produced by the Alliance.
Usage (main): An exclusively high-velocity variant of the submachine gun, the Overwatch Pulse Rifle (also known as AR2) is an impressive example of Alliance technology supplied to some classes of soldiers. The combination of powerful impulse charges and quick reload makes this rifle a deadly weapon. Use even shorter and more precise bursts than with the submachine gun - automatic fire quickly depletes ammo. High accuracy and double the damage compared to the submachine gun make this weapon the best choice for medium and long-distance combat or against large groups of enemies. Use it instead of the submachine gun at longer ranges.
Targets (main): Enemies the size of an antlion or smaller, groups of enemies.
Usage (alternative): The alternative attack launches a large energy ball that lasts three seconds. It needs to be aimed precisely at one of the opponents in the group. Generally, the ball travels for two seconds and then ricochets, killing enemies in a second. Usually, one ball can kill up to three opponents. To make the best use of the ball's short lifespan, you need to be relatively close to the enemy before firing.
Targets (alternative): Groups of enemies in confined spaces (never use against single targets the size of a human). Large single enemies (such as Striders).
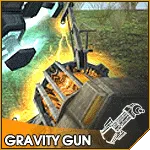
Gravity Gun
First encountered: Chapter 5, Black Mesa East
Damage: Varies
Ammo reserves (in magazine/in stock): Not required
Pick-up ammo: Not required
Alternative attack: Yes
Description: The gravity gun emits an orange beam capable of manipulating inanimate objects.
Usage: The gravity gun is the most versatile, useful, and sometimes destructive weapon you will encounter. Its application depends solely on the current situation, allowing you to be truly creative with surrounding objects.
Pressing the alternative attack button attracts objects (up to the size of a car) into the gravity gun's field right in front of you, where you can hold them. Another press of the right mouse button drops the item. Attracting with the alternate fire button can often come in handy for picking up objects that are at a distance.
Pressing the primary attack button pushes objects away. The impact beam has great power, but you can further increase its strength by first attracting the object to you (with the alternative attack) and then pushing it away. For example, you can break crates this way.
Use the G button (by default) to switch to the gravity gun and back to your previous weapon. This is very useful for, say, clearing a path during a fight when you need to quickly switch between the gravity gun and regular weapons.
Now that you know "how," you need to know "what" to attract and push away:
* Any object except those screwed to the ground or organic (like people) can be attracted or pushed away.
* The weight and size of the object determine the power and distance it will be pushed away. Small items (cans, boxes, circular saws) fly fast and far. Medium items (batteries, washing machines) fly fast but not far. Large items (cars) can only be nudged.
* Use batteries and similar items (that don’t block your view) as projectiles against enemies. You can use one item many times and carry it with you. This saves ammo. Circular saws are also very effective.
* Stack objects to reach high places.
* Quickly and efficiently clear paths of debris.
* Pick up items and supplies that would otherwise be unreachable.
* Destroy barricades by striking with the left mouse button.
* Manipulate large objects (like cabinets) instead of shields or block enemy passages.
* You can manipulate explosive barrels, but with great caution.
* Additional ammo or health packs can be carried with you or thrown into places you will come back to later.
* Destroy manhacks and scanners by pulling them towards you and smashing them against walls or sinking them in water. Holding a manhack lets you use it as a saw.
* Catch and reflect falling large objects.
(More about this weapon can be read in a separate article posted on the blog http://www.gamer.ru/games/214-half-life-2/posts/6990 )
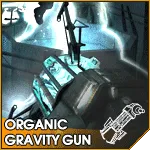
Gravity Gun (Organic)
First encountered: Chapter 13, Benefactory
Damage: Varies
Ammo reserves (in magazine/in stock): Not required
Pick-up ammo: Not required
Alternative attack: Yes
Description: This type of gravity gun emits a blue beam, which can manipulate both inanimate and organic objects.
Usage: Modified with Alliance technology, the gravity gun’s flow can now manipulate both inanimate and organic objects. In addition to all previously described capabilities, any enemy, whether human or machine, can be attracted, pushed away, or used as if it were a barrel or a piece of trash. The combat possibilities of this technique are limitless: throwing enemies at each other, using an opponent as a living shield, hurling enemies with surrounding objects.
Additionally, the power of the gravity gun when handling inanimate objects has been increased, allowing for the use of more powerful projectiles. For instance, you can throw energy spheres from enemy to enemy, smash enemies against walls, or drop heavy objects onto them.
Targets: All Alliance troops within the Citadel.
(More about this weapon can be read in a separate article posted on the blog http://www.gamer.ru/games/214-half-life-2/posts/6990 )
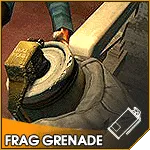
Fragmentation Grenade
First encountered: Chapter 3, Route Canal
Damage: 125
Ammo reserves (in magazine/in stock): 1/5
Pick-up ammo: 1
Alternative attack: Yes
Description: A disposable cylindrical military fragmentation grenade with a four-second fuse.
Usage: Pull the pin by pressing the left or right mouse button and throw the grenade by releasing the button; the trajectory of flight is determined by the crosshair's position, not by the duration of holding the mouse button. In primary attack mode, the grenade is thrown in a long arc. It lands and explodes after the fuse ignites, starting from the moment of the throw. It is used to eliminate enemies in cover or around corners. Practice throwing grenades to learn how to use the right trajectory and achieve an explosion at the desired point.
The alternative attack throws the grenade a short distance. This can be useful for taking out an enemy around a corner when you’re close. Using the alternative attack while crouched rolls the grenade along the ground, which can be used for precise elimination of turret-type objects. Also remember that enemy grenades can be picked up (with your hand or the gravity gun) and thrown back to the opponent (or shot back with the magnum), but you need to keep an eye on the timing. Finally, grenades are good for eliminating enemies in buildings or for stealthily attacking groups of enemies who are unaware of your position. For example, break a window using another weapon, and throw a grenade inside or roll it into a door.
Targets: Enemies in cover or around corners, stationary enemies, ground turrets.
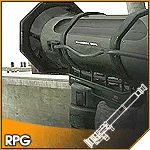
Rocket Propelled Grenade (RPG)
First encountered: Chapter 7, Highway 17
Damage: 200
Rounds (in magazine/in stock): 1/3
Amount of pick-up rounds: 1
Alternative attack: No
Description: A reusable rocket-propelled grenade launcher that uses fin-stabilized rockets. It loads from the muzzle and fires from the shoulder. Recoil is nonexistent. Used against vehicles and infantry.
Usage: Given that the RPG only has three charges, you can’t waste shots, but each of these shots is devastating. Only the primary attack is used for firing; click the left mouse button once to launch a rocket. The rocket is heat-seeking but not very smart and can easily be intercepted by Alliance combat ships. For effective use, launch the rocket, then press and hold the primary attack button to activate the laser. Guide the rocket to the target with the laser (ideally, the laser point should be on the target itself for the rocket to reach it).
When attacking Alliance combat ships agile enough to intercept rockets fired “head-on,” use a “barrel roll” to guide the rocket in a loop until it reaches the target. Use this weapon from a distance! It’s the best choice for taking down combat ships and striders.
Targets: Alliance combat ships, other flying objects, armored personnel carriers, striders, enemies at very long range.
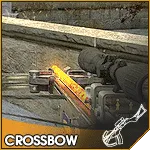
Crossbow
First encountered: Chapter 7, Highway 17
Damage: 100
Rounds (in magazine/in stock): 1/10
Amount of pick-up rounds: 6
Alternative attack: Yes
Description: A black hunting crossbow with a draw weight of 113 kg and an arrow flight speed of over 110 m/s, with an additional attachment for an optical sight.
Usage: The best silent sniper weapon; eliminating an enemy at long range more than compensates for the limited charge supply and long reload time. The primary attack fires an arrow, while the alternative zooms in much further than your HEV suit can (press the right mouse button again to remove the zoom). If you need to scout a potential ambush point — use this powerful one-shot killing weapon. Remember that the arrow takes time to travel, and you need to lead your shots against moving targets (to where the opponent will be when the arrow reaches, not where they currently are). The trajectory of the arrow gradually drops; consider this when shooting at long distances. Take down unsuspecting stationary enemies with the crossbow.
Targets: Humans at very long ranges or on high platforms and areas that cannot be accessed.
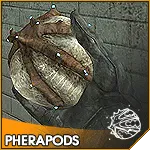
Pheropods (Insect Bait)
First encountered: Chapter 8, Sandtraps
Damage: Immobilization (Alliance), death (antlion attack)
Rounds (in magazine/in stock): 1/not used
Pick-up ammo: Not required
Alternative attack: Yes
Description: Pheropods harvested from the carcass of a large antlion (Mirmidont gigantus).
Usage: After these pheropods have been extracted from the decomposing remains of a large antlion by vortigaunts (humans cannot extract them themselves), antlions cease to be a threat. Now you can use the pheropods to direct their swarm to attack, primarily against Alliance forces. The primary attack throws a pouch of pheropods (of which there is no limit) in an arc, like a grenade. The flight distance depends on the position of the crosshair. Upon landing, the pheropod explodes, causing any nearby antlion to rush to the explosion's location. If the pheropod hits an Alliance soldier (not a zombie), he loses mobility for 5 seconds due to the spray cloud that freezes around him.
This feature can also be used to immobilize enemies without the help of antlions. However, if the lions are available, they swarm the area and wait for you after you’ve killed the enemies. The primary attack can also be used to direct antlions to a desired area. The alternative attack compresses the pouch, which dully releases a pheropod and attracts all nearby antlions. This is useful to gather all the lions in one spot when preparing for an attack.
Targets: Alliance soldiers
Additional Types of Weapons:
Stunstick
The police stunstick is used by the OS. In single-player mode, this weapon cannot be used by the player. If the player picks up the stunstick, it acts as a battery for the suit instead of a weapon. In Half-Life 2: Deathmatch, the stunstick can also be used by a player who has set the model of an OS officer or an Alliance army soldier. Note: if you rename the file weaponstunstick in the scripts folder to weaponcrowbar (replacing the original), the stunstick can be used as a regular weapon.
Alliance Sniper Rifle
The sniper rifle is the main weapon of the Alliance's sniper divisions. The weapon is not designed for player use. In the original Half-Life 2, it doesn’t even have its world model, but the rifle can be seen in Episode Two. Its prototype was the .50 caliber Barrett M99 rifle.
S.L.A.M.
A universal portable explosive device. It has 2 modes: remote-controlled charge and tripwire. Not much is known about it.
Alyxgun
This weapon is used in the game only by one character — Alyx Vance. It has high accuracy and rate of fire but does not have its own view model. In Half-Life 2 and Half-Life 2: Episode One, the weapon uses its own type of ammo, equivalent in power to 9mm pistol ammo. These rounds cannot be obtained through the console or found on maps in any way other than by taking down an NPC already equipped with this weapon. In Half-Life 2: Episode Two, the weapon uses standard pistol rounds that can be found in ample quantities throughout any level of the game. The alternative fire mode is switching between automatic mode and burst mode (non-functional, as when firing in burst mode, only the corresponding animation plays, but only one round is consumed and only one shot is made).
In the user weapon modification SMod for Half-Life 2, this weapon already has its view model, switches properly between three fire modes, and has a high spread when firing continuously.
Hunting Rifle (Annabelle)
The rifle used by Father Grigori. Instead of standard shotgun shells, it uses revolver ammunition. The weapon can be obtained using the command give weaponannabelle as well as by approaching Father Grigori when he gives you the shotgun. The weapon has better accuracy than the revolver and a fast reload speed, but its main drawback is a very limited ammo supply. Due to Valve not fully incorporating this weapon into the game, it doesn’t have its own model. Instead, it uses the vshotgun model - the model of the shotgun. The prototype of this weapon was the .357 Marlin 1894C rifle.
Cubemap
A weapon for testing reflections. It can be summoned with the code give weapon_cubemap or impluse 81. It only works in Half-Life 2: Deathmatch; in Half-Life 2, an ERROR will appear on screen instead of the model. To fix it, all files from the model shadertest\envballs in Half-Life 2: Deathmatch must be copied to Half-Life 2.
Stunner
This device is used by Alyx Vance and Judith Mossman. It allows hacking consoles and electronic locks.
Tau Cannon
The Tau Cannon is mounted on the buggy in Half-Life 2. There is no real prototype.
Food Bag and Suitcase
These items are not weapons, but they can be summoned in the console. Classifying them as weapons was done so that civilians (Chapter "Arrival") could carry them.
All damage statistics are given according to the game’s standard health calculation system. 1 unit = 1 unit of health for the protagonist.
Used materials:
Also, my own thoughts and opinions.