Siege of Dragonspear - Walkthrough, Part 9 (Final)

You have returned to Baldur's Gate under circumstances far more sinister than anyone could have expected. What should have been your triumph has turned into a nightmare beyond your understanding.
Skae Silvershield is dead, presumably at your hand. The priests are unable to resurrect her. The magically preserved body has been delivered to the great duke, Entar Silvershield. He clings to a faint hope that his daughter might still be revived. And you share his hope. Without Skae, you may never learn the truth about what happened on that dark night.
You once thought you had escaped your father’s influence. But when you went to Dragon Spear Castle, you realized that wasn’t the case. You are still a child of Bhaal, the lord of murders. A part of him lives in you. Has that part slipped out of control again? Was it your hand that plunged the dagger into Skae Silvershield’s chest? You do not know. And that doesn’t give you peace.
When you left Baldur's Gate, people hailed you as a hero. Now they see something entirely different in you.
**[Siege of Dragonspear - Walkthrough, Part 1](http://www.gamer.ru/baldur-s-gate/siege-of-dragonspear-prohozhdenie-chast-1)**
**
Siege of Dragonspear - Walkthrough, Part 2
Siege of Dragonspear - Walkthrough, Part 3
Siege of Dragonspear - Walkthrough, Part 4
Siege of Dragonspear - Walkthrough, Part 5
Siege of Dragonspear - Walkthrough, Part 6
Siege of Dragonspear - Walkthrough, Part 7
Siege of Dragonspear - Walkthrough, Part 8
**
TRIAL
The Flaming Fist army escorted the hero to Baldur's Gate, where the trial will take place. It seems that the city's judicial system is entirely in the hands of the council of four Great Dukes. Thus, the proceedings will be held in the square before a crowd as a public hearing. Without a lawyer or prosecutor. The Great Duke Belt will act as the "chairman."
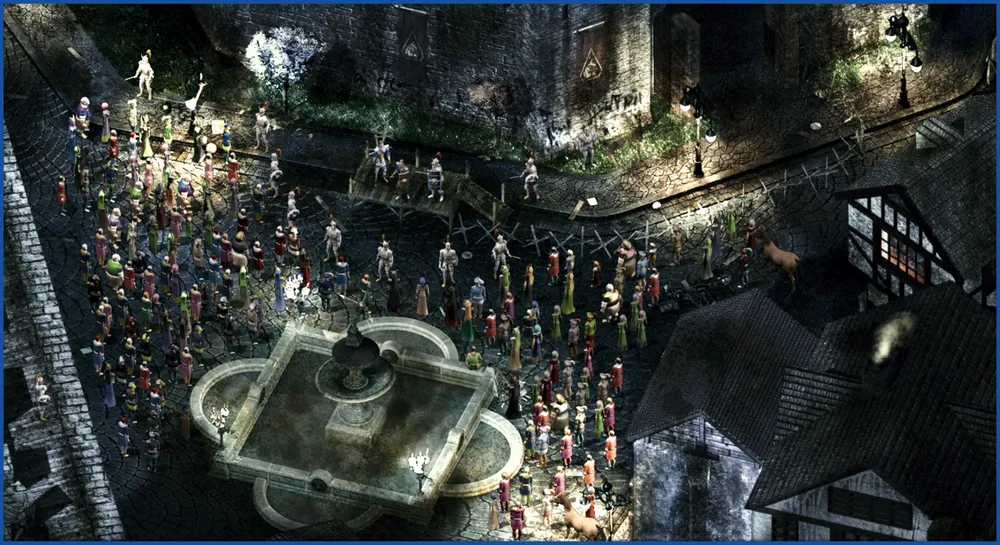
Public Hearing
1. Public Hearing. The cutscene opens at the moment when the main witnesses have already testified. They recounted how the accused was found in the main hall of Dragon Spear Castle, with Skae Silvershield's body lying at his feet. And now Belt invites Corporal Bens Duncan to share his memories of the disturbing incident that occurred at the Boareskyr Bridge (see Walkthrough, Part 4 - BM, item 6). The corporal's testimony depends on the choice you made during the siege of Bridgefort. If you fought back the crusaders and broke the siege, Bens will mention this event. Otherwise, he will only recount the mark of Bhaal that was seared on the bridge around the unconscious hero. Duke Belt, in turn, will respond based on the speech you selected that the hero made while leaving the city (see Walkthrough, Part 2 - On Campaign, item 4). If you admitted to the hero's kinship with Sarevok, the duke will remind that the hero never hid their familial connection to the god of murder. Otherwise, the duke will say that the mark itself is not evidence of guilt but casts a shadow over the hero. This will conclude the corporal's questioning.
The next step will be for Belt to allow the hero to speak in their defense. However, he will warn that the oracles will provide evidence of the truth of his words. Further events depend on your earned reputation and choices made during the game. Initially, various response options will be presented to you as the hero's first remark. They are similar and with few exceptions in all of them the hero denies guilt, except for the last remark. In it, you can waive your right to speak and wait for the court's decision. The other options differ from one another in rhetoric. Since there is no other evidence related to what happened at the castle that could justify the hero, all you can do is rely on your actions during the expedition.
For the hero's defense, up to four events may be available:
you freed the priestess of Bhaal and commanded her to atone for her actions (see Walkthrough, Part 4 - HB, item 13);
you refused to poison the supplies of Dragon Spear Castle (see Walkthrough, Part 5 - LK, item 17). Or you agreed, but did not poison;
you obtained a cure for the infection spreading in the coalition camp (see Walkthrough, Part 5 - KR, item 7);
during the pursuit of Kaylar in Avernus, in a dialogue with the demon Trix, you wagered the main character's soul instead of one of your companions (see Walkthrough, Part 8, item 4).
In addition, a fifth option may be available depending on reputation. At a high reputation (over 16), a phrase will become available: "My deeds are known everywhere. Many call me a hero. That counts for something." At a reputation of "villain" (under 6), the phrase will be different: "I have done many evil things, and I did so with pride. If I indeed killed Skae, I would not deny it." Besides reputation, the appearance of these phrases also depends on the rhetoric you previously selected. For instance, having a reputation above 16, if you start a speech with the remark: "I am not a hero and have done bad things in my life," then the above phrase will not be available.
To successfully perform at the hearing, you must present at least three out of five "evidences." Duke Belt will only accept a maximum of four. And here's the oddity (whether this is intentional or a "bug" in the game is unclear); the "villain" phrase is counted by Belt but ultimately does not matter, as it is useless. Its counterpart at high reputation does not have this peculiarity and is regarded fully.
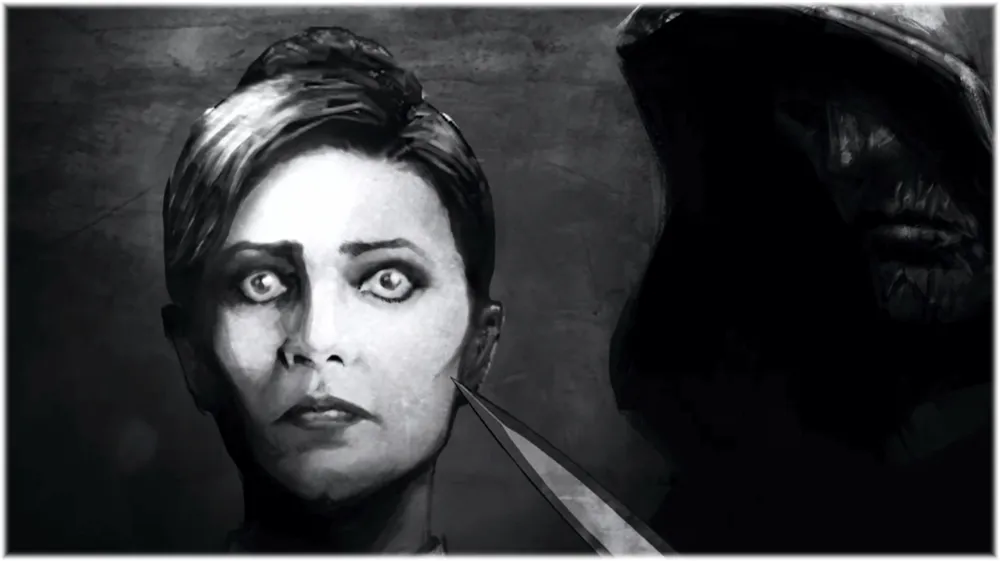
When the hero finishes their speech, an enraged Entar Silvershield will emerge, clearly eager to spill blood from the presumed murderer of his daughter. His furious remarks will make it clear why the priests are unable to bring Skae back to life. The murderer struck her with a special dagger, the "Soul Collector," and now the soul of the duchess is trapped within it. Where that dagger is now, the oracles cannot see, as it is hidden by someone's powerful and evil will. Eventually, Entar will retreat but threaten the hero with the gallows.
At the end of the hearing, Duke Belt will announce that the Flaming Fist will take the suspect into custody until the counsel of the Four renders a verdict. After which, the hero will be taken to prison in the castle of the Flaming Fist.
Place of Imprisonment
2. Prison. After some time, Captain Corwin will visit the hero. The dialogue with her will differ depending on whether a conversation occurred after returning from Avernus or not (see Walkthrough, Part 8, item 8). If a romantic line between Corwin and the hero has developed and in that dialogue they agreed to take their relationship to the next level, Corwin will express regret about the situation but cannot (or rather does not want to) help. Regardless of how you react, she will voice her doubts about the hero's innocence and, declaring the end of the relationship, will walk away.
If the dialogue after returning from Avernus did not occur, or in it, the hero proposed to remain friends, Corwin will suggest not to evade responsibility and admit guilt. No matter what you choose as a response, the hero will insist on their innocence. To this, Corwin will state that she does not believe that, and she doesn’t care whether the hero is guilty or not. In her opinion, the hero of Baldur's Gate should justify their title and sacrifice themselves for the peace of the city, as the execution of another child of Bhaal would ease the tension in a society weary of constant upheavals. After stating her position, she will say goodbye and leave. If the main hero has developed a romantic line with another character, that character will visit the hero following Corwin. However, the dialogue with this character, plus or minus, will be the same as with Corwin and will end in separation.
Next, the very "Exile" (see Walkthrough, Part 8, item 9) will visit the hero. In conversation, he will say that this is not the end of the road. After these words, he will send another vision to the hero.
Vision
In it, the hero will see the full picture of what happened in the hall of Dragon Spear Castle that fateful night. As a parting gift, the "Exile" will threaten that the hero will meet him again, and that this meeting should be feared.
At this stage, the visits will end, and the hero will lie down to sleep. Further events will differ depending on your decisions at the trial. Let’s consider them sequentially, first the bad outcome, then a more optimistic one.
3. Escape. Suddenly, the hero's sleep will be interrupted by a thief. He will open the grate and inform that the council of Four has decided to execute the accused at dawn. But not all is lost, as the hero has one loyal ally—Imoen (see Walkthrough, Part 2). It is she who sent the thief to rescue her childhood friend and lead him out of the city. After finishing the dialogue, follow the thief to the central hall.
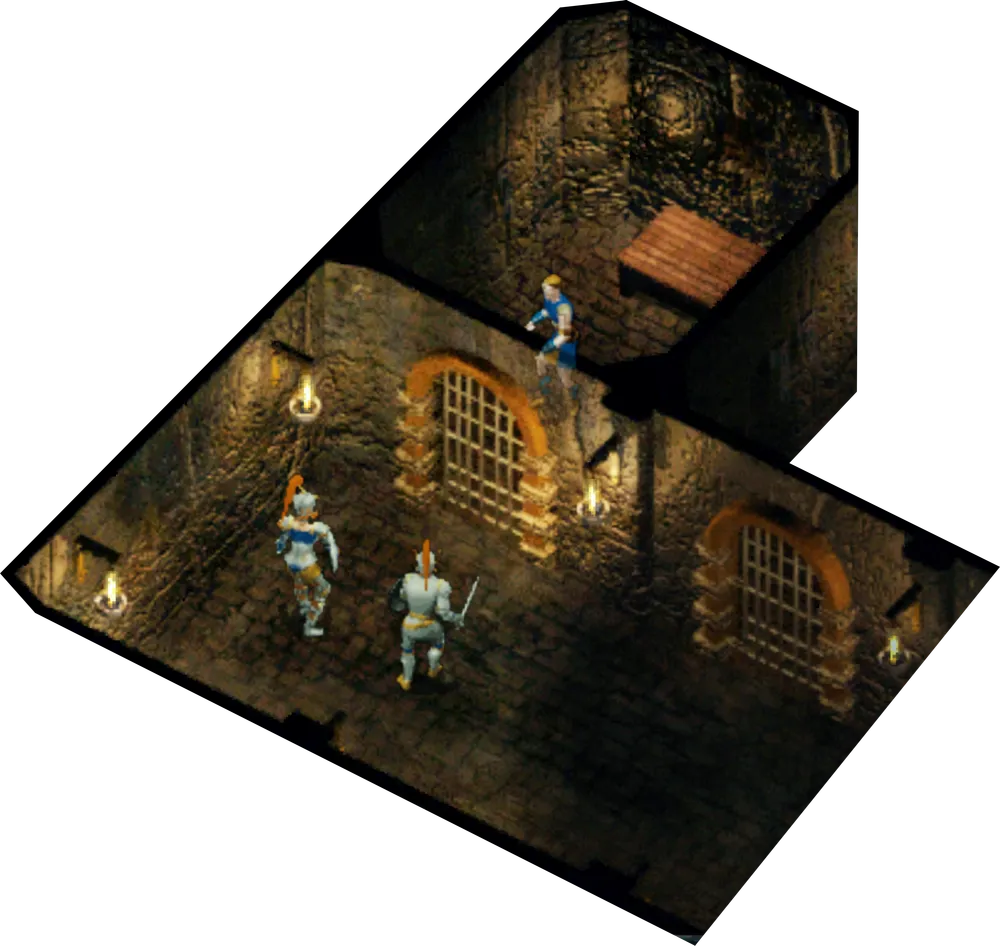
Central Hall of the Castle
Here you will notice the dead guards of the Flaming Fist; evidently, the thief prepared for an unimpeded escape. On one of the tables, you can pick up confiscated items from the hero, after which descend into the basement through the open hatch in the floor.
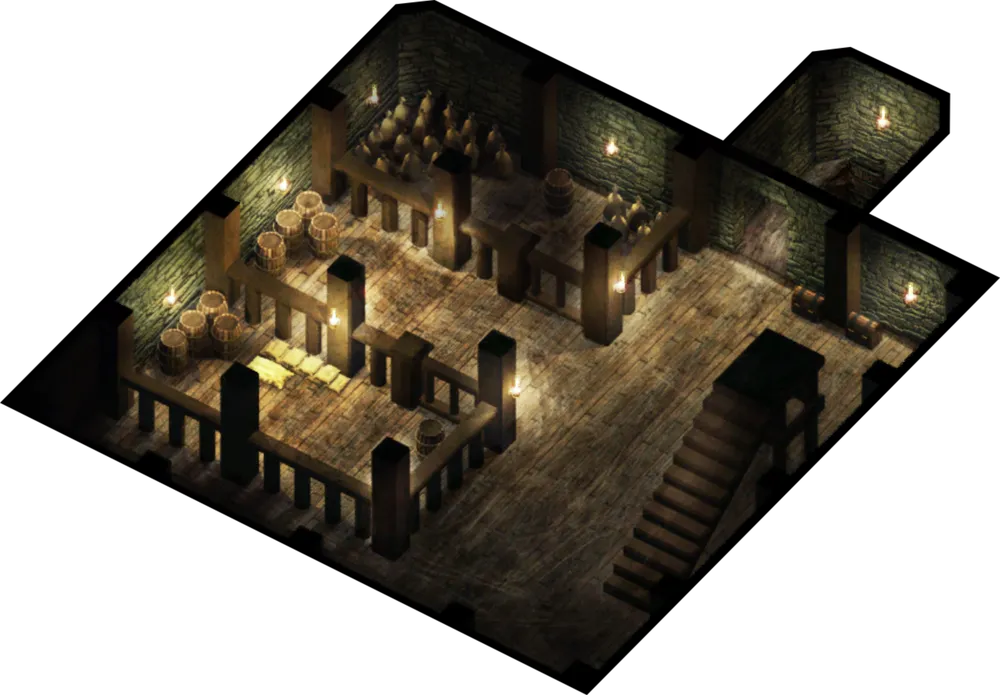
Basement of the Castle
In the basement, the thief will open a secret passage to the sewers and advise moving through the canals to the east towards the waterfall. The waterfall leads to a cave, the exit of which leads beyond the city; there, Imoen will be waiting. With this, the thief's job ends, and he leaves. Before descending, you can examine the nearby chests and a barrel in the far part of the basement. In them, you will find a mace, a shield, a sling, ammunition, a crossbow, and bolts for it.
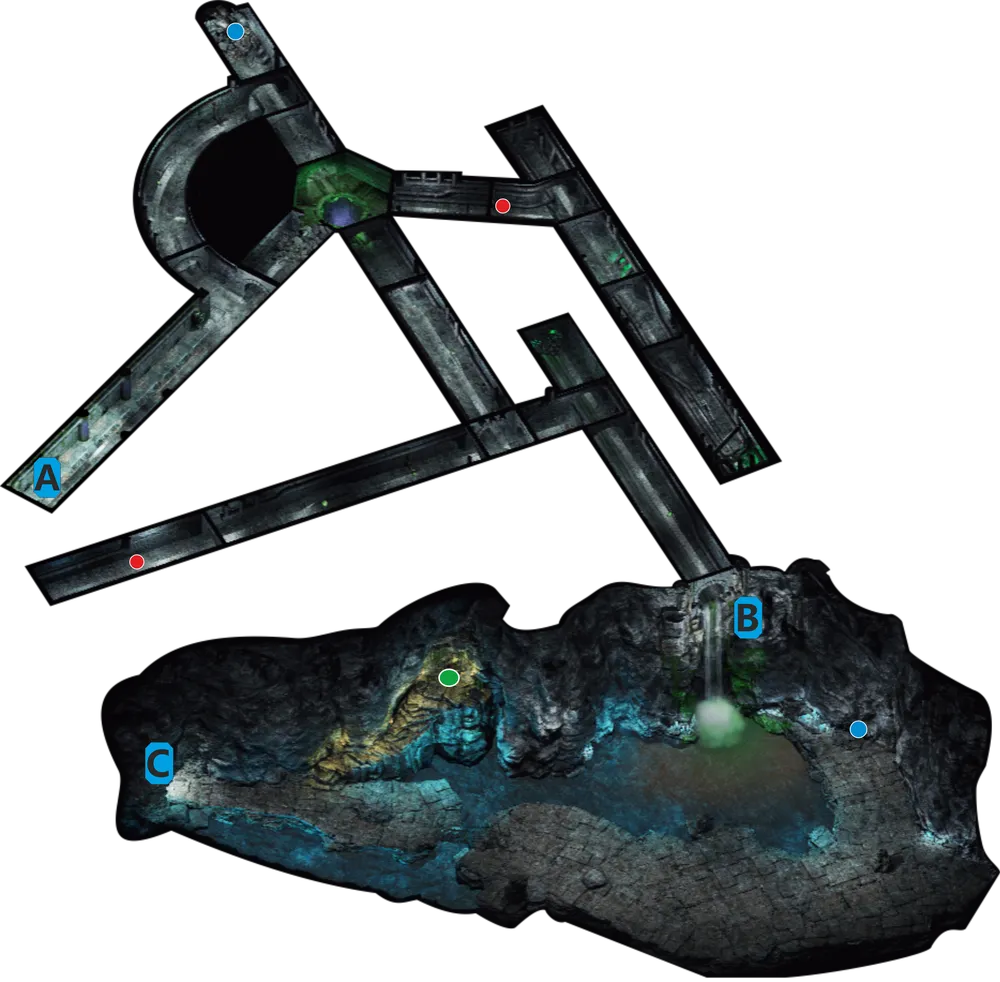
A – descent into the sewers; B – waterfall; C – exit from the cave;
red dots – Flaming Fist patrol; blue dots – interesting places;
green dot – alternative exit;
The sewer resembles a labyrinth of channels; along the way, you may encounter large slugs and drops of green slime. You should be careful; in some corners, you might run into a Flaming Fist patrol. Overcoming them alone may prove difficult. You may also come across the body of a dead adventurer, from whom you will find a key and a letter. From the letter, you can learn that the key unlocks a stash in the cave and was intended for a member of the thieves' guild imprisoned in jail. But evidently, the thief never made it out of the sewers.
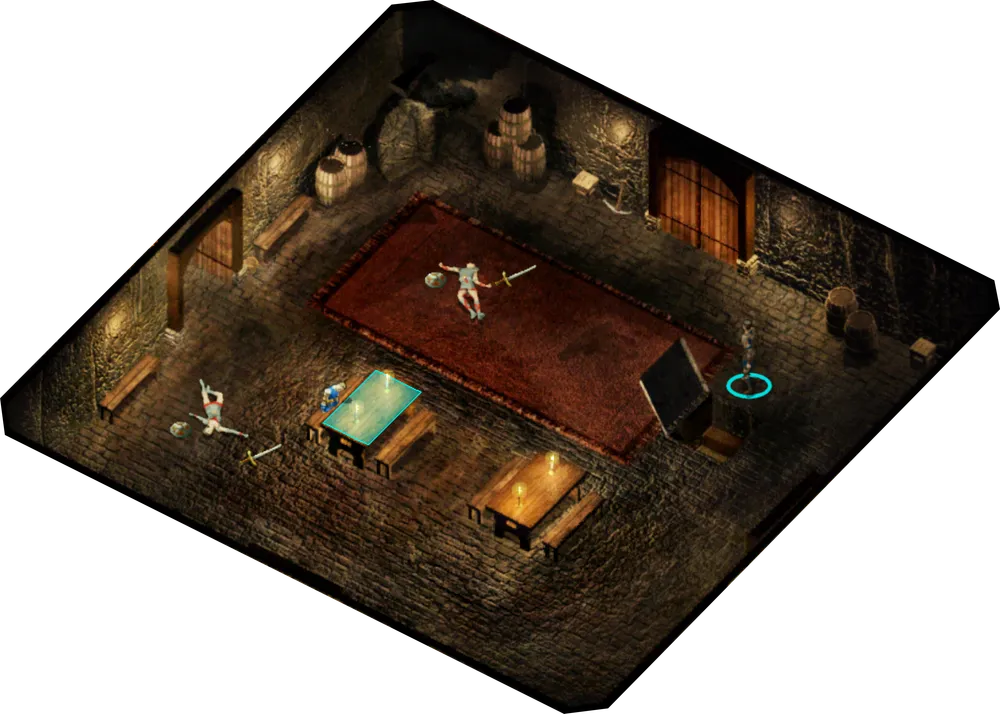
Approaching the waterfall will trigger a cutscene. In it, the hero will be cornered by a Flaming Fist squad led by Corporal Duncan and Captain Corwin. In dialogue, they will demand surrender. They will not listen to the hero's argument and will attack. Fighting them is not necessary; simply approach the edge of the waterfall, and the hero will jump down and end up in the cave.
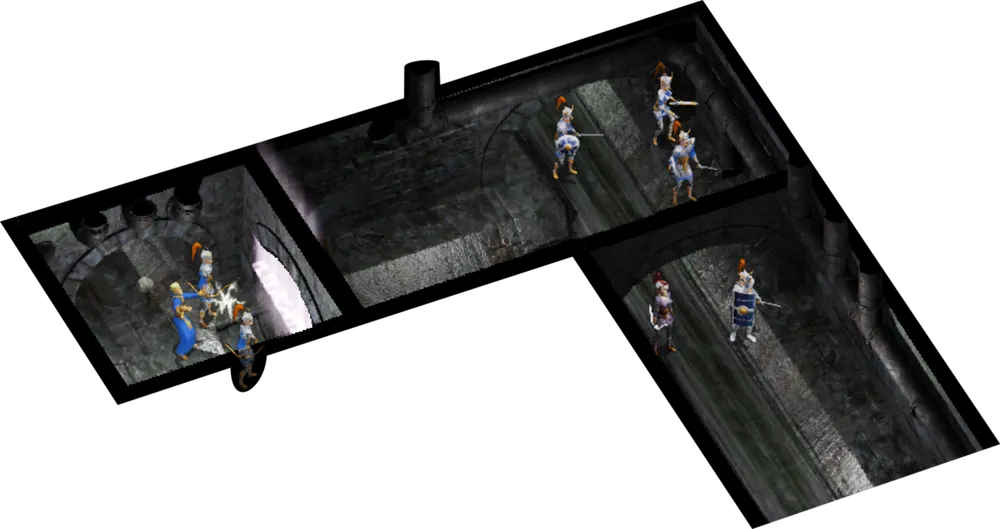
Ambush
However, if there was a romance between Corwin and the main hero (see above, item 2), at the end of the dialogue a line will become available: "If duty is more important to you, fine, I surrender. I did not kill Skae and will not attack you." Corwin will be glad about this decision and order to take the hero back to the jail. But Corporal will strongly disagree with such a decision. At the Duke’s request or due to personal feelings towards Skae, he will decide to kill the hero on the spot. Corwin will be outraged by the insubordination of her subordinate and, saying, "Run, I will hold them back," will side with you. In an uneven fight, Corwin is likely to die, while the hero has to jump from the top of the waterfall. Saving her will be nearly impossible; the only chance is if you are a strong mage. For this, before the cutscene, cast protective spells on the character and summon a strong monster if possible. You can send it ahead of the hero and leave it at a fork near the waterfall (the presumed spawn point of the crusaders). For the fight, use speed oil in advance or cast the spell "Haste" and prepare spells like "Otiluke's Resilient Sphere," "Web," protection against simple projectiles, and powerful area damage spells. When the dialogue ends, first protect Corwin with a sphere; at this time, the crusaders will be distracted by your summoned monster. The next move is to envelop the area in web. You can easily destroy the trapped crusaders with powerful spells. After killing the warriors, you may attack the archers and the mage around the corner. A magical barrier will separate you. You can protect yourself against the archers using the spell "Protection from Normal Missiles." After the defeat of the crusaders, the barrier will not drop, but no new forces will appear, and Corwin will be safe. Unfortunately, after victory, no new lines of dialogue with her will appear, so you can move down into the cave.
Once you reach the bottom, look around. Near the rock, you will find the stash that is opened with the key found earlier. Inside, you will discover spell scrolls and potions.
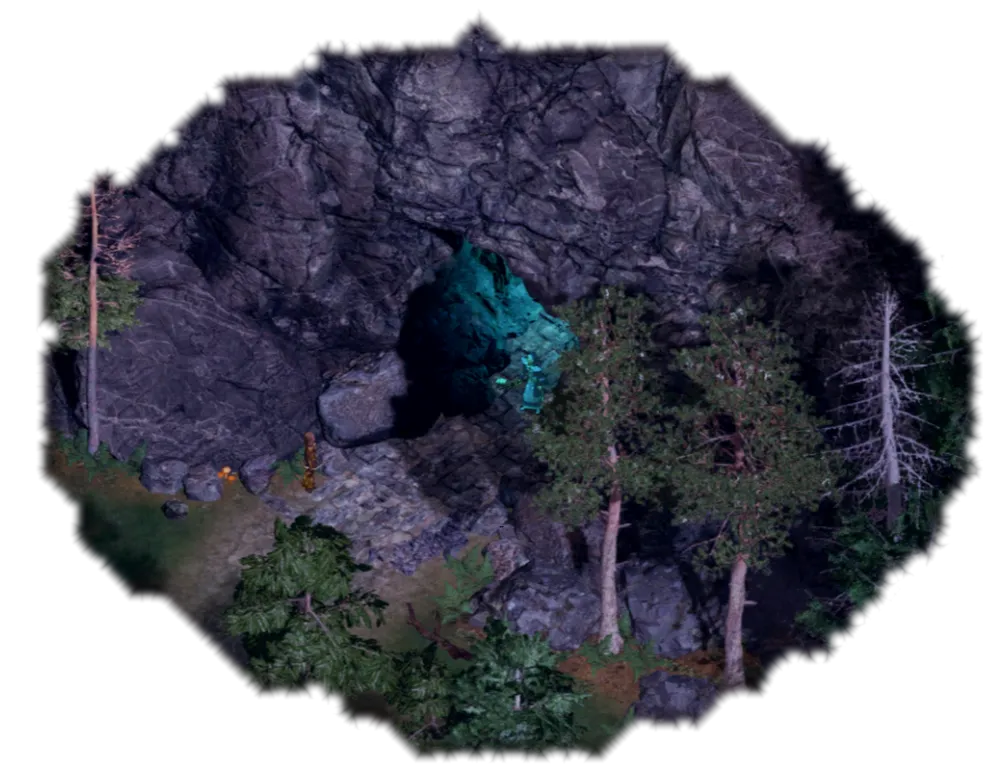
The exit from the cave is located to the west of the waterfall; along the way, you will encounter the same slugs and drops of slime. There will be no more "surprises" in the cave, so you can calmly emerge to the surface...
4. Deal. In this section, we will consider an alternative, escape option. If you managed to perform well in your defense at the public hearing, then instead of the thief, Duke Belt will awaken the hero. In the conversation, you can inform him that the real killer of Skae visited you. However, due to the lack of evidence, he will not take your tale seriously. He faces a different problem now. The council cannot come to a consensus on a verdict. Skae's father, Duke Entar Silvershield, demands execution, but others on the council are wavering. A strong rift in society is emerging in the city. Many townsfolk exalt the hero and are ready to fight for his freedom, while others fiercely despise him, seeing him as just another child of Bhaal. Therefore, if the council spares the hero, some, incited by Entar, are ready to riot and take "justice" into their own hands. Others will not simply stand by and watch their hero be executed. To prevent bloodshed and possibly a civil war, Belt will offer the hero a deal. The council (of course, behind Entar's back) will allow the hero to quietly leave the city, and in return, the hero will go as far away as possible and never return to Baldur's Gate.
After the dialogue, Duke Belt will leave, and the guard standing nearby will escort the hero to the central hall and open the hatch to the basement (see above, item 3). As before, retrieve your belongings from the table and descend. In the basement, the guard will open a secret door and, after a brief dialogue, you will descend into the sewers.
This time, there is no need to go through the canals and jump from the waterfall. After loading the location, the hero will immediately find themselves in the cave but near the "alternative exit" (see above, sewer map). Next, you can calmly leave the cave.
Note: if your hero possesses the lockpicking skill, can use the spell of unlocking, or has the opportunity to increase strength to 24 points (necessary for breaking a lock), then before climbing to the surface, you can loot the thieves' guild stash.
Imoen
5. Finale. At the surface, at the cave's exit, Imoen will meet you. In the dialogue, she will express regret for not accompanying the hero on the expedition and will then lead him to a small clearing where their companions await: Minsk, Dinahier, Jaheira, and Khalid. After each of them gives an encouraging speech, the party will set out on their journey.
Some time later, during a rest in the woods, the heroes will be enveloped in a strange mist, and the entire party will lose consciousness, while the main hero will again see a strange vision.

Hallucination
On this note, the DLC for Baldur’s Gate — Siege of Dragonspear concludes.
The End
From the Author
In this walkthrough, I attempted to describe the game's variability as thoroughly as possible. To highlight interesting nuances that arise from the choices made and what paths may be available to different heroes. However, I am absolutely certain that much interesting content escaped my view in the game, and I would be grateful to readers if they share their experiences in the comments.
Additionally, there are some small details that remained "off-screen." Perhaps, they may interest you, so I'll leave them here:
1. Dreams. In each chapter, starting from the eighth, during the first rest, the hero has "prophetic" dreams. Besides their narrative function, they can also aid your tactics, as in dangerous areas they guarantee, once, a hundred percent probability of a successful rest. To me, this is especially relevant at high difficulty levels. By the way, in the tenth chapter, in addition to sleep, such a probability is also granted by the quest involving Nira (see Walkthrough, Part 5 - KR, item 1).
2. Stealing, Breaking Down Doors, and Lock Picking. As I noticed while reading various forums and "guides," these are the most rarely used skills. And in my opinion, this is a pity. As practice has shown, interesting and quite useful items can be found in the pockets of "non-player characters." Such as the seal of Kaylar (see Walkthrough, Part 6, retrospective) or very useful potions from the vendor Waizab (see Walkthrough, Part 7, retrospective). Regarding breaking down doors and forcibly opening locks, this is a kind of alternative for warriors when there is no thief on hand. But, there is a serious hitch in this method; the strength should often be over 18, while "story-driven" doors are generally invulnerable. Still, I’ll note that this possibility has saved me in some situations.
3. Romantic Line. In this DLC, the hero has the opportunity to start a romance with one of the companions. Different lines will be accessible depending on the gender and race of the main hero. In my case, romances were available with: Corwin, Safana, Viconia, and Nira. Unfortunately, I was only able to bring the lines with Corwin and Safana to a logical conclusion. For those interested in a complete list of possible romances, I recommend checking the article from the fan wiki here. The game also has LGBT lines. I apologize, but I did not consider them.
4. Breaking Up Pairs. In this DLC, companions Minsk/Dinahier and Khalid/Jaheira join the hero's party only as a pair. But there is a way to split them if you want to hire only one. To do this, invite both into the group, then send the needed character far from the main hero, while keeping the other close. Afterwards, dismiss both from the group. After a while, they will each approach the hero in turns to confirm whether he indeed wishes for them to leave. The unnecessary one should approach first; send them back to camp. And when the second approaches, tell him that you made a mistake, and he should stay. That’s it, the pair is split.
5. Item Recharge. Disposable items, such as wands, and some equipment pieces that have a limited number of charges can be recharged. To do this, simply sell the item to a merchant and then buy it back. This method is expensive but effective. The only exceptions are quest items, such as the Eyes of the Zavik (see Walkthrough, Part 2 - TEP, item 6) or the "Reveal Secrets" stone (see Walkthrough, Part 3, item 12.7), as they cannot be sold.
This DLC was completed multiple times by two characters: a male human, truly-neutral mage; a male human, chaotically-neutral wizard slayer.
Lastly, I want to express my gratitude to the honorable nemsik for trusting me to continue his work, as well as for support and guidance. I hope I have not lowered the quality standard with my presence.
A list of informational resources that I used:
Colleagues' walkthroughs
https://arcanecoast.ru/forum/viewtopic.php?t=1323
https://www.rakingclaw.com/chapter-seven/
https://www.gamebanshee.com/baldursgate/walkthrough/sod-korlaszstomb.php
Fan wikis
https://baldursgate.fandom.com/wiki/Baldur%27s\_Gate\_Wiki
https://forgottenrealms.fandom.com/wiki/Baldur%27s\_Gate:\_Siege\_of\_Dragonspear
Thank you for your attention