Siege of Dragonspear - walkthrough, part 8

Avernus, the first level of the Nine Hells, has torn your senses apart. The stench of sulfur and curdled milk invaded your nostrils, coating your tongue and throat with nausea. The bitter moans of the damned surround you from all sides and suffocate you.
As your tear-filled eyes adjust to the dim light from the lava pit, you begin to feel the oppressive grandeur of the cursed wasteland around you. In pursuit of the Shining Lady, you have entered the darkest place imaginable, and the chase is not yet over. Corpses of crusaders are scattered everywhere, but there are no signs of Kheilar herself.
**[Siege of Dragonspear - walkthrough, part 1](http://www.gamer.ru/baldur-s-gate/siege-of-dragonspear-prohozhdenie-chast-1)**
**
Siege of Dragonspear - walkthrough, part 2
Siege of Dragonspear - walkthrough, part 3
Siege of Dragonspear - walkthrough, part 4
Siege of Dragonspear - walkthrough, part 5
Siege of Dragonspear - walkthrough, part 6
Siege of Dragonspear - walkthrough, part 7
**
RETROSPECTIVE
Before starting this chapter, I find it important to mention one nuance. It turned out that during the defense of the camp, before heading to the campfire in the south (see walkthrough, part 6 - camp defense, p. 1), you will have the last opportunity to reform your party. After that, you will have no such opportunity until the end of the game.
AVERNUS

Portal
Around the hero spreads a portal to Avernus, opened at the end of the previous chapter. Before entering it, you need to prepare. The theory on how to resist hellish filth may have been learned from the book "Faces of Evil," which you found in the library of the Dragon Spear castle (see walkthrough, part 7, p. 11). This book states that all demons have immunity to fire damage, while actively using fire magic themselves. Therefore, feel free to clear the spell slots of fire damage spells on the mages and add spells that protect against fire. For the other characters, remove weapons and arrows, bolts and other projectiles with fire damage, and prepare fire resistance potions. Using logic, it can be inferred that if demons are immune to fire, they may well be vulnerable to cold. Ice damage spells (ice storm, cone of cold, chill touch, etc.) and ammunition with the same properties will be useful. Also, the book states that some types of "abominations" are poisonous and can poison or infect with diseases. Therefore, antidote vials, health potions, and scrolls of poison protection spells would not be unnecessary.
The further text of the book tells about the abilities of stronger demons. In addition to the described characteristics, they have an aura of fear, possess charm and illusion magic. Moreover, they cannot be harmed by normal weapons. Consequently, it is essential to prepare potions and spells of resistance to fear and charm, to equip magical weapons, preferably with a +3 bonus. It wouldn’t hurt for a mage to fill a couple of spell slots with the spell "enchanted weapon." This spell increases the magical power of the weapon held by the chosen character to +3. You may have found a scroll containing this spell in one of the chests in the castle (see walkthrough, part 7, p. 11), or earlier in the trolls' cave (see walkthrough, part 4 - LKT, p. 6).
In addition to everything listed, scrolls of spells for "protection from evil" (for mages) and "mass protection from evil" (for priests) would also come in handy. Naturally, it's vital to have a large number of potions of superior healing.
Lower demons will periodically appear from the portal: "lemurs" (120 XP), imps (1,400 XP), hamatulas (6,000 XP), black abishai (7,000 XP), green abishai (8,000 XP), and red abishai (9,000 XP). You can rest peacefully between waves of enemies. It's a great and relatively safe way to test your strength.
When you are ready, step through the portal.

1 – crusaders' detachment; 2 – angel;
A – ladder to the bridge.
1. The lagging crusaders. Upon crossing the portal, you will find yourself on a plateau at the foot of a tall staircase leading to the "Basalt" tower bridge. Along the way, you will stumble upon a detachment of crusaders fighting a losing battle against demons. The leader of the demons is an erinyes (a type of devil that resembles a human girl with harpy wings) named Illyra. After a brief dialogue, she will attack the heroes' party. Be prepared; her first attack will likely cast "horrible charm" on one of the heroes. Other than that, you should expect no more surprises from her. The other demons, in general, should already be familiar to you; they are the same vile creatures that emerge from the portal in the castle's cellar. Nonetheless, there is one demon not encountered before—a "Witch." By appearance and fighting style, the hellish creature is similar to a "sneak" (see walkthrough, part 4 - LKT, p. 2), but in addition, it can hide in shadows. After defeating Illyra and her entourage, the surviving crusaders will address you.
In the dialogue, the leader of the crusaders, Darnass, will thank you for saving them. You, in turn, can provoke them into a fight and kill them or let them leave safely. In the case of the latter, before heading towards the portal, they may reveal some information. According to them, at the Gates of Baldur, the killers sent by Kheilar were not supposed to kill the hero but rather to abduct him (see walkthrough, part 2 – DG, p. 3).
After dealing with the crusaders, take a look around. On Illyra's body, you will find a scroll with the minutes of a meeting of higher devils. It will become clear that the lord Hefernaana, a certain "Destroyer of Ancient Enemies," has long been interested in the hero of the Gates of Baldur. However, he has a rival, a mortal known as the "Outcast." According to the "Destroyer," he possesses immense power and can stand up to even such mighty devils as those present at the meeting.
Note: earlier in the temple of Bhaal, during the description of the battle with Neofelid (see walkthrough, part 4 – HB, p. 13), advice was given to detach a Companion affected by charm to stop them from being hostile until the effect of the charm ends. Unfortunately, I have to warn you that this tactic does not work in this chapter. The detached character remains hostile, and since they are no longer part of the party, the AI characters will automatically attack them. The nastiest thing in such a situation is that after the charmed and detached character takes damage from former companions, they will become permanently hostile.
2. Angel. At the foot of the staircase, if you have any "observation points" left (see walkthrough part 2 - TEP, p. 6), you may notice another shadow. By using a charge on it, you will summon an angelic maiden named Idiletia.
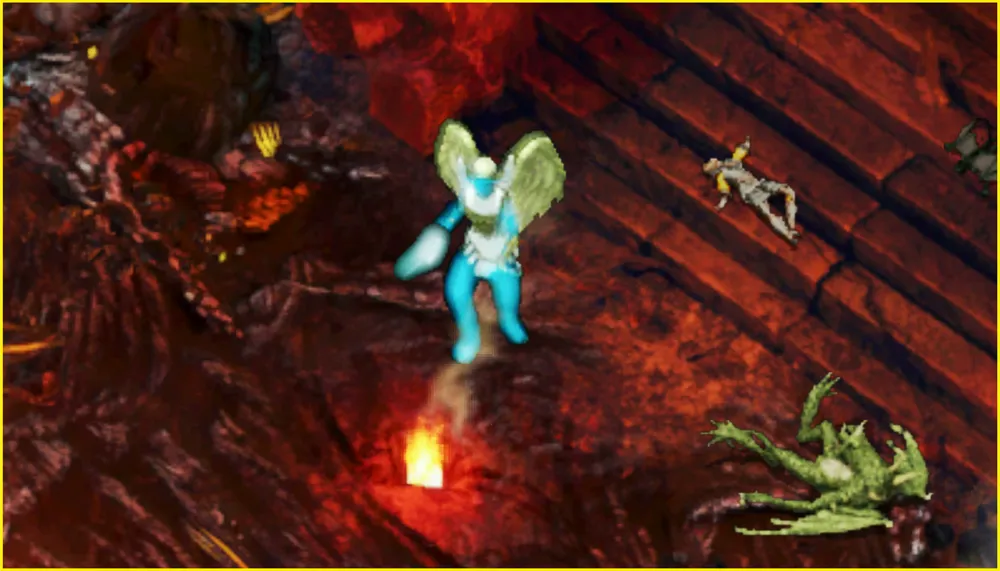
Idiletia
The angel will not appreciate being summoned right into the depths of hell. If you are rude in dialogue, she will attack. As an opponent, Idiletia is quite strong, and the battle will be complicated if the party's arsenal is prepared for battles against demons as described above. The angelic maiden is weakly susceptible to spells and is completely immune to cold damage. However, magical weapons work effectively against her. Thus, to achieve victory, send fighters equipped with such weapons to the front, while priests and mages should support them with defense and health. Be aware that the angel often uses the spell dispel magic; therefore, protective and enhancing spells on the warriors won’t last long. Moreover, her strikes not only deal massive damage, but they can stun your warriors. Additionally, you can entangle her using the "web" spell, preferably after utilizing potions and spells granting immunity to entanglement or equip the freedom of movement ring (see walkthrough, part 7, p. 6), or shoot her with magical ranged weapons (you will need magical ammunition of at least +2). Unfortunately, there’s one more surprise from her. When the maiden’s health drops to its minimum, she will use healing and completely restore her health. This will significantly prolong the fight, especially if you've already used your main arsenal. After a second "round", you will finally defeat her. For defeating Idiletia, you will earn 15,000 XP. Unfortunately, nothing will drop from the angel's body.
If you behave correctly and acknowledge your responsibility for the summoning, the angel will not attack; however, the dialogue will be interrupted by suddenly appearing demons. Defeating the creatures together won’t be a challenge. After the battle, the angel will scold the hero for thoughtlessly using summons and will teleport away. In this case, you will receive no rewards or XP.
After finishing up, climb the stairs to the top.
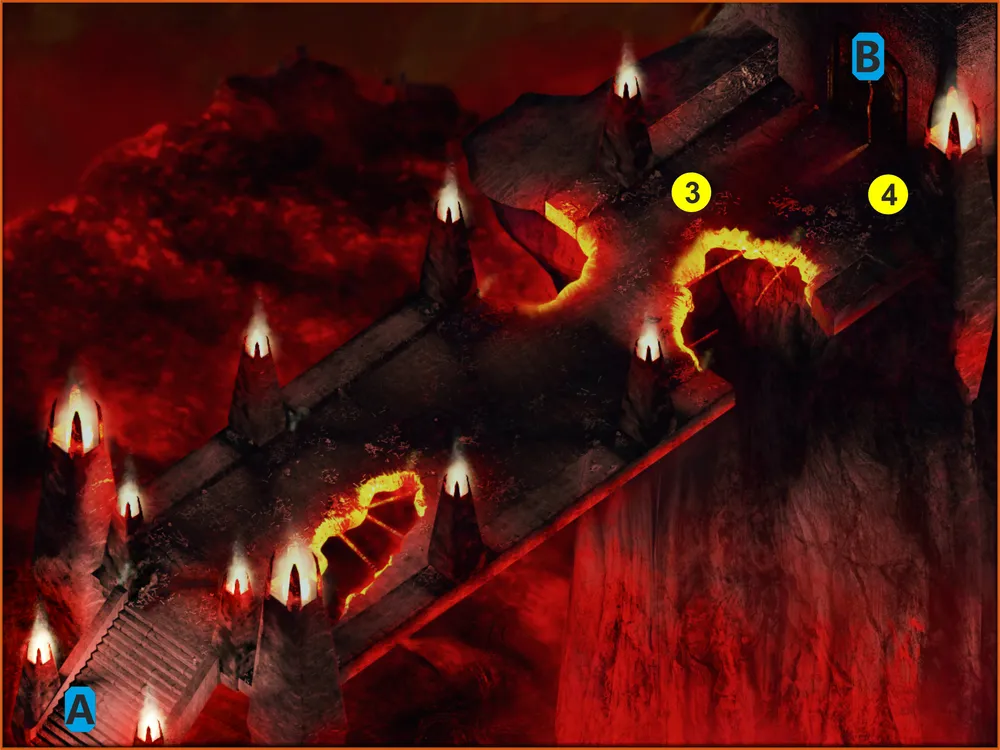
3 – Kheilar; 4 – Gatekeeper;
A – descent to the portal; B – entrance to the tower.
3. Kheilar. As you progress along the bridge, you will encounter a small group of lower demons, similar to those that emerged from the portal in the castle's cellar. Therefore, they shouldn't present a problem. After breaking through closer to the entrance of the tower, you will finally catch up with a detachment of elite crusaders led by Kheilar, or rather, what remains of them.
After dispatching the last demons, one of Kheilar's crusaders will speak to you. He will be displeased with the current circumstances. The Shining Lady promised that they would return the souls captured by the devils, including his wife and children. But finding themselves here, he sees nothing but more deaths of his comrades, and Kheilar herself has changed. According to him, all holiness is gone from her, and only madness remains in her eyes. Angered by his words, Kheilar will threaten her subordinate with punishment, but at the last moment will fumble. At this moment, the main hero will intervene in their dialogue. After a brief verbal skirmish, the Shining Lady and her detachment will enter the tower, and the gates will close.
4. Gatekeeper of the Tower. As soon as the hero's detachment approaches the locked gates, a cornugon named Trix the Defiler will appear nearby. In dialogue, he will state that his master refuses to let the hero into the tower until he deals with Kheilar. After the dialogue, Trix will summon his "colleagues" to fight the hero.
Trix the Defiler
The summoned detachment of demons resembles that which attacked the lagging crusaders from the Shining Lady (see above, p. 1). However, there are a few more "abominations" this time, including previously unencountered bone demons. Leading this demonic detachment is yet another erinyes. Like her predecessor, she may charm one of the heroes with her first attack. Since this time there are no crusaders to distract the demons, the battle will be more complicated. The biggest problems may arise from the "witch." Attacking from the shadows, she deals immense damage and may target vulnerable heroes (a mage or priest).
A good tactic against these "abominations" would be to retreat to the narrow arch of the bridge between the two molten edges. Then, block the passage with warriors while mages cast spells to protect against fear and, if possible, ice. After that, unleash an ice storm on the demons. After destroying the lesser demons, it will be easier to deal with the demoness, but keep in mind that if you approach her too closely, the erinyes may use invisibility.
Upon victory, turn to Trix. The gatekeeper will be impressed by the hero's strength and believe that he can kill the master. According to Trix, he has grown tired of serving his master and wants to break free. For this reason, the demon agrees to let the hero into the tower, but with one condition. Since nothing can be given for free in Avernus, the Defiler offers a wager: if the hero wins, the demon will let him into the tower and give him a powerful item. However, if he loses, Trix will let him pass but claim the soul of one of the companions when their mortal life ends. In turn, you will have a choice:
Refuse; the gatekeeper will open the gates but summon new demons to punish the hero and teleport away;
Agree; Trix will pose a riddle, but before doing so, he will start bargaining about which soul he will take in case the hero loses. In dialogue, he will randomly select one of the companions. However, the deal can only be finalized if the character themselves does not object, or someone present does not intervene. Otherwise, the demon will choose another target. If negotiations reach a deadlock, you can wager the soul of the main hero. The demon will gladly agree to such a condition.
The riddle itself is as follows: "This is a useful tool, although many despise it. In the light, it topples kingdoms, while in darkness it unites nations. The poor undergo this daily, while kings fear it most. You are born to serve this, but from it, you are likely to fall. What is it?" The answer is death.
In the case of the correct answer, the demon will open the gates to the tower and offer to choose one of three items: the sword "Caustic Tongue" +3 (10% chance to slow the victim for three rounds), the helm "Devil Guardian" (immunity to critical hits, +15% resistance to piercing, cutting, and slashing damage, cannot be used by good characters) or the staff "Echo of the Devil" +3 (once per day cast the spell red fire shield, 5% chance when hitting to apply the spell "fire of the sun," thus creating a wave of fire). By the way, Trix would rather not part with the staff and will suggest reconsidering. However, a deal is a deal, so you can firmly insist on your terms.
If you couldn’t solve the riddle, Trix will open the gates but will warn that when the time comes, he will come to collect his debt.
Note: If you want to kill Trix himself, deal a blow to him during the battle with his "colleagues." Why only during the fight? In other cases, he will summon demons and teleport away. After receiving damage, Trix will become hostile and summon even more demons. For this reason, it is best to challenge him when there is only one enemy left from the first wave. Trix is quite a strong demon, deals a lot of damage, and can teleport to the victim, so it's not possible to block his movement with warriors if he's targeting a shooter or a mage. You will earn 10,000 XP for his death. In addition, there is another way to resolve the situation with the gatekeeper. During the first conversation with Trix, if you choose the option: "I have no time to talk to you, I have a tight schedule," and then: "Can I pass?", the gatekeeper will not summon demons but will keep the gates closed. Moreover, you won't be able to start another dialogue with him. In this case, you are left with only the option to attack him. After taking damage, Trix will summon a squad of erinyes and engage in combat.
In any case, you will then open up the path forward to the "Basalt" tower.

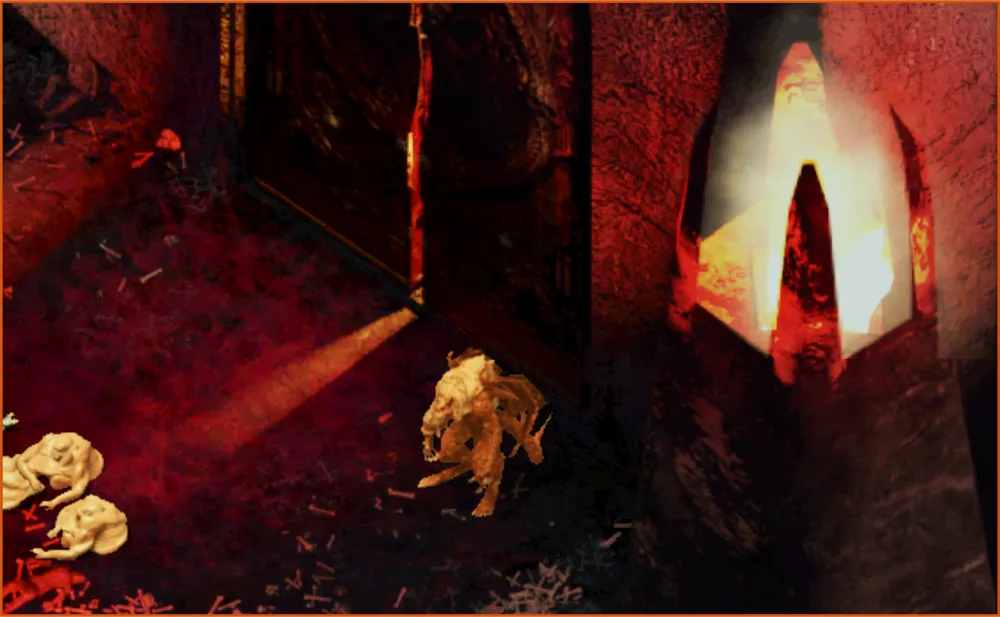
5 – demon of the abyss; 6 – lift lever;
B – exit from the tower.
5. Demon of the Abyss. Inside the tower, you will find a single room, in the center of which is an elevator to the top. If you have any "observation points" (see walkthrough part 2 - TEP, p. 6) left, you may notice another shadow near the elevator. Using a charge on it, you will summon a demon of the abyss named Xot.

Xot
Once in the tower, the demon will attack without delay. Among his spells are "mirror image," "true sight," and "confusion." However, on his own, he is very strong; his strikes deal enormous damage, and he is quite resilient and capable of withstanding a great deal of damage.
After a brief fight, Xot realizes that it is not the enemies who have come to him in the abyss but that he has been summoned straight from it, into Avernus, the den of his hated rival. In dialogue, for such a rare opportunity to visit this place, he will offer to part ways peacefully. If you agree, you will receive as a gift the sword "Gift of the Demon" +5 (THACO +5), but do not rejoice too soon over your successful acquisition. Gifts from such strong and cunning demons always have a catch. This sword is no exception; after five hits, its power will reduce to +1 (THACO +1), and the sword is cursed, and it can only be removed with the spell "remove curse."
If you decline the demon's offer for peace, the fight will continue. To kill the demon of the abyss, you must first remove his mirror image. The "oracle" or "detect illusion" spells will help with this. You will need two such spells, as after the first mirror image is destroyed, Xot will immediately cast a second one on himself. Furthermore, as the demon can use a very unpleasant "confusion" spell, it would be wise to protect all characters from this magic. Now would be the right time to employ priest spells such as "chaotic commands" and clarity potions. After removing Xot's magical defense and protecting your heroes from his magic, you can mount a counterattack.
As with the angel (see above, p. 2), the demon of the abyss is weakly susceptible to offensive magic, but vulnerable to magical weapons. He cannot dispel magic. Thus, the "enchanted weapon" spell will come in handy. Warriors enhanced by spells and weapon enchantments will be able to withstand the demon on equal terms. Upon defeating Xot, you will earn 12,000 XP. Sadly, nothing will drop from his body.
The demon of the abyss Xot is the last of the otherworldly entities that can be summoned using the points of Zaviak. If you have not been too greedy in using charges, should be out of them at this stage, and the quest will conclude.
Note: if, however, you do have an extra charge left, use it on any companion. They will suffer no consequences. The quest will conclude after the points run out.
6. Ascent. It is time to put an end to the threat of the devils; rest and prepare for new battles. After this, hit the elevator lever located at the far wall of the room.
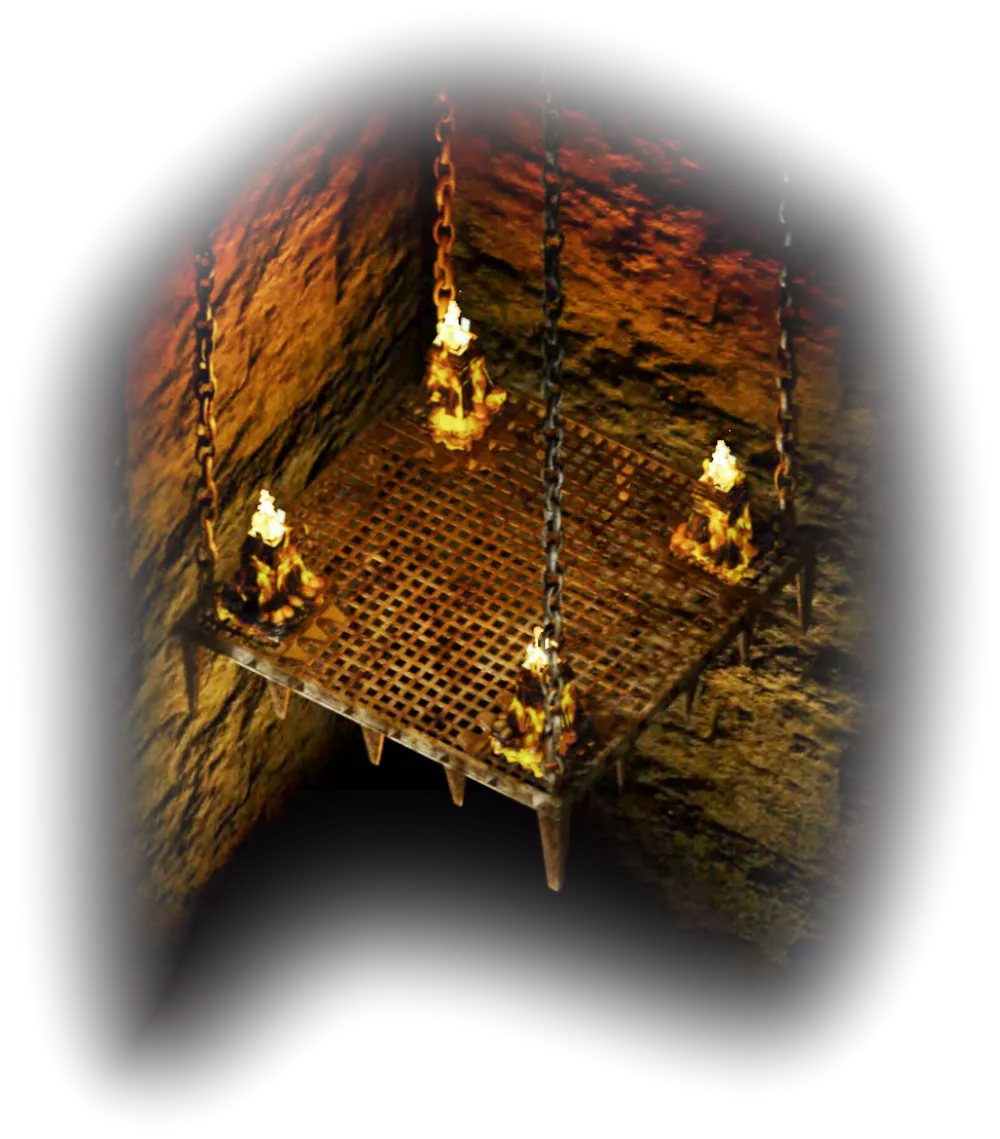
Elevator
During the ascent, you will face several waves of demons, between which, of course, you cannot rest. This time, the arena is very narrow, so the best tactic will be to form a circular defense in the center of the elevator. Unarmored heroes should take the central position, while warriors should encircle them. Since maneuvering will not be possible, ensure the party has maximum protection: spells of magical shield, protection from evil, resistance to fear, enchanted weapon, various potions of attribute enhancement, magical resistances, fire, etc. In these conditions, a good maneuver using cold magic is available. Cast cold protection on the entire party, and when enemies appear, unleash an ice storm on them. The storm will deal enormous damage to enemies, even including those who are invisible.
In the first wave, there will be lower demons: imps and "lemurs." They should not cause any problems. The next wave will consist of various abishais and "witches." The "witches" may present problems, as they become invisible and deal massive damage. If two such creatures appear in one wave and attack a single unarmored character, it is certain their death. A good way to deal with them is to execute the previously mentioned ice storm trick. The third attack will consist of abishais and bone demons. They won't exert strong pressure.
After three waves, the elevator will finally reach the top of the tower.
7. The Final Battle. Upon reaching the tower's top, you will witness Kheilar and her few surviving crusaders battling the great devil named Belhifet and his entourage.
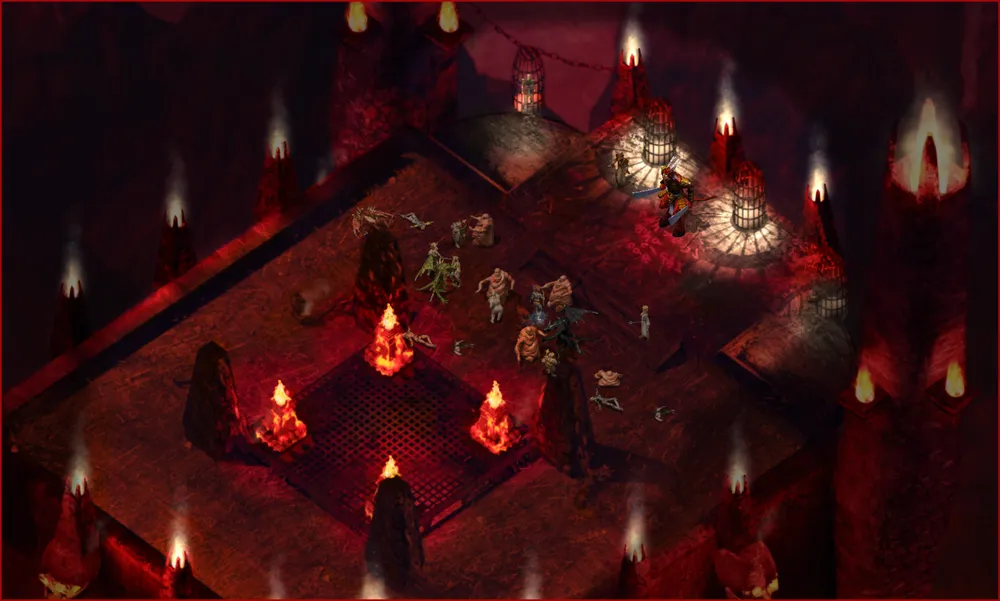
Tower Top
As a result, Kheilar will be repulsed by the devil, and the remaining crusaders will fall one by one at the hands of the demons. But Belhifet's entourage will die too, except for one—Hefernaana. Desperate, the Shining Lady will acknowledge her defeat and cease resistance. At this moment, the devil will notice the heroes and greet them. In a conversation with him, the truths will be revealed regarding Hefernaana and Kheilar.
It turns out that behind all the recent events lies the devil Belhifet. A long time ago, about a hundred years earlier, he had already entered the world of mortals but was flung back into Avernus, and the portal sealed behind him. Ever since, he has dreamed of escape from the underworld. And once, a certain restless girl, in whom the blood of her divine ancestors awakened, ignoring the prohibitions, sneaked into a closed section of the Astra Order's library. There she read a book that she shouldn't have opened. As a result, she was transported into Avernus inside a locked cage and became a prisoner of Belhifet. However, she did not remain imprisoned for long. Her dear uncle Aun Ardent, a devout servant of Astra and a valiant paladin, freed her. He offered his soul in return for Kheilar's soul. The devil agreed without hesitation. Overcome with guilt, she swore at all costs to free her uncle. But that was precisely what the devil needed; he sent his servant Hefernaana disguised as a priest to help and guide her in this endeavor. Since only divine blood can open the portal to the Nine Hells, they first planned to do this themselves using Kheilar’s blood, but failed because after so many generations in her the divine power was very little. Later, they learned that at the Gates of Baldur, a direct descendant of the dead god Bhaal had appeared. Consequently, they gathered a crusade under the banner of saving the souls of the wretched victims of demons and began devising plans on how to obtain his blood.
According to Hefernaana, Kheilar is actually indifferent to the fates of other victims; she has been manipulating people merely to liberate her uncle's soul. Kheilar will deny this, but it clearly shows that she has convinced herself of her own legend.
After the conversation, you will have a choice that will determine the placement of forces in the final battle:
The first option: summon Kheilar to atone for her guilt by joining the party against the devils. This will inspire her, and she will side with the hero.
The second option: ignore Kheilar and challenge the devil. For this, in dialogue, at a certain moment, you need to choose: "I don't care what lie brought Kheilar here; now you will pay for the evil you brought to the Sword Coast." Then, in response to Hefernaana's question about the seriousness of the threat, answer: "Well, yes!" In this case, Belhifet will destroy Kheilar in a pillar of fire and attack the heroes.
The third option: gloat over Kheilar's situation. In this case, she will beg for mercy and propose a deal with the devil. She will become his loyal servant in exchange for her uncle's soul and the death of the now useless assistant, Hefernaana. Belhifet will accept the terms and kill his servant. Then he will turn the Shining Lady into his Black Sentinel.
In any case, the battle will begin. Overall, the dialogue choices will not fundamentally change the battle tactics against Belhifet.
As a greater devil, Belhifet is invulnerable to simple or weak magical weapons. Therefore, he can only be harmed by magical +3. Characters without such weapons will benefit from the "enchanted weapon" spell. The devil mainly fights in close combat, occasionally throwing fireballs, the "hold person" spell, and "symbol: pain," but the arena will often be struck by meteor showers, dealing fire damage to everyone present. So ensure that the heroes have good fire protection. Fire protection potions and spells, as well as the scroll with green runes "protection from fire" will be beneficial. All three effects stack, giving you 127 points of protection from fire and 50 points from magical flames. Additionally, red fire shields will be useful for mages, adding another 50 points of protection from magical flames. Naturally, protection from evil is also essential, and a potion of storm giant's strength for warriors. Besides enhancing their protection, you can weaken Belhifet's defenses using spells like "reduce resistance" (lowers the target's magical resistance) and greater curse (lowers the target's saving throws). The devil will often teleport around the area, attacking different heroes. Hence, mobility among characters is critically important in this battle, and the "haste" spell will also be beneficial.
One more unpleasant aspect is Hefernaana. He will assume his true form as a demon and employ skills you already know, like aura of fear, charm, and confusion. If instead he is Kheilar, the Black Sentinel, the load on warriors will increase, as she is a strong opponent in close combat, but has no spells or abilities. In this case, resilience potions and a ton of healing potions (hopefully you stocked up on them well) will be useful. The "dark" Kheilar will not present any special surprises. The only note is that losing two-thirds of her health, she will use an invisibility potion (she has two vials in reserve) and exit the battle to use healing potions to restore her health. After which she will re-engage.
Besides Hefernaana, depending on the chosen difficulty, Belhifet will summon a squad of demons. At weak levels, there will be no squad; at medium levels, he will summon, mainly, up to three different abishais. And at high levels, a squad led by an erinyes, similar to the one summoned by Trix the Defiler, will appear (see above, p. 4). This walkthrough describes the method for medium level (basic rules).
Since there are many details to manage, long-lasting potions and spells are best applied already in the elevator, after the third wave. When the battle begins, send warriors to delay and "aggro" Belhifet, and immediately focus all attacks on Hefernaana (or Kheilar) to take them out of the game. But be prepared, as Hefernaana can cast "fear" or "confusion" on the heroes, so a counterspell should be at the ready for the mage.
At the same time, the summoned demons will appear near the elevator and attack from the rear, so a good maneuver will be to position unarmored characters on the eastern platform where Belhifet had been located at the start of the cutscene. When he teleports away, thus giving a brief respite, deal with the demons. Now, the devil is alone.
The ensuing battle against Belhifet will be more predictable. He fights in close combat, after a certain time striking a nearby hero with a pillar of fire and teleporting to the opposite side of the arena, casting one of the spells (fireball, "symbol: pain," "hold person") and re-engaging in battle. By this point, your heroes may well have immunity to all those effects. The situation will heat up again when the devil loses about half his health. He will start opening hellish gates and summoning new servants. These can be either a squad led by an erinyes or a cornugon resembling Trix (see above, p. 4).
Further actions should be taken depending on Belhifet's health; if he is nearly defeated, focus your efforts on him. When the devil finally falls, the remaining servants will immediately teleport away, and the battle will conclude. You will earn 45,000 XP for defeating Belhifet.
In addition to the battle itself, it is also wise to pay attention to Kheilar. As mentioned earlier, you can recruit her to your side. In this case, she will act as an ally and will act independently. As a result, if she is not supported in battle (which, by the way, is not easy), she is likely to perish. However, there is one rather important nuance. If the party reached the summit with one vacant "slot," Kheilar will join as a full-fledged companion, significantly increasing her role under your command. By herself, she is quite strong and virtually protected from everything. Her standard equipment has the following defenses:
Immunity to poison, disease, fear, charm, and paralysis;
Protection from evil;
Protection from critical hits;
30% magical resistance;
40% fire resistance.
Furthermore, she has free slots for amulets, bracers, rings, and boots. Because of this, towards her already considerable enhancements, you may add, for instance:
crusader's ring (see walkthrough, part 6 - DZD, p. 12) and fire resistance ring (see walkthrough, part 6 - PR, p. 22);
Lona's amulet (see walkthrough, part 2 – SHKZ, p. 3) or medal of valor (see walkthrough part 5 - LK, p. 8);
cheetah boots (see walkthrough, part 4 – BM, p. 5.1);
bracers of protection class 6 (or any others that have accumulated in your bottomless bag).
Of course, you will also be able to share potions with her.
Moreover, she possesses active skills: bless (x2), heal critical wounds (x3), and "Shining Projectile." I will elaborate more on the last one. This skill fires a projectile of divine energy dealing massive damage to undead and demons, ignoring their magical resistance. This skill can be used to finish off Belhifet in one strike when he has low health (one of five segments).
All this makes Kheilar an excellent "tank" in this battle. For this reason, I recommend that if you arrived in Avernus with a full party, look to see who among your characters is the weakest link, and after successfully fending off the waves of demons in the elevator, detach them, sending them home (after previously stripping them of any equipment that may be useful to Kheilar).
When the battle concludes, approach the locked cage in which Aun Ardent is imprisoned.
Note: in the case where the main hero is a mage-slayer class, you will need to adjust your battle tactics slightly. Since this warrior is not affected by any potions, but their own magical resistance is quite high, and their strikes interrupt the enemies' spells, they should primarily target Hefernaana and the summoned demons (except for the cornugon). From available armors, the best choice for them is the commander’s chain mail +3 (see walkthrough, part 5 - LK, p. 4), which gives the entire party immunity to fear. In the battle against Belhifet, efforts should be made to avoid putting the mage-slayer in harm's way, and always retreat behind the protection of their companions if the devil attacks the hero.
8. Return. After freeing Aun Ardent, a small dialogue will unfold, unveiling the details of the previously described Kheilar story. After that, the action will shift to the portal. Here, it turns out that there’s an unpleasant detail related to the portal; it can only be closed from this side using a devil's blood; hence someone must remain. If Kheilar survived, she will decide to atone for her sin by staying in Avernus and bearing punishment upon the demons in their world. Otherwise, Aun will stay, having first given the hero the key to the door of the cave with the portal. After the dialogue, the party will pass through the portal, which will close behind them.
Returning back to the castle's cellar, unlock the door and exit the cave. There, warriors of the coalition, Torsin de Lensi and Corporal Duncan, will greet the heroes. They will inquire about what transpired. After recounting your misadventures in hell, proceed to the exit from the cellar and speak with the sergeant standing on the stairs. He will escort the hero to a place where they can rest.
Note: if Corwin is in the party and a prior dialogue occurred (see walkthrough, part 6 - PR, p. 30, note) where she was assured that she is liked by the hero, after speaking with the soldiers, she will approach him. Judging by her demeanor, she is heartened by the victory over the crusade and the devil of Avernus. Additionally, the role played by the main hero in this victory will convince Corwin of his "pure intentions" and she will propose to elevate their relationship upon returning to the city. In turn, you can agree or suggest remaining friends. If Saphan is in the party, you may also approach her (on the skills panel, the first icon with the dialogue image). Despite placing a final point in the relationship, there will be a "funny" dialogue.
9. The Nightmare. In the middle of the night, the hero will experience another dream, resembling those that have appeared over the past few weeks. In this one, he sees a hooded man previously encountered (see walkthrough part 6 - PR, p. 12) and Skye standing beside him.
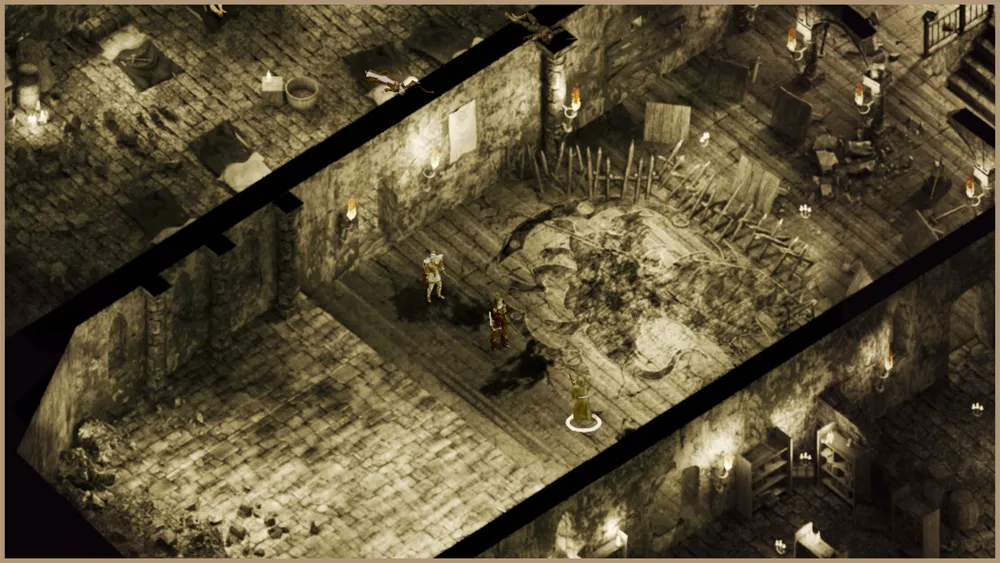
Another dream... or not.
After a brief dialogue, he will transform the duke's daughter into a monster resembling the one that has attacked various times in those dreams. But this time the hero is not helpless and can defend themselves. The monster, in reality, is quite weak and will fall after a couple of your strikes, yet you probably guessed that this was a trap set by the stranger, who is indeed the "Outcast" (see above, p. 1). You may ignore Skye and continuously retreat while moving around the room. Eventually, the "Outcast" will get tired and, with the words, "screw this, your very presence is the main thing," will kill her, and the hero shall lose consciousness.
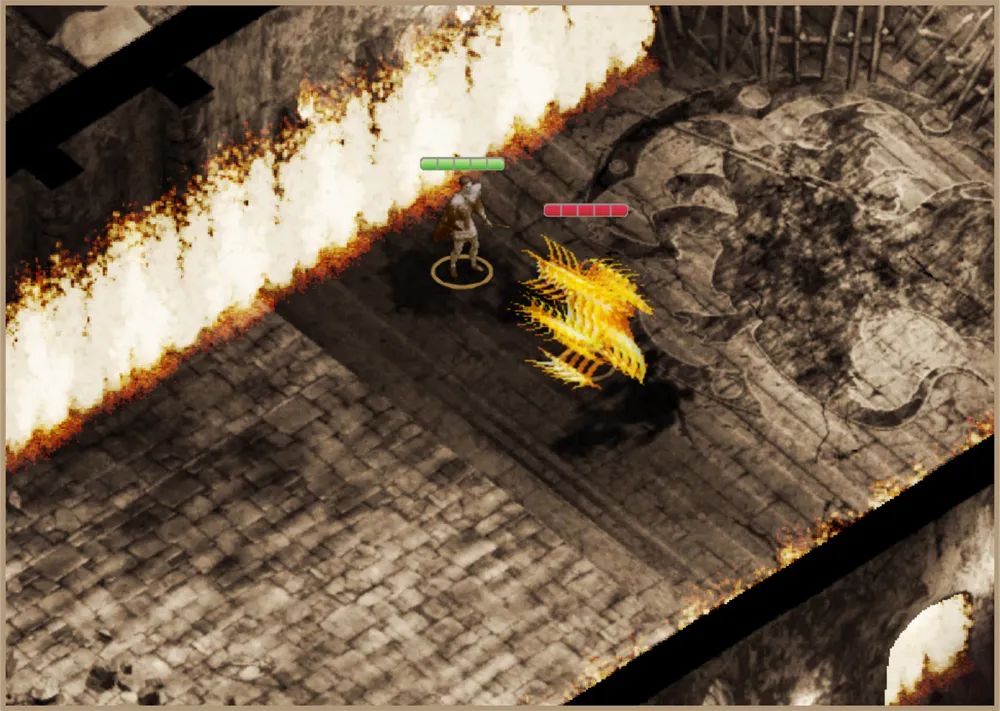
Nightmare
Later, the main hero will awaken beside Skye's lifeless body, surrounded by the soldiers of Corporal Duncan. The corporal will erupt in fury at the sight before him and will order the arrest of the hero on suspicion of murder to be delivered to the Gates of Baldur for trial.
To be continued...