"Mark of the Assassin". Complete walkthrough
Our adventure begins with this statue in Hawke's home.
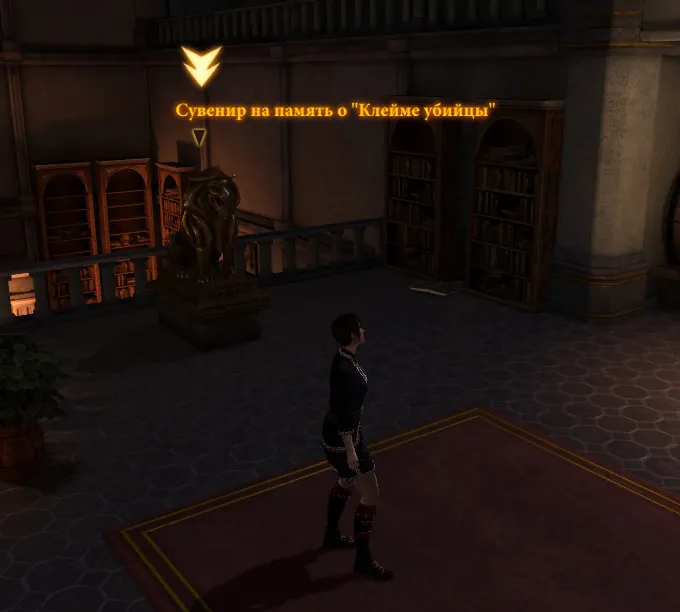
Orlesian lions are the most graceful lions in Thedas!
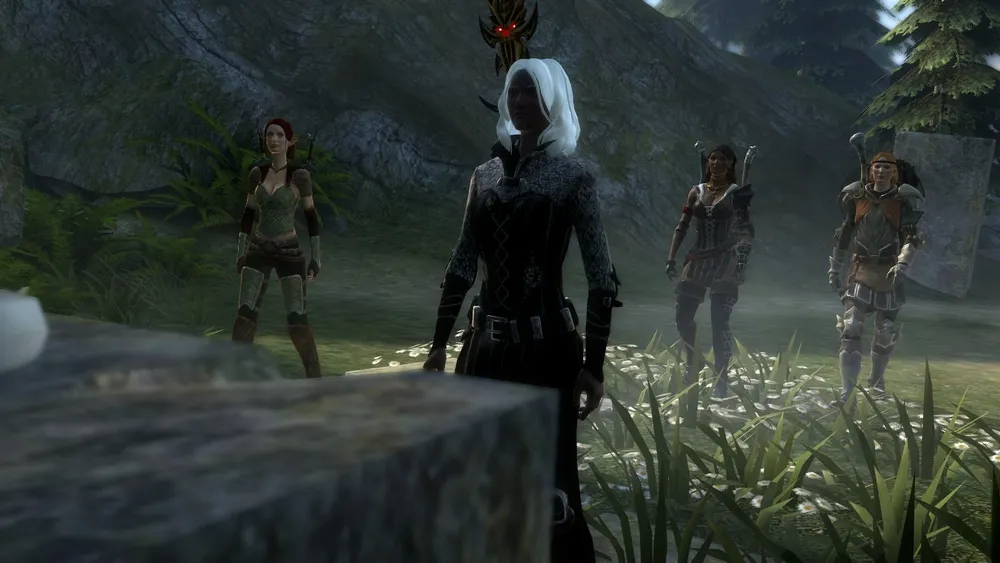
As a prologue, we see a scene: a meeting in the Upper City with a certain Blade. Besides the mandatory character (Varric), we can bring any others, except a sister or brother. It doesn’t play any significant role; the difference will only be in a few minor lines. But it’s better to select a party ready for a fight.
So, arriving at the meeting, we suddenly realize that this is no meeting, but an outright ambush. Well, we are used to it. And here’s the main heroine of our adventure: Tallis.
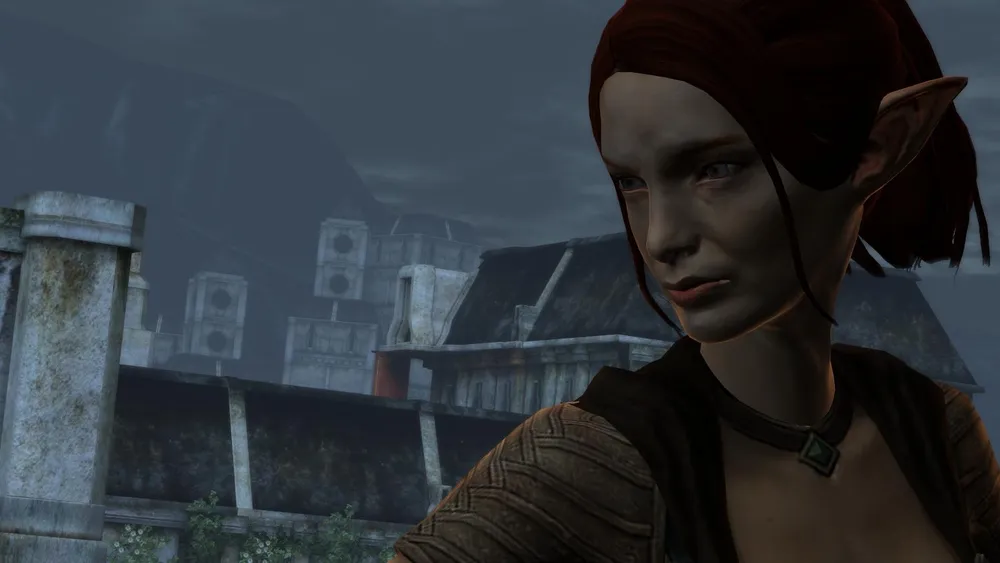
Meet the assassin
After her dramatic entrance, it becomes clear that she didn't come here by chance. The elf needs someone with an invitation to the duke Prosper de Montfort's castle – and we have that. However, it won't be just a social gathering, but a "quasi-legal" incursion into the sanctum of the castle of En – its treasury, from which we need to steal a certain gemstone – Heart of Many.
We search the corpses and find a letter among them.
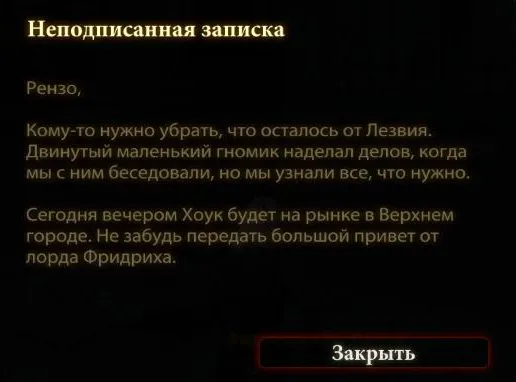
We head to the exit of the district, where the elf stands.
Since Tallis will be a required companion, we can only take two more allies besides her. If the brother or sister is alive, they can also join the team.
Meeting the castle's owner leaves a mixed impression. There's a feeling that behind the mask of politeness and refined manners lies some trickery. However, we are supposed to be prejudiced against the Orlesians. And so, everything begins with a wyvern hunt.
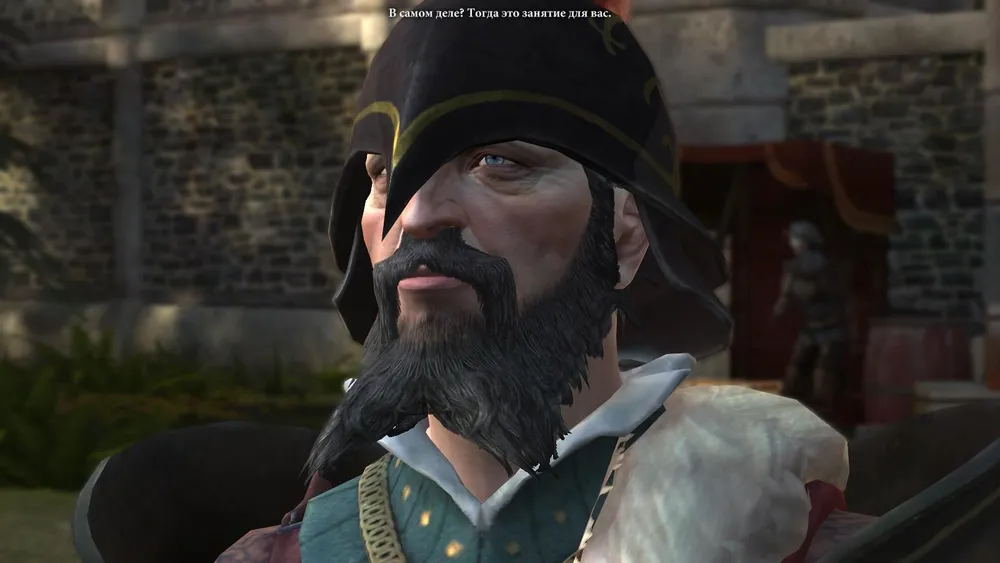
And the eyes under the helmet are so kind...
Courtyard
Map of the area
After talking to Tallis, one can look around. To the left of the castle gates stands a vendor with equipment. You can find decent items there and sell your junk. If Sebastian is in your party, a recipe for his quest lies near the vendor's chest.
To the right is someone named Gabriel, with whom you can take the quest “Ranger's Balm” - an antidote for wyvern poison.
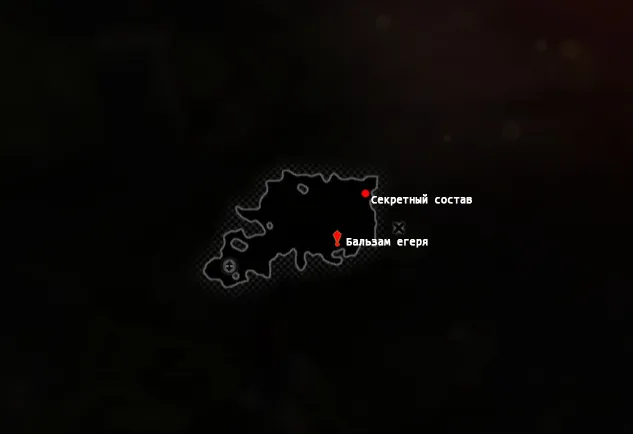
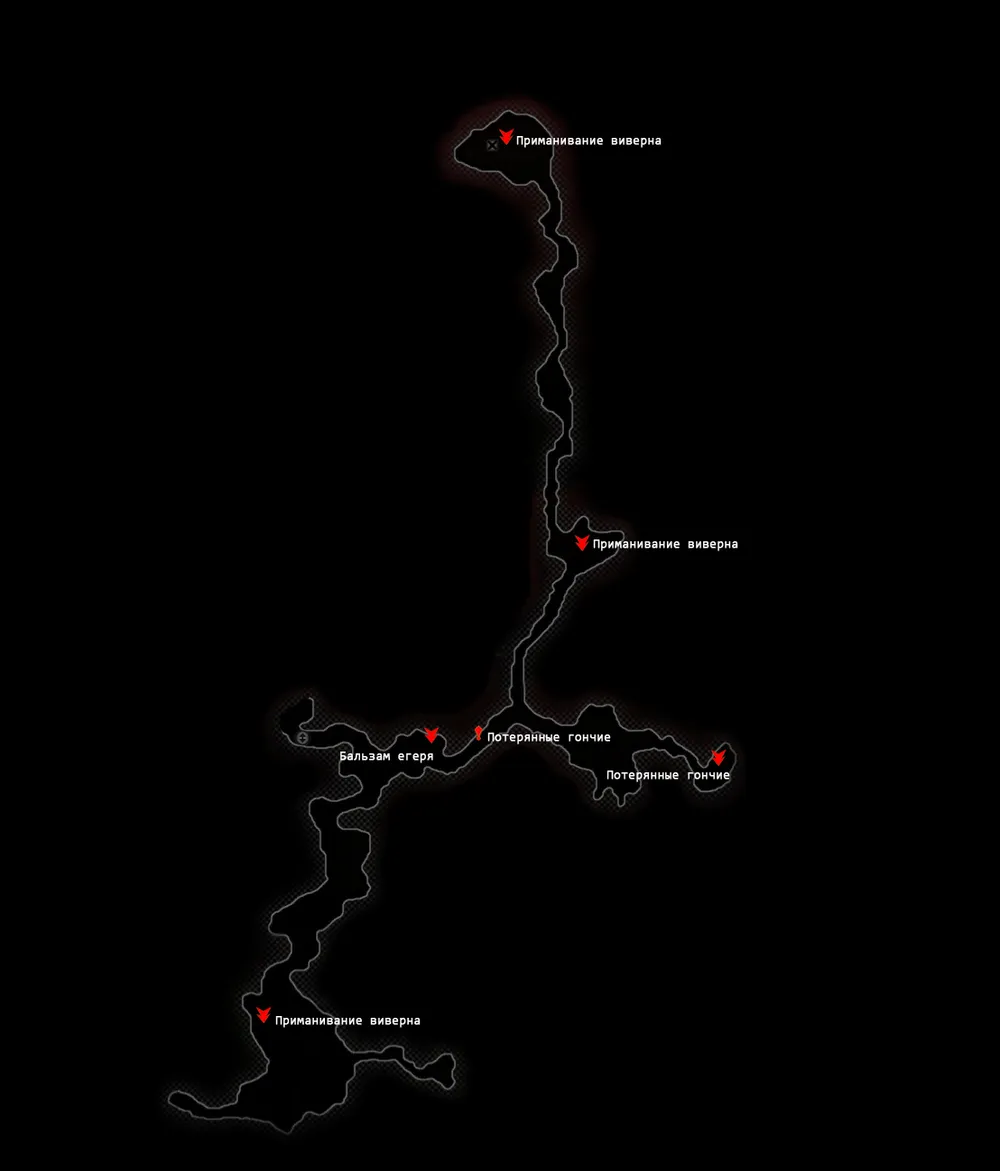
Hunting Grounds - West.
Hunting Grounds - West
We rush up the steps to the right. On the clearing, a cluster of dragonlings attacks us, followed by two vengeful mothers. We kill the dragons – they drop nothing particularly valuable. However, one dragonling carcass is a quest item: after talking to Tallis, we take it with us as bait for the wyvern. We exit onto another path and move further. To our right, we come across a clearing with an ancient altar. We can activate the altar now, or we can pass by for now – we'll have to come back later anyway. If we activate it, altar guards – cultists of the Avvar goddess Mistress of the Sky, led by a Heavenly Horror – will attack us. The fight will be tough. After every third of their health is lost, the Heavenly Horror hides behind an impenetrable barrier and remains there until we dispatch all guards. Then it returns with new ones, and the cycle continues.
Something's about to happen...
Going further down the path, we stumble upon a pool of blood. After talking with Tallis, we note that wyverns will be more attracted if we add some blood to the dragon carcass.
On the lower clearing roams a hunter who lost his loyal dogs: Nicodemus and Sylvain. We agree to search for them and receive the quest “Lost Hounds”. We turn around the bushes and run further along the path.
We find ourselves back at the clearing we were at before, but now we run southeast. Along the way, we find hunter camps where we can gather several potions. To our left is an inconspicuous trail, and by following it, we find three interesting items: Andraste's Mantle, a wyvern's scream, and a skeleton of a man, presumably killed by a pile of cheese.

What an absurd death
Taking note of the wyvern's scream, we run further until we encounter two hunters who shout that they seem to have found a trail. But do not rush to chase after them – to the right of the trail where they ran lies the second ingredient for the balm – Fly Honey. Now we can go check out what that trail leads to.
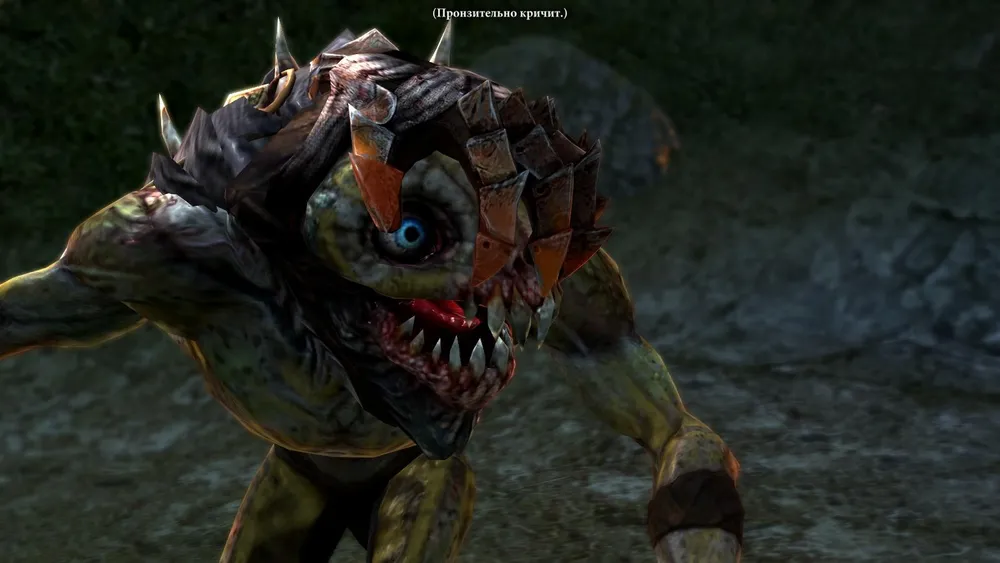
Cutie
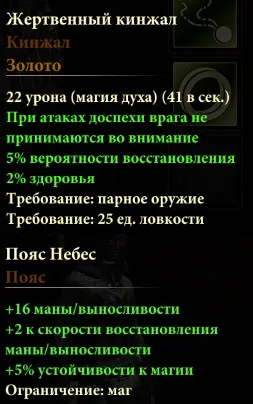
Oh, dear. The eager Orlesians have fallen prey to little wild abominations – ghasts. These guys are quite weak, but they come in numbers. After defeating them, we head south to find the unfortunate scholar. He will say he got lost while searching for the Avvar altar. Upon hearing about our find, he gives us his notes, which describe how to find a hidden treasure in the altar, activating the quest “Cult of the Sky”. We return to the altar and find a codex article, a Sacrificial Dagger, and a Belt of the Heavens. If we haven't already eliminated the altar's guards, now is the time.
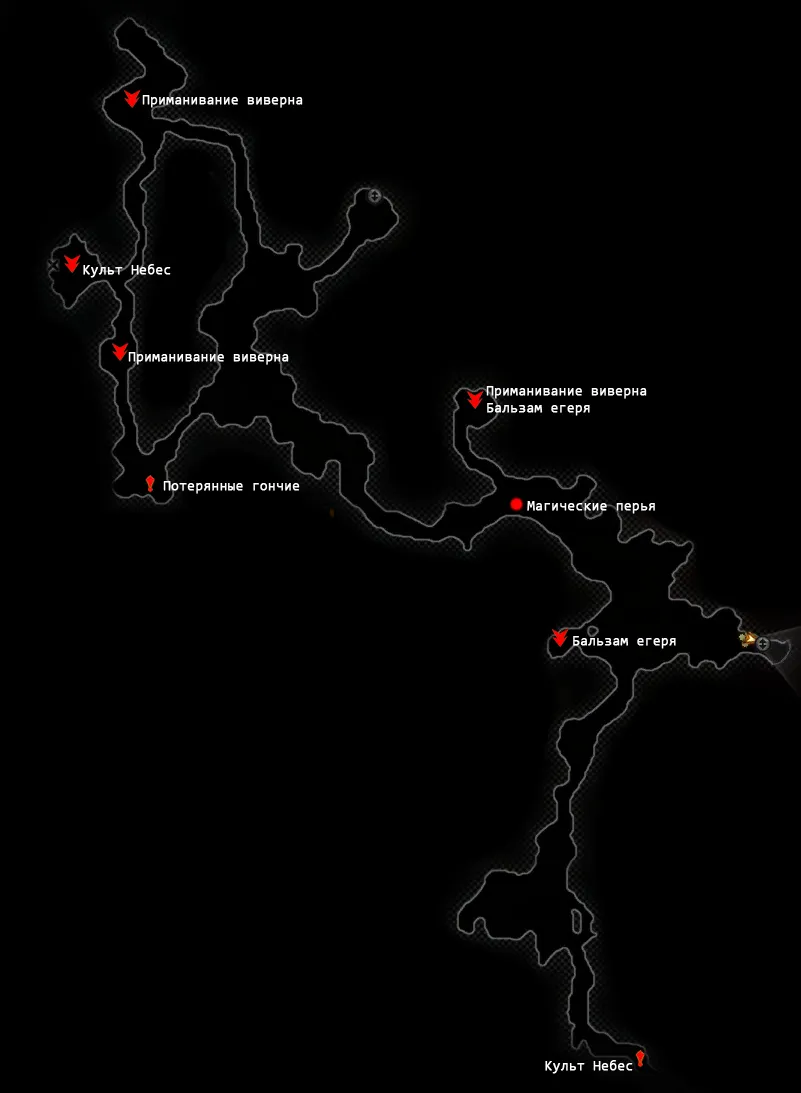
Hunting Grounds - East.
Hunting Grounds - East
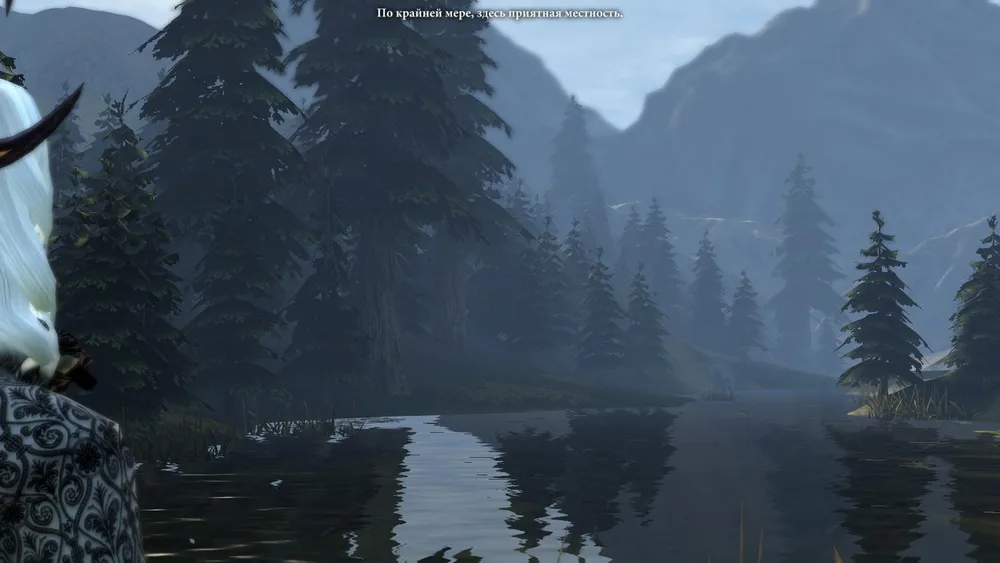
At the entrance to the location, we immediately stumble upon a track (the main thing is not to engage!). On the first clearing by the lake, we find some potions and the third ingredient for the balm – Holly. Yes, the remedy is a bit short, even one person won't suffice. Additionally, you can enjoy the view of the lake and mountains and discuss inheritance issues in Orlais.
We head south. There’s really nothing interesting down there, except for some remains (a quest item for bait) and, again, a pack of ghasts. However, this time, there will be a ghast sorcerer - Velestriel. He will attack with magic and hide behind a barrier that can be destroyed with attacks.
Turning east, we meet one of the hunter's dogs – Sylvain. He seems to want us to follow him. We run after the dog until the fork and then to the right, through a clearing. Don't let the ghast dens scare you for now – as we chase the dog, they will stay quiet. Aha, and here’s the second dog – Nicodemus. He appears to be poisoned by wyvern venom, but we have the balm at hand. If we heal the dog, the hunter will meet us at the clearing and reward us with a decent bow. However, the dog can be left or put to sleep. In that case, you won't receive the reward. Before running to the clearing to follow the dogs, you can disturb the ghast dens and slay the creatures.

Following the dog, we veered onto the right path; now we’ll go left. Almost immediately, we encounter the last needed ingredient for the bait: rummaging through a huge pile of dung, we find Nagy bones. And why not try to attract the wyvern with a nag's scream?
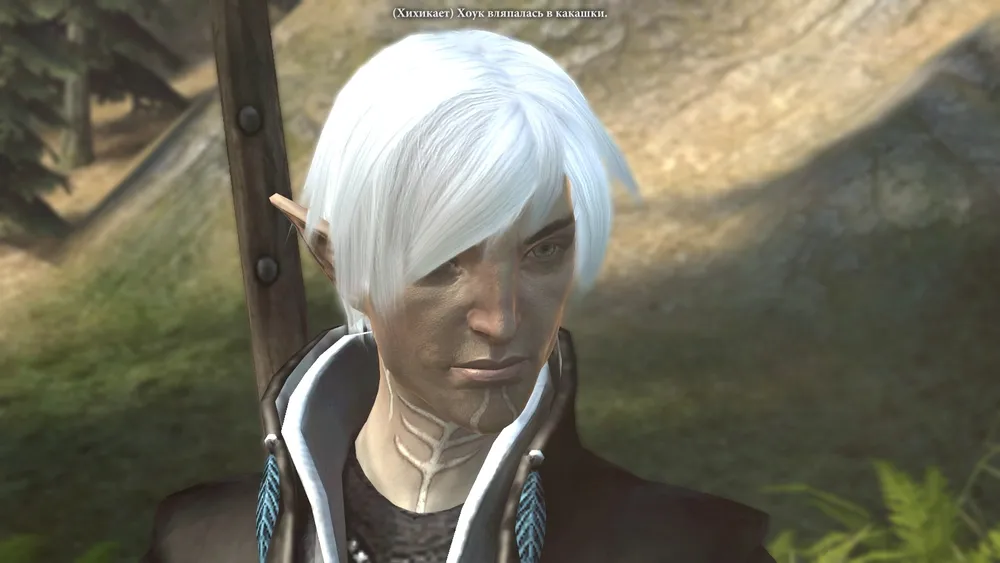
Fenris is joking?! That's something new.
We go straight – there’s nowhere else to turn – and we arrive at the "wyvern" clearing. No, wyverns don't grow there like mushrooms, but it’s a perfect place to set the bait. You needn't spill everything you have, as two components will suffice to attract something. But if you gathered everything, you can indulge your vanity and try to attract a particularly large specimen – the Wyvern Leader. In any case, it will not affect the story, but we will receive a better reward and the achievement "The Hunt for Prey".

Pet the wyvern!
At higher levels, the creature is quite easy to slay, but if your hero is still low-level, you will have to work hard. The monster spits venom and can charge, dragging anyone in its path across the ground. However, you can dodge the wyvern. Freezing and immobilizing spells, as well as stunning, work if upgraded.
So, the beast is defeated, but carrion birds have arrived at the feast. It turns out, this is not just hunting, but hunting on bribes. This year, the right to be the winner was paid for by a certain Baron Arlansh – a person prone to hysteria and name-calling. It's utterly impossible to negotiate with him, even if you want to – you will have to fight. The battle lasts until the Baron has his entire health knocked down, so you can first take out his guards and then him, or attack him with all characters to finish up faster.
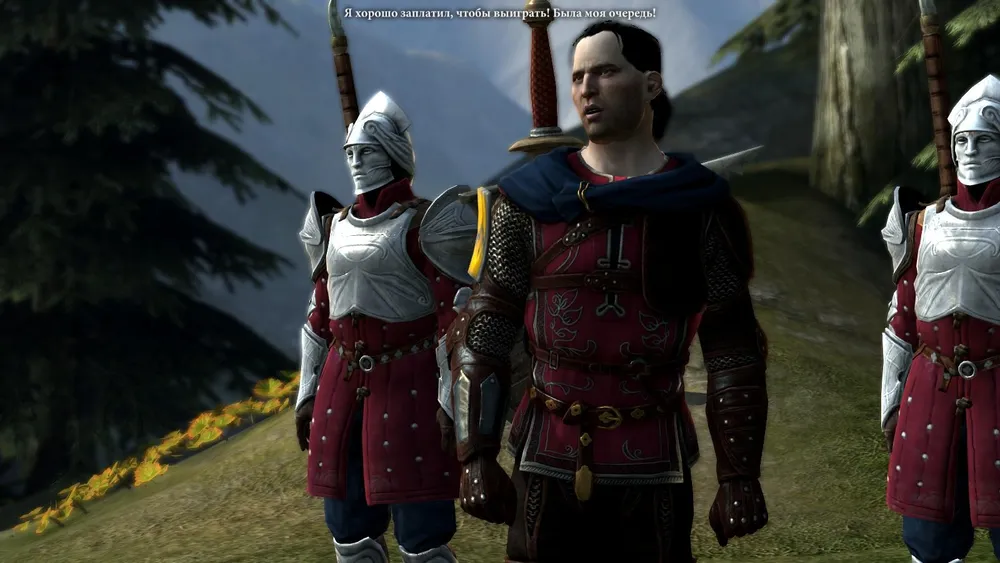
Someone's money went down the drain
Either way, he doesn’t die, as at the most critical moment, the host of the festivities, that is, the duke, intervenes. He acknowledges our right to victory and offers a choice: let the baron go or kill him for his insolence. You can also kill him. In that case, Hawke will take a decent sword and shield from the corpse. But I recommend letting him go for now – we will meet him again later, and we may get more loot and experience.

The hunt is over – we can head to the castle. And here’s the exit: right in front of us.
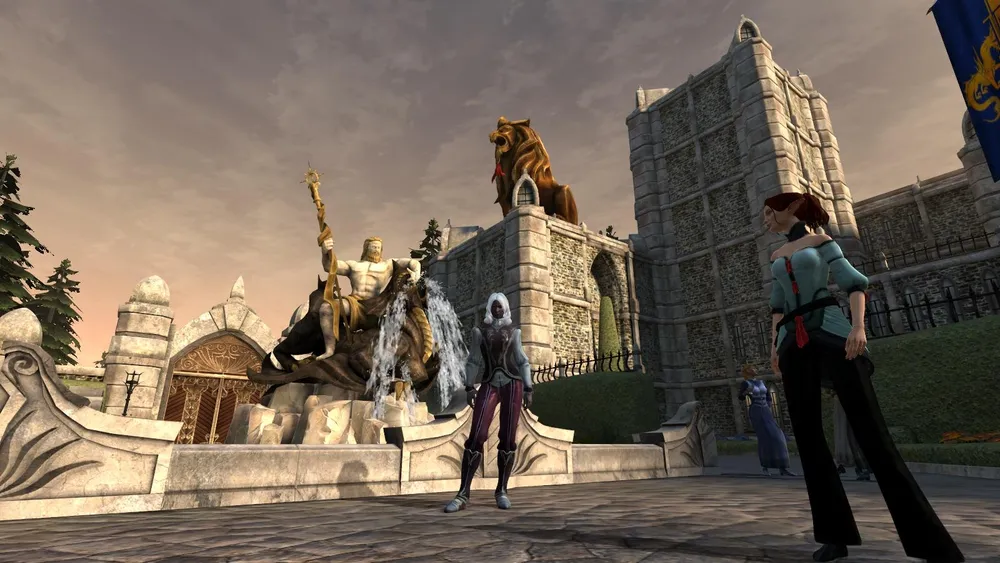
Castle's Inner Courtyard

Castle's Inner Courtyard
It all starts with the award ceremony for the winner. The duke introduces Hawke to the other guests and presents a valuable prize - a belt with quite commendable characteristics. Here, we also meet Prosper's "pet" wyvern - Leopold.

Next follows a short clip in which Tallis mentions that the doors leading into the castle are locked, and the key is probably with the guards. Here we will have to part ways with the other two companions for a while, to avoid drawing attention with a large party.
You can roam the courtyard and chat with guests, collect coins to toss in the fountain, or sell junk to the quartermaster at the tables.
To approach the guards, you can use any excuse: from visiting the restroom to a scandal with the cook regarding bad delicacies. From the first guard, we learn that he gave the key to a servant. The elf we need is standing by the fountain with a tray. After a brief dialogue, Tallis will seclude herself with her and find out that the servant also doesn't have the key: she handed it to Lord Cyril – the duke’s son.
We start a social conversation with the lord, accept a whimsical coin gift, and somehow send him away with Tallis to whisper. But it seems that the lord doesn't like elves; Tallis totally flops, and she asks Hawke to talk to Cyril. You can flirt with him and sneakily steal the key, or you can knock him out and search him. If you don't want to act with either charm or force, you can just talk, and he will ask you to bring him a glass of wine. Tallis will mention that she has a sleeping potion for this occasion, so we take a glass of wine from the table near the quartermaster and present it to the lord – now we have the key. On the way, we toss some coins into the fountain and head to the door into the castle.
Make a wish
You need to collect all whimsical coins and throw them in the fountain. There are five in total:
- Near the cage with Leopold, on the barrel.
- On the bench behind Prosper's son - Cyril
- On the bench near Leliana
- Freebie from the quartermaster
- Gift from Lord Cyril.
We throw all the coins in the fountain, completing the quest, and receive a reward of 1 attribute point.
Moreover, we can chat with the festival guests:
- Countess Dulsi de Spear
- Lady Elegant
- Bann Tegan and Lady Isolda
- Leliana
- Seneschal Bran
Castle En
Castle En
As soon as we pass through the door, one of the guards notices us. It seems he has the gatekeeper syndrome and refuses to leave and pretend he hasn't seen us. Tallis kills him and suggests sneaking further to avoid unnecessary bloodshed. Whether we agree or decide to push through fighting will affect the further gameplay.
Of course, it’s easier just to walk in and chop everyone up. There will be more enemies, and fewer good items, but it will be faster overall.
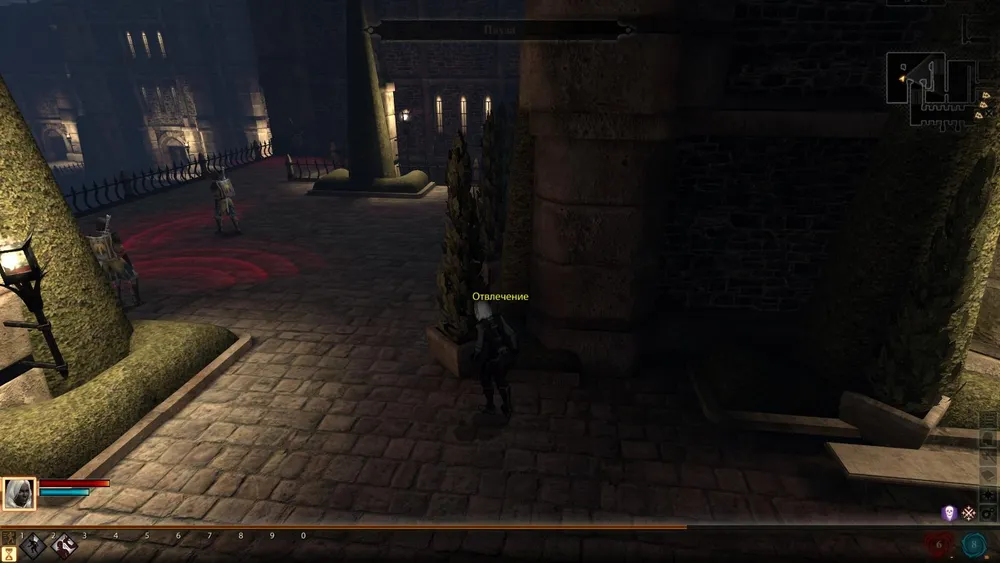
Sneaking is much harder, but the haul of various trinkets will be more substantial. So, we have three main techniques: distraction (throw a stone to make the guard go to the sound), incapacitation (sneak up from behind and knock the guard out), and hiding in shadows (when the hero stands in the shade and not too close to the guards, he becomes invisible – at such moments he is enveloped in a sort of shadow aura).
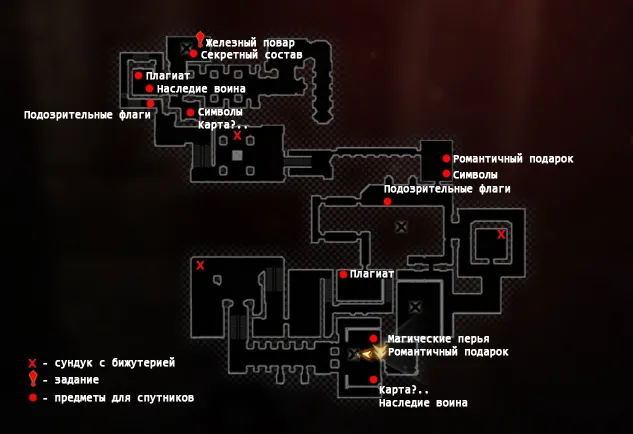
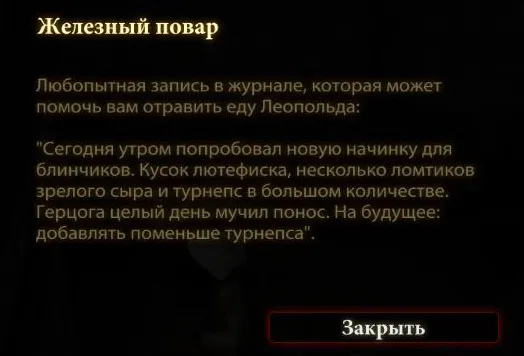
We distract the first guard with a stone to face the wall, slip into the corridor, and hide in the shadows behind a column until a group of guards passes by. We proceed to the kitchen and cunningly send the cook away. We pick up quest items for our companions and read the cook’s journal. To mix up the proper concoction, we take 4 pieces of lutefisk (2 clicks), 3 pieces of cheese (1 click), and 5 pieces of turnip (5 clicks), and take the mixture from the jug to sprinkle it into the basket of food for Leopold. This will make him move much slower in the final battle.
We break into the castle through the door opposite the kitchen and find a medallion for Isabella and a drawing for Bethany in the room.
We sneak up on the captain of the guard from behind, knock him out, and search him for the key. While he is unconscious, we grab a book for Varric and a medallion for Fenris nearby. We ascend the stairs, picking up a flag for Carver along the way, and enter through doors.
We exit into a courtyard. Hiding in shadows under the stairs, we wait for the nearest guard to go patrol the area. We follow along (at a distance, of course), hiding behind overgrown fences, and approach the chest to fetch a trinket from the jewelry set.
In the same way, sneaking behind the guard, we reach the stairs down and descend to the door. Behind the door is a balcony that we simply pass. Below, servants are chatting, but they won’t notice us. In the next room, we pick up love poems for Aveline and move on. Next, we need to head right, but to find the key to the door, we should turn down the left corridor. The guard stationed there can be knocked out or quietly passed by. At the fork, there will be a door to a room with two chests. While there, we can take a rest – the door is closed, and nobody will notice us. In the smaller chest lies a key to the balcony, while in the larger one lies the second item from the jewelry set – the Alarm Ring.
When leaving the room, we should be cautious: open the door, hide in the adjacent room behind the wall, and wait for two guards to walk by before we slip past them. If you enter directly into the guard’s room balcony, you can loot a cheap junk chest on the left. We dash down the balcony to the needed door and pass through it onto the balconies in the courtyard. From there, we can traverse through several doors to enter the lower library. We grab a book for Varric and ascend to the second library room, where we can check out several Orlesian paintings.
Quietly sneaking
From the library, we exit to an open courtyard with several guards. Hiding in the shadows, we approach the guard by the stairs and incapacitate him. While he remains unconscious, we throw a stone toward the fence above the courtyard to make another guard go check it out, and we dash left to grab the chest. However, we can also choose not to run; there’s nothing valuable in there. Instead, we can hide in shadows and assess the situation. Two guards patrol in front of the door, over whom we can sneak if we wait for them to turn around, but the door is locked. Therefore, taking a chance, we run past the door and hide in shadows on the other side. We distract the guard by throwing a stone behind him, sneak up on the captain of the guard, incapacitate him, and take the key (note: if you don’t distract the guard and just knock the captain out, he will notice us). Once the "Take Down" effect fades, we sneak up on the guard sitting with his back to us and strike him. We dash behind a column and loot the chest for the third and final piece of the jewelry set – the Undefined Ring. If in that time our valiant guard regains consciousness, we take him down again. In any case, we run into the shadow to the right of the needed door and wait for the opportune moment to slip past the two patrolling guards.

Bonus for completion: +10 to stealth
The finish line. We are almost there. Keep an eye to the left – there’s a chest with various junk.
Final Sprint
At the entrance to the room, a trap is activated: the exit is blocked by a massive grate, and the door ahead doesn't open. To open it, we need to stand simultaneously on two tiles near the chests, but all access to the chests is cut off.
We stand on the two tiles near the rug and open the grates at the staircases. Next, we lead Hawke and Tallis parallelly across the tiles, until we reach the statues – we topple them. We must move out at the same time; otherwise, the grates will drop.
Again, we stand on the tiles before the rug – the grates under the balconies open. Now we must open entries in the chests by moving in parallel on the lower and corresponding upper sides. The chests hold trash and some money. Additionally, the lids contain quest items for companions: a medallion for Isabella, a feather for Anders, a medallion for Fenris, a recipe for Sebastian, and poems for Aveline. If one of the chests becomes inactive, don't worry: it will become available when the grates in front of the door are raised. To raise them, stand simultaneously on both tiles before the chests.

Caught!
We successfully passed all the trials to fall into the ambush. We are welcomed by Duke de Montfort himself with his guards and sent to the local dungeon, where our hero awaits an interesting conversation with Tallis. But why waste time? Our other companions are roaming about somewhere, and we are still getting out of our cell. After meeting with companions and regaining our belongings, we need to make a crucial decision: go through the cellar or through the caves in the prison. If we sneaked into the castle, the achievement "Quietly Sneaking" will be unlocked.
Cellars

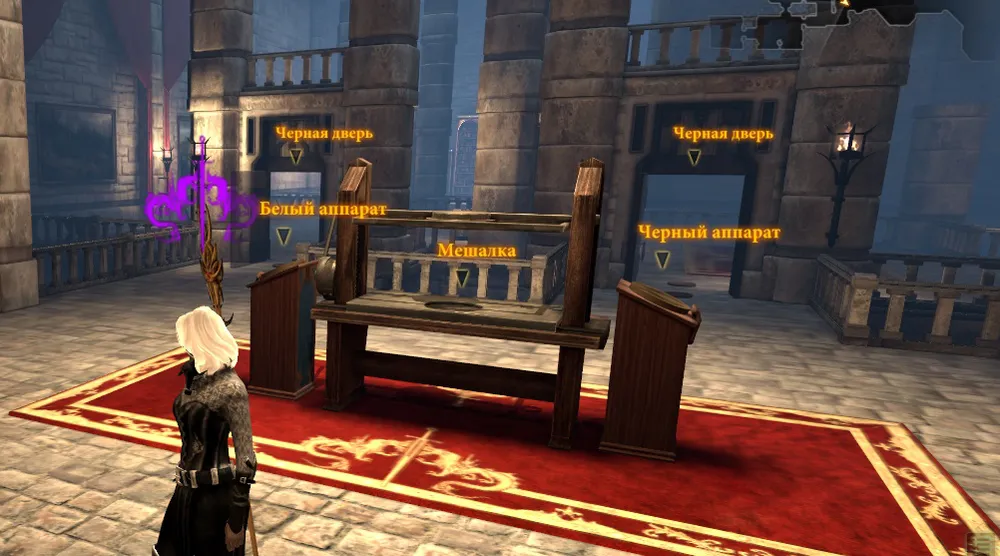
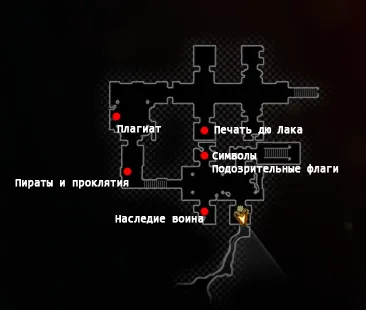
Cellars
In the first room, we see two machines (white and black), a mixer, and three locked doors: two white and one yellow. When pressing a machine, a corresponding color symbol appears over the character’s head, and we can open doors with such colors. In the mixer, we can mix two different colors to obtain a third.
So, we take the white symbol and open the two doors to our left. We return and take the black color, go through the right white door, and open the black door. We take the blue symbol, return to the main room, and drop the symbol in the mixer (it won’t disappear). We now run through the left white door and open the blue door. We kill the rune golem – not too strong a monster, it’s easy to handle. Immediately after the defeat, a strange-looking painting opens: people in masks and without, arranged in three rows. If you have Isabella with you, look back and pick up the cursed emerald – it will be useful for the quest. We take the yellow symbol from the machine by the door and return to the main room. We open the yellow door, drop the symbol in the mixer, and retrieve a mixture of blue and yellow – green. Just behind the yellow door, to our left will be a green door, behind which are treasure chests: money and items of mediocre parameters. Moreover, if Isabella is in the party, a quest item – a cursed diamond – will lie on the floor.
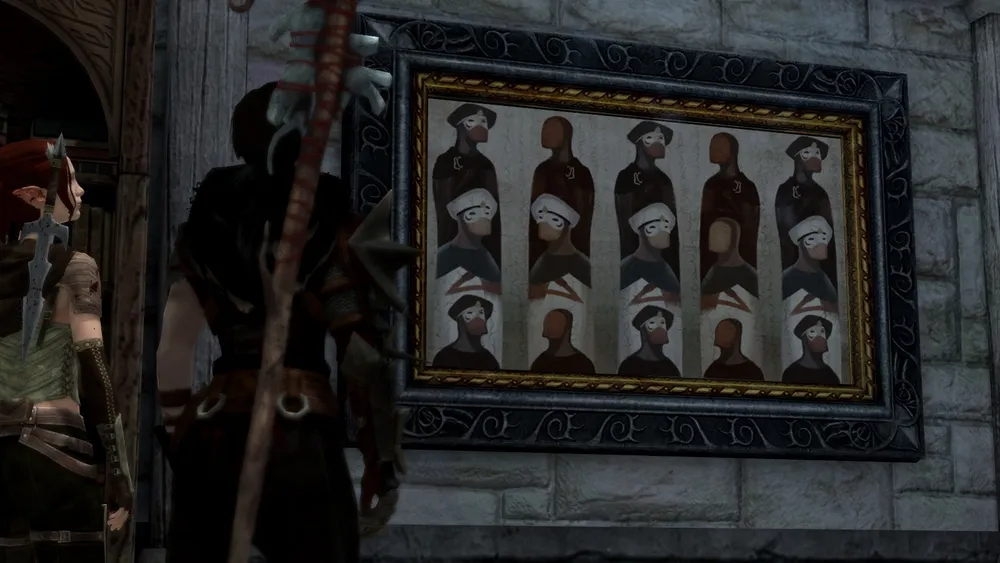
There’s something strange about this painting
We dash down the corridor and end up in a large room with a big chest behind three impenetrable barriers. Right in front of us are rotating tiles. Noticing that the number of tiles precisely equals the number of people in the painting, we turn them over so that tiles with illustrations correspond to persons in masks, and the clean ones – to persons without masks. The first barrier is opened.
Note: to remove barriers, it is not necessary to solve the puzzles - it is sufficient to position the required tiles in the needed order, provided you know it.
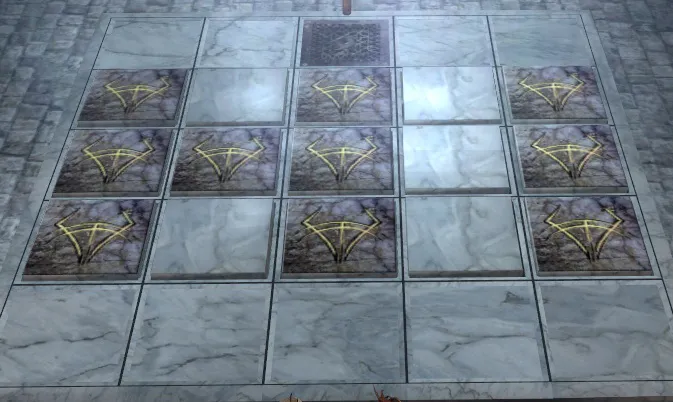
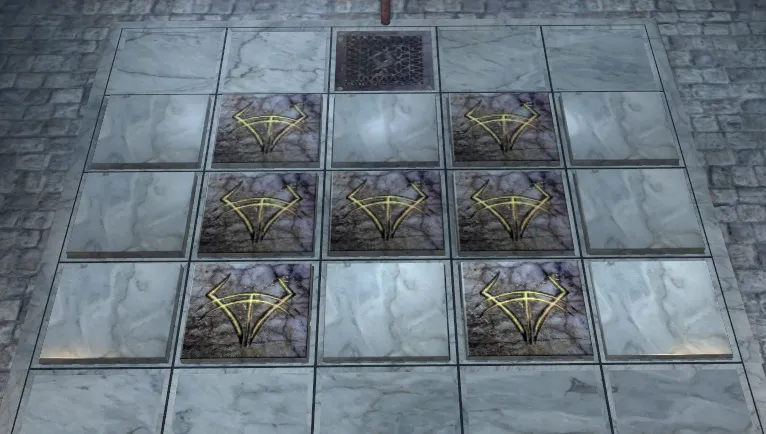
In the eastern room, we also need to solve a tile puzzle. The essence of it is that all tiles must be flipped so as to fully compose the portrait displayed on their reverse side. When pressing a tile, it flips, and tiles sharing common edges will flip too; i.e., adjacent to it horizontally and vertically. If anything goes wrong, the progress can be reset by pulling the lever beneath the painting. The overall algorithm of the solution is depicted in the image. This algorithm is not the only one, but it’s the simplest. If you wish, you can try to assemble the mosaic yourself.
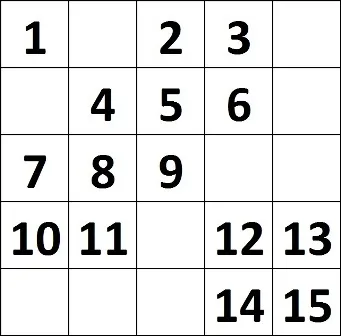
The order in which to press the tiles
Let’s remember the arrangement of people in masks and lay out the corresponding scheme of tiles at the exit. The second barrier is overcome.

I wonder, does the duke go through all this too?
In the western side, we face the wonderful doors again. We take the black symbol and unlock both black doors directly. We switch the symbol to white and open the white door behind the left black door. We grab the blue symbol in the room’s apparatus and put it in the mixer. We run through the right black door and open the blue one – here’s another golem! We take down the poor golem and receive the third painting of people in masks. If Isabella is in the party, we pick up the cursed ruby. We grab the symbol from the red apparatus and hurry to the mixer. After obtaining the purple symbol, we unlock the door to the treasury. The chests inside contain money, junk, and some mediocre items. Don't forget to look for the cursed sapphire for Isabella. We position the tiles at the exit as depicted in the third painting – and the last barrier is removed. We receive the achievement "Loot".
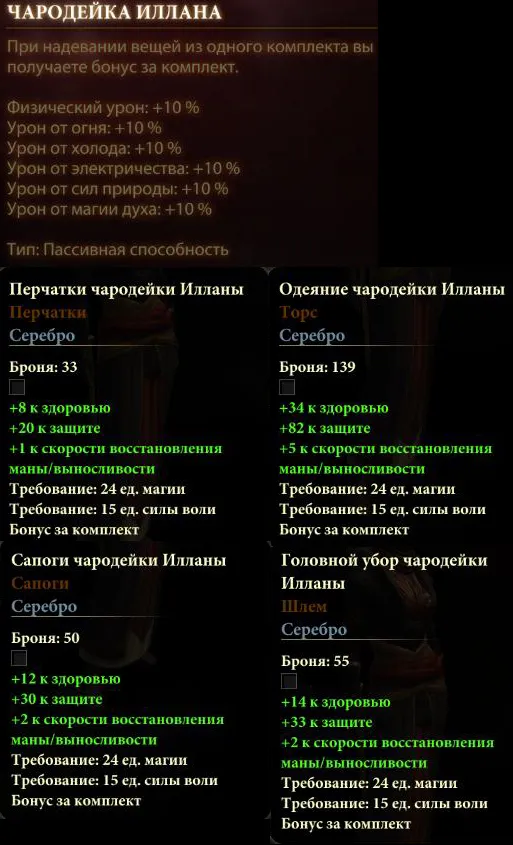
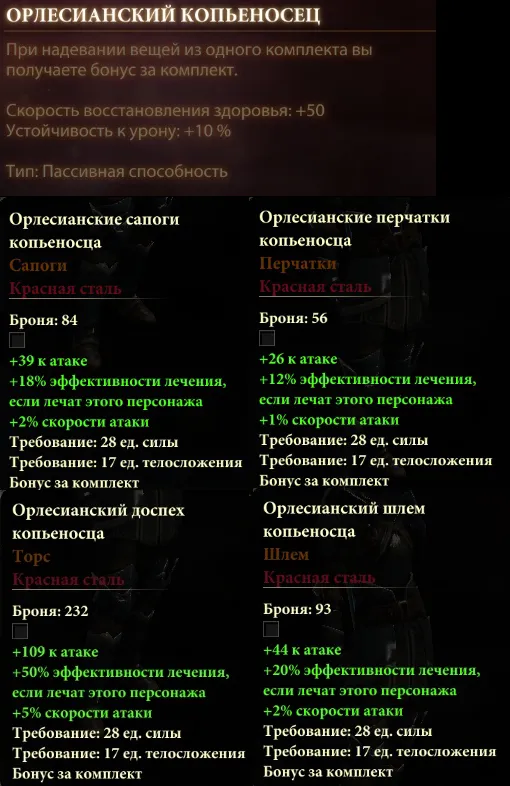
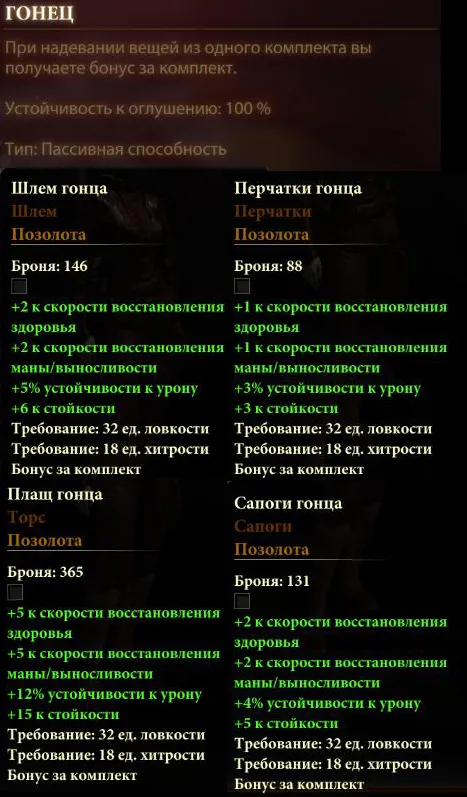
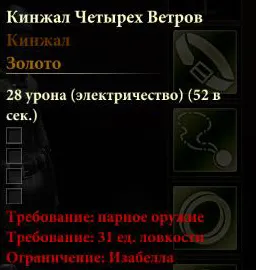
Apart from money and various trinkets, we find an entire set of items for our hero inside the chest and treasure piles. The type of set depends on the class, and the bonuses it provides depend on the hero's level. Furthermore, here we can find a rusty dagger – the last item for Isabella's quest.
There’s nothing more to do here; we rush south down the stairs. If Aveline is in the party, there will be a battered book lying before the door to the next room – an item that starts her personal quest - "The Seal of du Lac". Aveline will say that the book contains notes about an arrested person, who had a tattoo of her father’s seal – du Lac. We enter the door. Another ambush! The duke decided not to let us leave and unleashed his hasind on the hero with two jesters and a pack of ordinary soldiers. The hasind immediately runs away, leaving his lackeys to be torn apart by Hawke, which he successfully takes advantage of. The battle isn’t complicated; the main thing is to take out the jesters quickly. They are quite bulky brigands who hit hard, but there are only two of them, and they jump out one after the other.
Once our hero deals with the scum, Tallis suggests leaving through the caves in the underground.
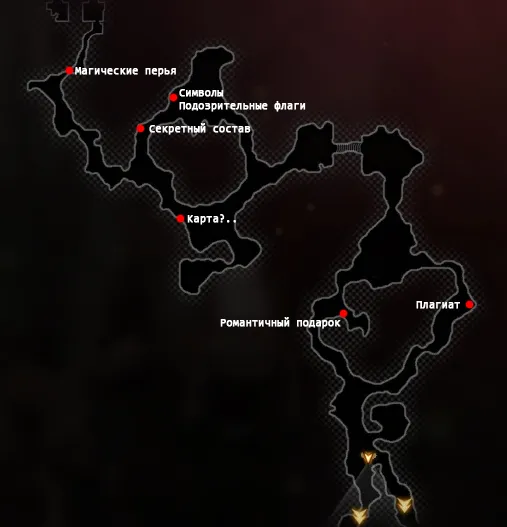
Underground
Underground
If you chose to go through the underground, you will encounter guards: the first fight will occur in the large hall in the northwestern part of the map, and the second – in the hall in the southeast. If the battle with de Montfort’s guard has occurred, it will be quiet and calm here.
Having emerged from the casemate with Tallis, the hero finds himself in the northern part of the dungeon. Nearby is an entrance to the cellar, and straight ahead – a corridor with cells. There are only four cells, and two of them contain prisoners whom we can free by breaking the locks.
In the southern part of the underground, there are two exits: to the cellar (into the ambush room) and to the sanctuary.
Note: once we exit through the crack into the caves, we can no longer return.
Before leaving, it is advisable to rummage through the cells. Among the quest items here is a wobbling brick for Aveline’s quest “The Seal of du Lac.” Upon exploring the hideout, Aveline will discover a strange vessel with smoke inside. Inside the vessel will be a scroll and a ring, as well as the spirit of the Risen. The monster isn’t new; everyone knows how to fight it. If you don't know, keep in mind that it’s best to hit it from a distance: the powerful aura around the corpse strikes anyone nearby. Additionally, it can attract targets to itself, knocking them down.
After defeating the monster, the conversation will continue, and Aveline will tell us she doesn’t know how this is all connected to her father, but she intends to ask someone about it. At this point, the quest will end, and our iron lady will gain a useful trinket.

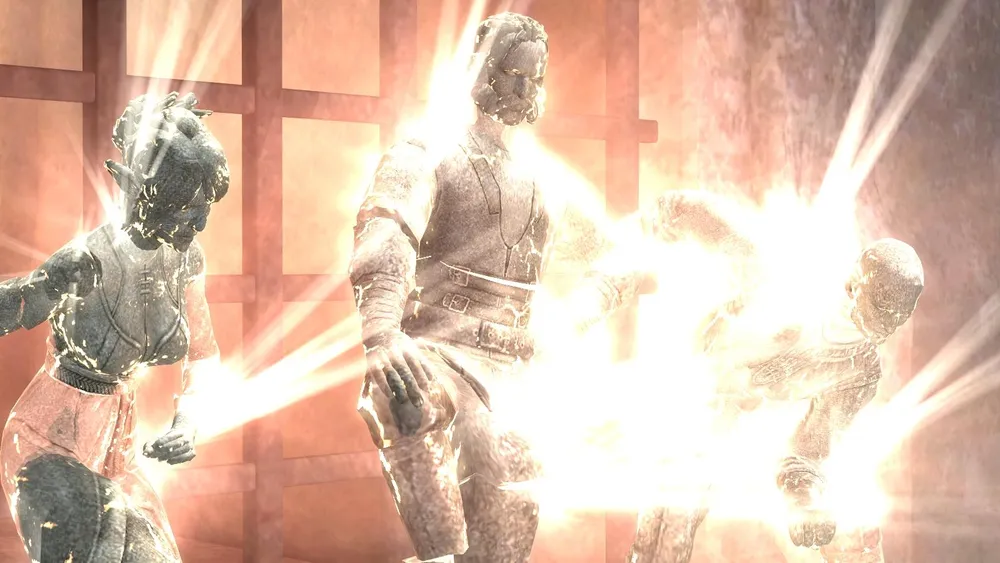
Keep the dagger for myself or remove the curse?
In the corridor stand three stone statues: pirates cursed. If you approach them with Isabella, they will call out to her and tell how they stole from their maleficar captain a dagger that was cursed. Only another captain can lift the curse if he finds this dagger and shows generosity by gifting it to them. All parts of the dagger are scattered in different spots around the basement. If you haven’t collected it yet – you’ll have to go into the basement. If the dagger is ready, then it’s time to decide: relieve the pirates from the curse or not. If you leave the choice to Isabella, she will choose to keep the dagger for herself. The hero can persuade her to do a good deed – the pirates will be freed from their stone prison, swear loyalty to Isabella, and flee. Subsequently, they will assist you in combat in the caves.
In the large hall lies a book for Varric's quest. In the other cells, we can gather items for other companions: a chevalier flag for Carver, a painting for Bethany, and an amulet for Fenris.
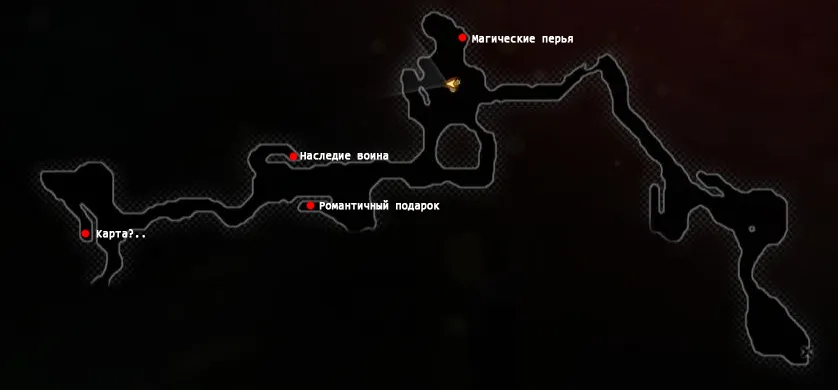
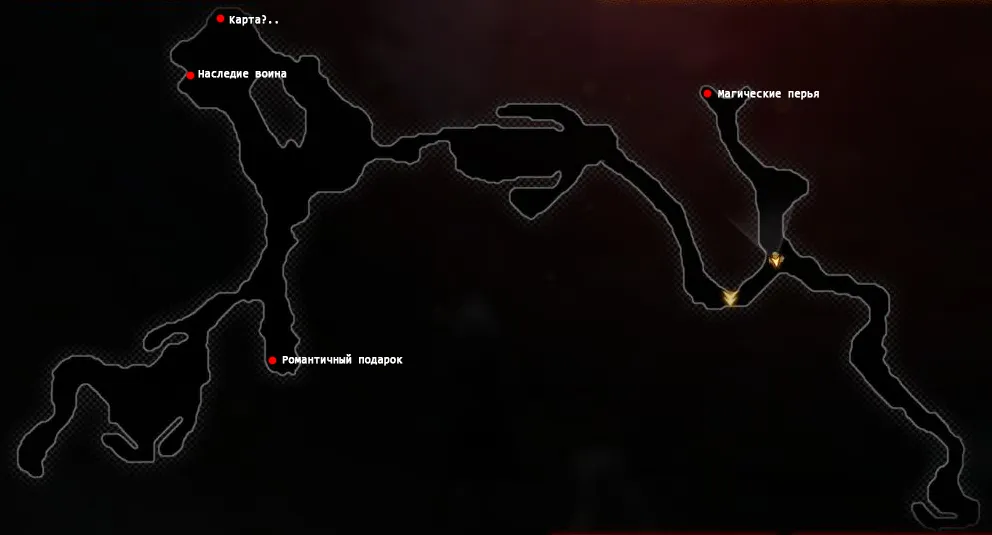
Sanctuary
Caves of the Sanctuary
In the first ring, you can find a feather for Anders, a hideout for Sebastian, a hideout for Bethany or Carver, and a medallion for Isabella. In addition, we will face a tribe of ghasts led by Velestriel.
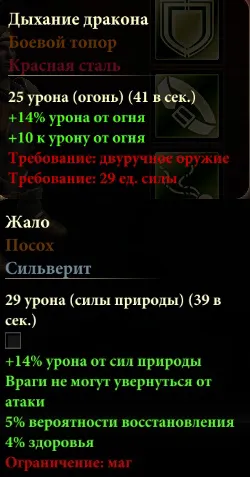
On the bridge, a more serious encounter awaits us – with that very hasind who has been pursuing us since the beginning of the adventure. He will have several soldiers and a bunch of mages with him. At the start of the battle, Tallis will be cut off from the team, and if you want to get her back quickly, beat the hasind as soon as possible. Once he has about a third of his health left, Tallis will rejoin the group. After the battle, loot the bodies: Kahir will "share" the key to the grating and a decent two-handed weapon, and we can strip a good staff from the mage. If Isabella is with you and has freed the three unfortunate souls from their curse, they will aid you in this fight. Additionally, from the bridge, you can enjoy the view of the lake at the observation point (Tab key for help).
In the second ring, we’ll find poems for Aveline, a hideout for Varric, and another pack of ghasts. After the hero deals with the savages, Tallis will announce that we are already at the exit and will try to convince us to follow her to help her.
We are free to either agree or decline to help. This only affects which route we take and what enemies we encounter along the way.
If we refuse to help, we will take the shorter route, and the enemies we will face will only be guards and wyverns with... a wyvern. "Don't believe your eyes". In addition, this location has hideouts for those companions who have not yet claimed their rewards before: Fenris, Aveline, Anders, and Isabella. The exit to the ruins will lead us to the meeting place of Prosper with the Qunari.
On mountain trails: a stroll with three
If we decide to go with Tallis, there will be more running around. Almost immediately after exiting the caves, we are ambushed by Baron Arlansh, if Hawke hasn’t killed him yet, of course. He will be accompanied by archers, soldiers, and a jester. For defeating him, the hero will acquire a decent sword and shield along with various junk. Then we encounter some insignificant scum like ghasts and wyverns with wyverns– well, just the usual deal. "Don't believe your eyes" (s). Additionally, one can gather rewards for those quests of companions who have not yet acquired their personal trinkets: Anders, Fenris, Aveline, and Isabella.
On mountain trails in the company of Tallis
The main enemies in this location are tal-vashoth. First, a small group led by an officer appears, then a smaller squad but led by the tal-vashoth's leader, who lures us further and further after getting thoroughly beaten. After finally dealing with the leader, Tallis learns where the meeting with Prosper will take place – we return and head to the ruins.
Final Battle
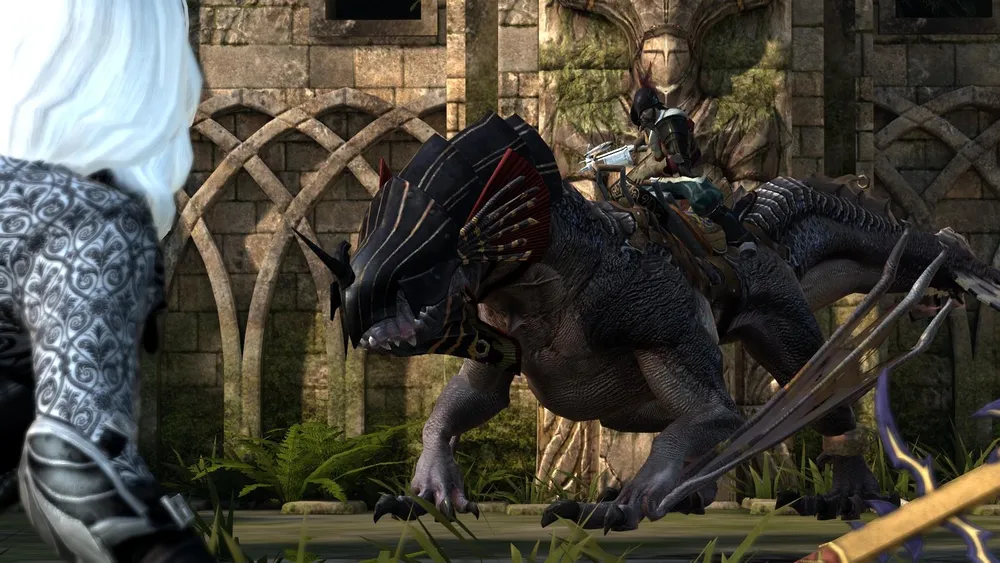
We watch a short cutscene where the duke receives some scroll from the tal-vashoth. Regardless of whether we agreed to help the elfen girl or not, she will join the party, and Prosper will order his soldiers to attack us.
Conditionally, the battle can be divided into three stages: Prosper, Leopold, and Prosper mounted on Leopold.
During the first stage, Prosper will fight below while the wyvern spits poison from above. Don't stand under the stream! Hit the duke and dodge the spits. When the duke loses almost all of his life, he will leap up, and Leopold will take over watch.
If you poisoned the wyvern's food, it will move quite slowly at this stage. Prosper will mark one of the characters (usually the one you are controlling), and Leopold will relentlessly pursue that character until the marker drops. The tactics are simple: strike the wyvern, and the one with the mark must run.
The duke and Leopold are a force to be reckoned with!
When Leopold is thoroughly beaten, the duke summons him back to himself and places chain-explosive traps on the field. Try to stay in free areas, then almost no one will get caught. After that, de Montfort riding the wyvern descends to the battlefield, and the final stage begins. Just like in the second stage, the duke will mark. But Leo is already sprightly and frantic, so you cannot dodge. However, you can push him off the edge: when the wyvern charges at the "marked" character standing at the edge of the cliff, evade to the side – the wyvern will be carried off by inertia past the location, and for a while, it will cling onto it, doing nothing else.
We defeat the duke, watch a beautiful cutscene, and bid farewell to Tallis. If you refused her, you will have the option to demand a reward from her. In any case, she will hand Hawke what was planned to be substituted in the guise of a stone – a rather decent amulet. Additionally, if the hero does not have a companion nearby and you flirted with the elven girl, you can receive a romantic kiss from her, but nothing more will come from it.