
"You Can't Drink Away Mastery". Developing Character Skills
In Arcanum, like in any respectable RPG, there is a system of various skills and their improvements. There are a total of 16 skills in the game, divided into four groups by type: combat, thieving, social, and technical. You can see the entire assortment in the character window. In this post, we will look at what skills exist, what they are for, and how to develop them.
So, each skill has five gradations and three ranks that provide tangible bonuses. The gradations are straightforward: the player invests points one by one at each step, and the more points invested in a skill, the higher rank the character can aim for. Additionally, each level of skill requires a certain amount of the corresponding characteristic: for level 1 - 6 points, level 2 - 9, level 3 - 12, level 4 - 15, and level 5 - 18. That is, counting starts from six points and goes on by 3 points for each level. There are three ranks in total: apprentice (depending on localization, it can be either 'apprentice' or 'intern'), expert, and master.

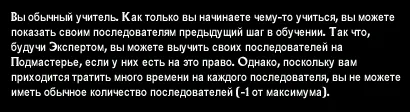
It’s simple with apprentices: as soon as you invest at least one point, you can become an apprentice by asking the corresponding character. There are quite a few such characters, but they teach the skills they possess themselves. For example, guards teach hand-to-hand combat and evasion, traders teach trading and eloquence, herbalists teach healing, technicians teach repairing, and so on. The training itself costs about 90 gold - the higher the trading skill, the cheaper it is.
The 'expert' rank requires three points to be invested in the skill. To become an expert, you need to pay about 500 coins, but finding a teacher is already more challenging. For most skills in the game, there are two characters teaching at the expert level, and some of them, besides money, require also meeting certain conditions.
And finally, to prove that the character has reached the peak of mastery in their field, the hero must have the maximum leveled skill, find a master, and complete a trial. In addition to the bonuses provided by the 'Master' rank, the hero gets a corresponding point in their reputation.
Companions of the character cannot learn ranks of skills, but if the main hero has chosen the biography 'Teacher', they automatically teach their companions the skills they possess, but at one rank lower.
So, let’s consider each skill individually.
Combat Skills
Archery
Characteristic: agility.
Used: when using a bow.
Apprentice. The speed of shooting increases by 5. Trained by guard archers.
Expert. Shooting two arrows at once. Trained by Captain Elite Archers, Derngholm.
Master. Shooting without a distance penalty. Trained by Kitzel Pierce, Black Root, Tavern 'Galera Annabelle'.
The master of archery is at the bar counter in the Black Root Tavern. First of all, he will ask you to find his missing apprentice, Dudley Crosston. The latter walks around Derngholm near the barracks (in brown armor), but looking for him is not necessary – it's a side quest. To train as a master, you only need to have the maximum leveled archery skill and complete Kitzel's task.
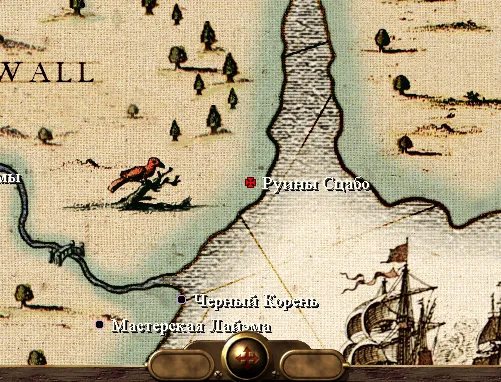
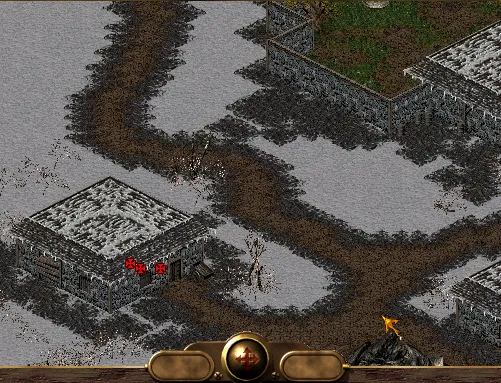
You need to obtain the Ecclesiastes bow in the Ruins of Scabo (1028 W 1324 S) and bring it to the master archer. To get through the first door, pick up the key from the pile of garbage nearby. In the next room, there will be skeleton archers. We kill them, gather arrows and potions from the corpses - they have nothing more valuable. The next fight will be more serious: you need to kill two club wielders - these are large monsters with big swords, their armor is sturdy, and they hit hard, but their speed is not impressive (one hit per round). Furthermore, if you don't rush into the room, you can kill them one by one. The monsters will drop the Crushing Mace and the Axe of Authority. Next to the second club wielder, in the pile of garbage lies the second key. Pass into the adjacent room and extinguish the torch by shooting it (in combat mode, shoot at the fire while holding the Alt key).
The second part of the dungeon consists of a long corridor (without forks), along which ambushes with skeleton archers are located. You can shoot them for experience, or simply run past to the end of the corridor. Again, extinguish the torch and find yourself in the room with a chest and three torches. In the chest lies the Ring of Protection and the Ecclesiastes Bow – the reason we came here. By extinguishing the right torch, we will find ourselves at the entrance to the ruins. The other two lead to the beginning of the previous levels of the dungeon.

To achieve the master rank, head to Caladon to the 'Mushroom' inn. Kitzel Pierce is waiting for us close to the halfling innkeeper. You can either give him the bow or keep it for yourself, paying Kitzel 2000 coins. In any case, he will make our hero a master archer.
Evasion
Characteristic: agility.
Used: helps to dodge blows and shots.
Apprentice. 10% chance that the opponent will miss critically on a critical successful evasion. Trained by guards.
Expert. 50% chance that the opponent will miss critically on a critical successful evasion. Trained by Wind, Kintarra, and Herkemer Oggdoddler (kudos to the localizers!), Black Root.
Note: Herkemer teaches agility, hand-to-hand combat, trap finding, and shooting, but only if you listened to his story and didn’t argue with him. Otherwise, he won’t want to teach you even for a lot of money.
Master. 100% chance that on a critical success of the hero, the opponent will miss critically. Trained by Edkin Chambers, Quiet Waters.
Edkin lost his sight in a duel with Garrick Stout and wants to take revenge on him. He will ask you to kill Stout and bring him his eyes as proof. If you don’t plan on becoming a master of hand-to-hand combat, that will be enough to become a master of evasion. Otherwise, it’s better to complete Stout’s quest first, and then kill him. If you decide to go down the second path, give Edkin a potion and tell him about lady Druella, and he will happily make the hero a master of evasion. However, you can also do it the other way around, but then you will have to talk to Edkin twice.
Hand-to-hand Combat
Characteristic: agility.
Used: in close combat with or without weapons.
Apprentice. +5 to speed when using melee weapons. Trained by any guard.
Expert. The character does not suffer penalties from poor lighting (or from light if the hero has chosen the 'Light Sensitivity' biography). Trained by Gorin, Isle of Despair, and Herkemer Oggdoddler, Black Root.
Master. The character does not suffer critical misses when using melee weapons. Trained by Garrick Stout near the barracks in Derngholm.
To become a master in hand-to-hand combat, talk to Garrick. Make sure not to contradict him; otherwise, he will refuse to teach you or may even attack if you are very rude. Stout will tell you about his duel with Edkin Chambers and how his beloved - lady Druella - scared away and ran from him when she saw Stout injure his opponent. Garrick will ask you to find her in the lair of Gir-Doloros (1182 W 1583 S) - creatures that feed on the energy of their victims, causing them to remain in oblivion. You will need to save Druella and persuade her to marry Sir Garrick. To make her more compliant, Stout promises to give Edkin Chambers a potion for blindness in exchange for her consent.
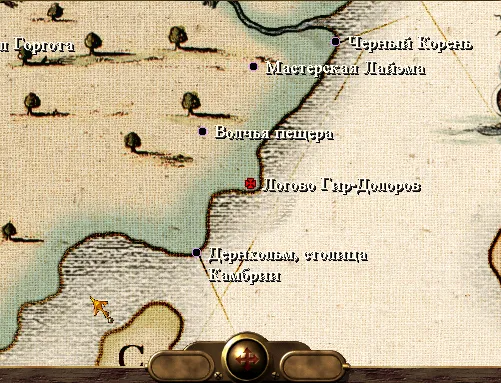
Run to the specified location and kill all the monsters. There are many Gir-Doloros, but they are quite weak. Gather the scattered supplies and herbs, and bring lady Druella back to consciousness. After learning what sir Garrick wants, and that her beloved Edkin is alive, she proposes to trick Stout. For this, she will agree to let you get a bottle of medicine, and then after he makes the hero a master of hand-to-hand combat, you kill him. You can trick the lady and not kill Stout, but in this case, you will not be able to become a master of evasion. However, if you do as Druella asked, then together with Garrick, you will be attacked by guards nearby – you will have to kill them all quickly to minimize the number that detects you. In any case, Stout will give you a potion for Edkin and make you a master of hand-to-hand combat. What to do next is up to you.
If you decide to kill him, Druella will ask you to take the potion to Edkin Chambers and let him know she is waiting for him in Derngholm.
Throwing
Characteristic: agility.
Used: when using throwing weapons, including grenades.
Apprentice. +5 to throwing speed. Trained by any guard in town.
Expert. Throwing distance is doubled. Trained by Lianna Pel Dar, Derngholm, and Theo Brightstart, Ashbury.
Master. No distance penalty. Trained by Clarissa Shalmo, Tavern 'Galera Annabelle' in Black Root.
Clarissa Shalmo is at the bar counter. She promises to make the hero a master of throwing if they have at least the apprentice rank, in exchange for the Star of Azram - a powerful throwing weapon hidden in the ancient ruins of Kna Ta (1435 W 616 S).
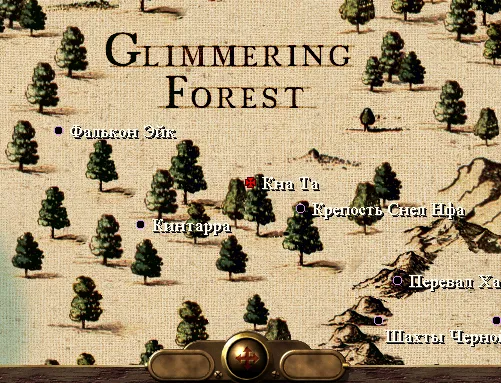
Let’s go to Kna Ta, enter the ruins. Clear out the two side rooms (female bear with cubs and a forest man), collect any rubbish and a boomerang from the chest. At three torches, kill the plague girl and extinguish the torches (attack the fire while holding the Alt key). The left and right ones – lead to the room with the chest. The central torch teleports you inside.

Extinguish the right torch at the door and proceed. Remember this trick: all doors open this way. It’s better to run in turn-based mode since they close quickly. So, ahead is a long corridor – just run and run, it's hard to get lost here. Extinguish the torch, open the door to the library. There will be a Lesser Lich. You won’t get anything from it besides a handful of experience. Exit the library into another corridor, run to the door, extinguish the torch, and pass through. Beyond the door is a Scorching Spider – kill it and collect grenades and potions from the chest.
Next, we run down the corridor to the fork. You can go straight and left to kill the skeleton archers, but the path we need is to the right. We enter an open area. Go left along the path. On the way, you will encounter two great Goorats – kill them and approach the three bowls of fire. The left one returns to the first part of the location, to the room with the chest. The central one takes you to the beginning of the location with corridors. So we need the right one.
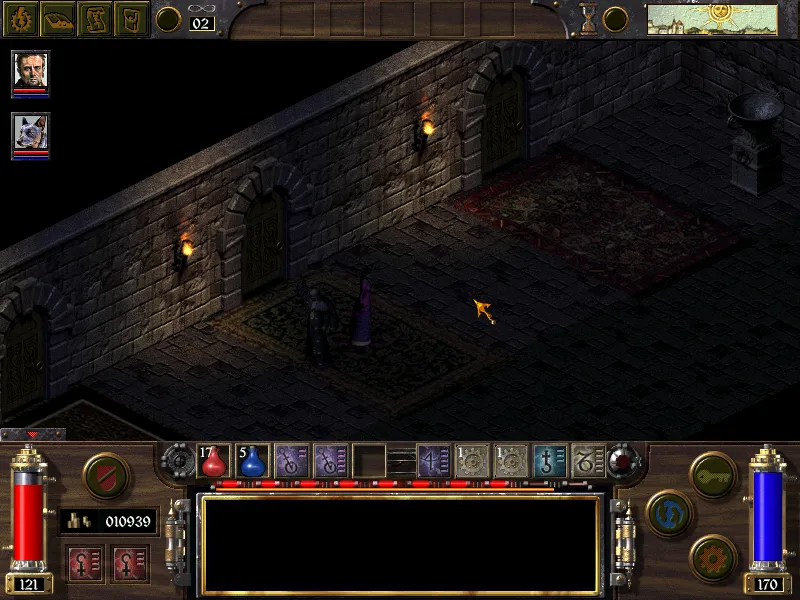
We find ourselves in a room with three locked doors and a non-functioning bowl of fire. To activate it, you need to visit all three rooms. Behind the left door are two bloody spirits, in the central room are two rune golems, and behind the right one are two burning wizards. Once all three torches are put out, the bowl will light up. We extinguish the fire and jump into the room with… three bowls!
The second and third bowls will return us. The first bowl teleports to the corridor where various monsters stand in niches. You can kill them for experience, or you can run past – they won’t be able to chase the hero because the niches are blocked. On the way, loot the chest for various trash and potions and reach the fork.
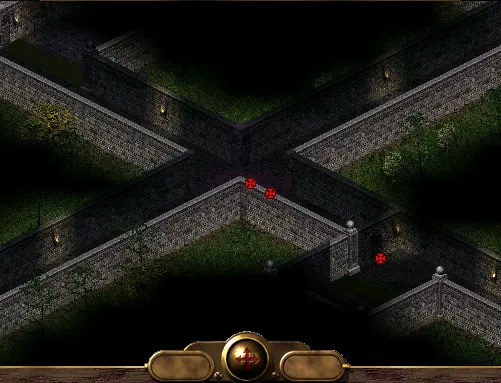
Straight and to the right, you can run and kill monsters for experience. Also, there are teleports to the start of this location. But we need to the left. We run down the corridor, kill the monsters and end up at the three bowls of fire. The left torch leads to the room with three doors, the right – to the start of this location, the central – the one we need. Extinguish it and enter the room bordered on four sides by niches, where various monsters appear. Their quantity is limited, so you can farm for experience, especially since most of them can’t retaliate. And you can immediately search the chests – they contain various potions and the Jagged Chakra – and extinguish the fire in the bowl. We get to the outdoor platform, search the altar for the Star of Azram, and extinguish the fire in the bowl to exit to the world map.
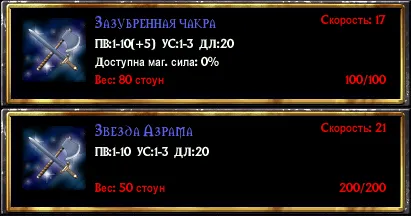
We return to Black Root to Clarissa Shalmo and hand her the Star of Azram, for which she will make the hero a master of throwing.
Thieving Skills
Backstab
Characteristic: agility.
Used: provokes critical damage when striking from behind. Initially works only when using a dagger.
Apprentice. Armor no longer counts. Trained by any of the patrols of Tarant or thieves from the Underworld.
Expert. The skill also extends to swords and axes. Trained by Mister Raccia, Caladon (Tavern 'Weeping Onion'), as well as Mister Black and Halfling Merchant, Tarant (Low Dervish Row, 11).
Master. Chance of critical success increases by 10%. Trained by Dr. Edmund Craig, Roseborough.
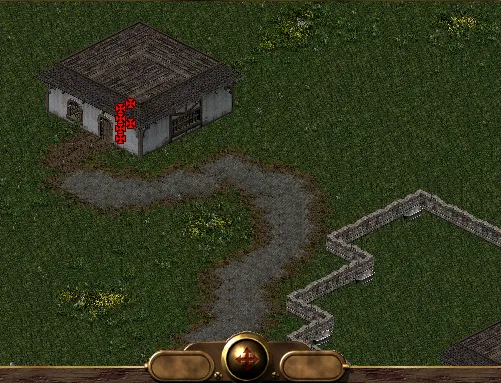
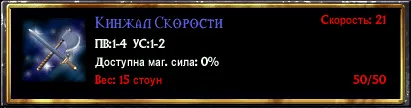
Talk to Craig and ask him to make you a master of backstabs. He will teach you, but when you try to leave – he will attack. We kill him, loot the Speed Dagger from his corpse and proudly flaunt the master status.
Theft
Characteristic: agility.
Used: for stealing items from pockets.
Apprentice. Caught stealing only on critical failure. Trained by thieves from the Thieves' Underworld (you need to be a member of it).
Expert. The penalty for the size of items that can be stolen is halved. Trained by Mister Black and Pun, Tarant.
Master. The character cannot be caught when attempting to place an item in a pocket. Trained by Sammy White, Tarant.
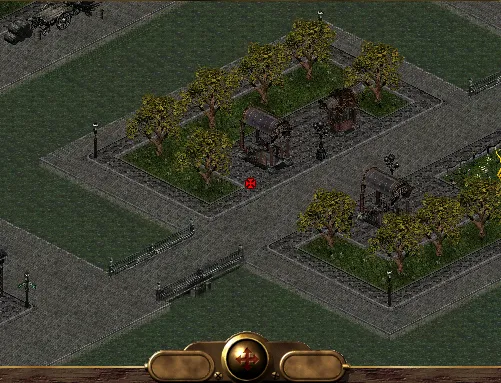
When you talk to him, the halfling will start hurling insults. Engage him in conversation without being openly aggressive, and when the opportunity arises, tell him you think he enjoys insulting people. After a brief dialogue, ask him to teach you the mastery of theft. Sammy will say that you need to walk up and down the street in your underwear. Take off your armor or dress and run around the main street of Tarant, enjoying the cries of decent townsfolk and your companions.

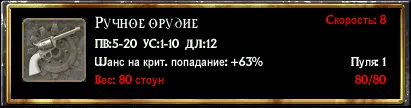
Return to Sammy and report your successes, and he will make you a master of theft. If you managed to create a good impression during the conversation, he will gift you a hand weapon – a decent firearm with a 63% chance of critical hit.
Stealth
Characteristic: perception.
Used: during stealth mode.
Apprentice. The penalty from armor decreases by half, and the skill of hiding does not depend on lighting and the time of day. Trained by wise women, members of the Thieves' Underworld, and halfling guards.
Expert. The skill does not depend on the surrounding environment, the character moves silently even when walking normally. Trained by Mister Raccia, Caladon, Mister Black, Tarant, and the captain of elite archers, Derngholm.
Master. The hero successfully hides even in combat mode and moves silently when running. Trained by Albert Leak, Tavern 'Weeping Onion', Caladon.
From the person who taught us to be an expert, we receive the first note of the master of stealth.
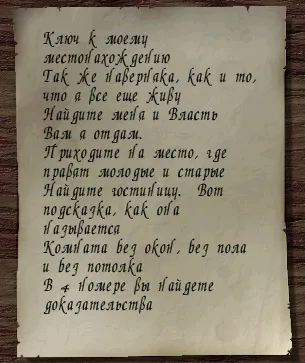
We go to the 'Mushroom' inn in Caladon, to room 4. There, on the floor lies the second note. As per its text, you need to search the bed closest to the nightstand - there are glasses lying there.
"Applying a magnifying glass and examining the drawing, you found a map under a transparent layer of paint. You noted the place marked on the mysterious map."
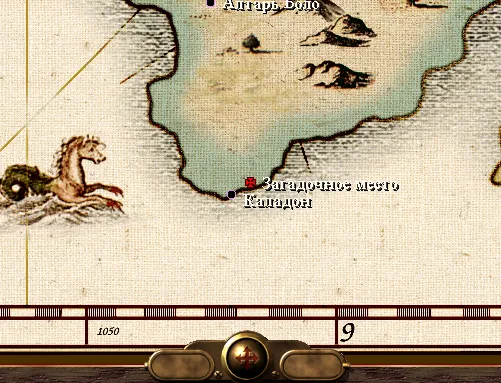
Let’s head to the mysterious place marked on the map (1586 W 1817 S). Packs of wild dogs roam there, so you can net some experience. Approximately to the northeast, look for a stump by which lies a skeleton and take the Master of Stealth note 3 from the stump.

Return to Caladon to the 'Mushroom' inn and read the note again, but this time by the fireplace.
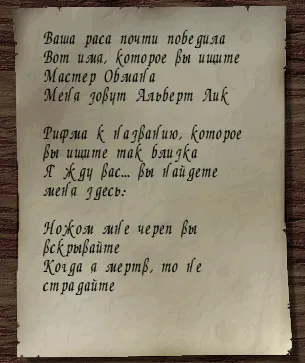
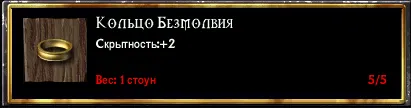
Go up the street to the Tavern 'Weeping Onion' and meet an elf in white standing at the bar. He introduces himself as A.L., and if we did everything right, the hero will recognize him, and the half-elf will make him a master of stealth and gift him the Ring of Silence.
Trap Detection
Characteristic: perception.
Used: for detecting traps.
Apprentice. The penalty from poor lighting disappears. Trained by guards in cities.
Expert. Magical traps can also be detected. Trained by Vegard Molten Flow, Clan Wheel, and Herkemer Oggdoddler, Black Root.
Master. A second attempt in case of failure to detect (except for critical failure). Trained by Frederick T. Fitzgerald, Tarant (Polton Cross, 40).
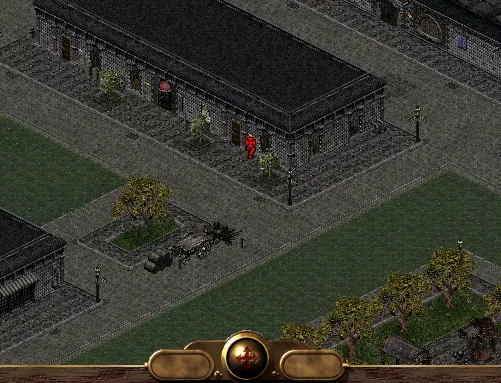
Go to Fitzgerald and ask him to teach you the mastery of trap detection. He agrees, but in exchange for a miracle staff from the fortress of Snel Nfa (1385 W 643 S), clearly hoping that our hero will kick the bucket there.
We head to the location marked on the map. Now it’s time to consider whether our hero can handle several level 20 mummies and a level 35 lich. If so, it’s better to ask companions to wait outside, or they will bloat and die by stepping on traps. If you really want to bring them along, stock up on resurrection spells and revitalizers. You can’t get lost in the castle: just go through the unlocked doors. As for the traps, they cover at least three-quarters of the total area. If your hero knows how to disable them – that’s great. If not, it’s not a problem either; you just have to run through a real minefield: there are empty spaces among the winding 'plantings', and furthermore, with the expert rank the character sometimes steps on traps without activating them.
Little Tip: Instead of clicking on the floor, click on the desired door – the smart character will quickly run the safe way and open it.
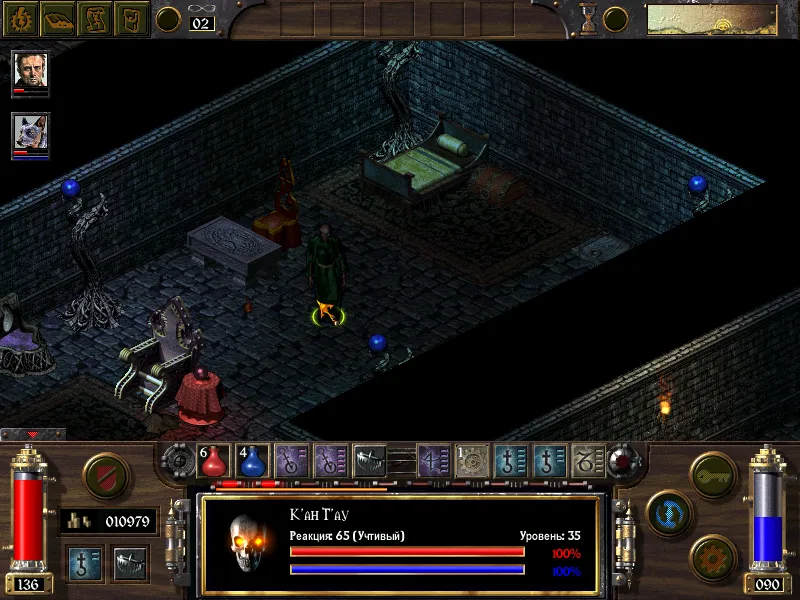
Here is the master of the castle - K’an T’au. We kill him and open the chest. If it doesn’t open, you can break it – the staff will be at the bed. Clicking on the hatch in the corner of the room will return us to the location's beginning in front of the castle.
Take the staff to the halfling, who will be quite surprised to see us again and demand that he recognizes the hero as a master. If you really like the staff, you can kill him later, but in that case, watch out for the guards nearby.
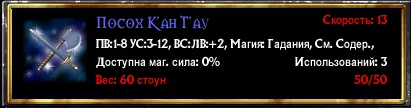
* plus spell 'Teleportation'
Social Skills
Gaming
Characteristic: intelligence.
Used: when playing gambling.
Apprentice. Merchants will play for more expensive items. Trained by Mr. Langley, the Bride’s Day Hotel, Tarant.
Expert. Merchants play for their items (which they are wearing). Trained by the bartender in any tavern.
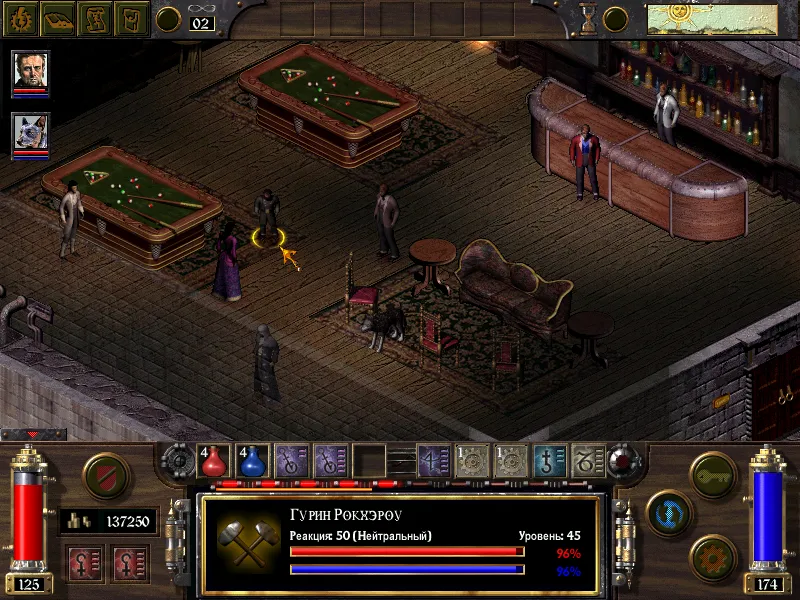
Master. Merchants will play for items they would never sell. Trained by Guryn Rockherrow, 'Wellington's Gentleman's Club', Tarant.
Talk to this gnome and ask him to teach you the mastery of gaming; when he offers to play for money, agree. At first, you will have variable success in the game, but then the hero will start hitting one failure after another. A series of victories will only come after you lose a considerable amount: 15-20 thousand gold. If you find yourself short on cash, Guryn will offer to lend you 5000 gold interest-free – you can agree to borrow on your honest word to return it; in this case, a note will appear in the hero's reputation stating that they owe money, and it will hang there until the debt is repaid. Either way, once the hero thoroughly loses, a streak of luck will start (but only if they lose a sufficient amount), and the gnome will recognize them as a master of gaming.
Trade
Characteristic: willpower.
Used: in trade to make more profitable deals.
Apprentice. Items are bought without markup. Trained by any trader.
Expert. The character can sell items to traders that under normal circumstances they would not buy. Trained by the bartender in any tavern.
Master. The character can buy any item from a trader (including unique items they are wearing). Trained by J. M. Morant, 'Granta Tavern', Tarant.
The master of trade is a halfling in a red frock coat at the Granta tavern in Tarant. Talk to him and ask him to teach you the mastery of trading. He will demand 10,000 gold as proof of your skill in bargaining. In addition to granting the title of master of trade, he will also give a nice ring as a gift.

Healing
Characteristic: intelligence.
Used: for healing wounds with bandages.
Apprentice. Healing effectiveness can reach up to 50% more than the usual amount of restored health points. Trained by an herbalist in any city.
Expert. There are no extra bandages spent on critical failures. Trained by herbalists in any city.
Master. All successes become critical (can heal injuries). Trained by Fawn, Kintarra.
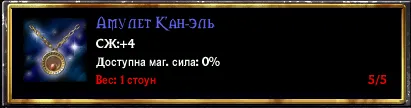
Just ask Fawn to make you a master of healing (from the entrance, go right and down). If you have a high enough reputation (forty points on the good scale will suffice), she will do it for free. Additionally, the hero will receive as a gift the K’an-el amulet.
Persuasion
Characteristic: charm.
Used: in dialogues to convince the interlocutor of something.
Apprentice. The waiting time for companions doubles. Trained by any trader.
Expert. The maximum number of companions in the party is increased by 1. Trained by Madame Lil, Tarant, and the tailor, Ashbury.
Master. Possible companions join regardless of the hero’s reputation (except for those companions with special conditions). Trained by Edward Willowsby, Tarant.
Edward Willowsby resides in Tarant at Alley Pivik, 19 (a house near the cemetery), but he only appears there after the hero visits Kintarra (according to the storyline). After a brief greeting, he will offer to discuss a few matters at the mayor's office – this building is to the left of Bates' house. Willowsby's office is directly opposite the entrance to the building. Talk to him and ask about his work; he will tell you about the negotiations with Caladon regarding joining the United Kingdom, which are poorly advanced. Volunteer to help with negotiations; the best recommendation will be a brilliantly conducted speech in Ashbury regarding the installation of a monument (so it’s better to tackle this task beforehand). Willowsby will entrust the hero with conducting the negotiations and hand over a hefty tome with guidelines on what concessions can be made and what steps would be undesirable.
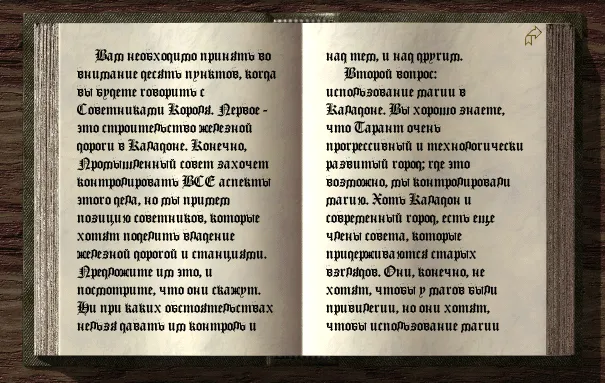
*1\. The construction of a railway in Caladon. Propose to **share ownership** of the railway and stations between Caladon and Tarant.*
2. The use of magic. Caladon wants magic to be used freely in the city. Tarant prefers to control magic but is willing to compromise.
3. Bates' steam company. Negotiate moderate restrictions on Bates' rights in Caladon.
4. The Caladon army. Caladon advisors will demand that half of their army be sent to United Battalions, but Tarant will prefer Caladon to completely disband its forces. Do not propose that Caladon fully maintain its army and fleet - they won't like it.
5. Membership tax. Tarant is interested in increasing the membership tax, while Caladon will want a delay on the tax with a gradual reduction. Stick to a moderate option; serious concessions in this matter should only be made as a last resort.
6. Caladon currency. It will benefit Tarant if Caladon immediately switches to the currency of the United Kingdom, but this can only be achieved in the best case. The maximum term for currency withdrawal, which should be agreed upon, is 5 years. If negotiations are going well, it can be reduced to 2-3 years.
7. Trade routes. Caladon advisers will insist on the longest period of tax collection from trade routes, and Tarant will benefit from their cancellation as soon as possible. The maximum concessions Tarant is willing to make are 5-10 years.
8. Trade unions. Tarant is against trade unions, and Caladon thinks they are good. Both sides will be satisfied if trade unions are allowed, but with limited rights.
9. The number of votes in parliament. Tarant wants Caladon to have only two votes in parliament for an indefinite period. However, if negotiations go extremely poorly, they can initially give them two votes, and then increase it to three in five years.
10. Farmers. Tarant prefers the cancellation of the agricultural tax, but Caladon is interested in its retention. The best option will be to reach a compromise in this matter, but if things go very poorly or extremely well, a more radical position can be adopted.
At the exit from Willowsby's office, the hero will be approached by a person who suggests leading the negotiations so that Caladon does not join the United Kingdom. This point is crucial, as the results of these negotiations will determine the game's ending. If you do not want Caladon to join the United Kingdom – agree, but in this case, the status of the master of persuasion will not be awarded to the hero.
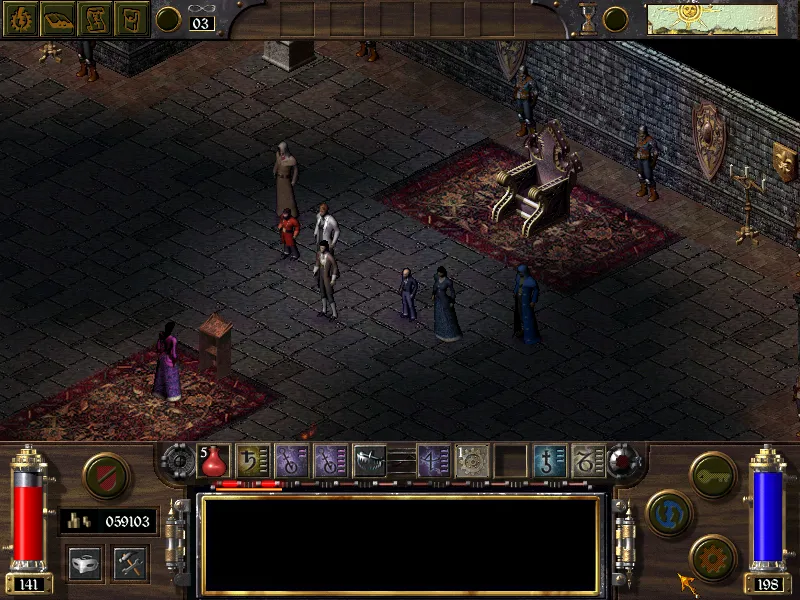
Upon arriving in Caladon, we head to the palace. Along the way, the hero will be accosted by palace visitors interested in resolving their issues for a fee. Whether to agree or not – you decide. In some matters, the guidelines allow for making certain concessions or achieving more favorable conditions. After the negotiations conclude, return the obtained agreement to Mister Willowsby, who stands on the street at the entrance.
As can be seen from the above list, many provisions allow for flexible decision-making. Compromise options will lead to average results. If you demand highly unfavorable conditions in one area, then in another, it’s worth conceding. And vice versa. The verdict is based on the sum of concessions and demands; the fewer privileges Caladon has, the more beneficial it is for Tarant, and the higher your reward will be. In the best result for Tarant, Willowsby will say that you handled it brilliantly and will award you 11,000 gold. In the worst case, you will receive nothing, and he will refuse to teach the hero to be a master of eloquence.
Technical Skills
Repair
Characteristic: intelligence.
Used: repairing broken items.
Apprentice. The overall durability of the item decreases by only 5%. Trained by a blacksmith in any city.
Expert. The overall durability of the item decreases by only 1%. Trained by Garrett Olmstead, Black Root; Mellin Bangerton, Tarant (Boyal), and any junk trader.
Master. The overall durability of items does not decrease when repaired. Additionally, the hero can repair completely broken items, sacrificing 5% of their original overall durability. Trained by Jeronimus Maxim, Caladon.
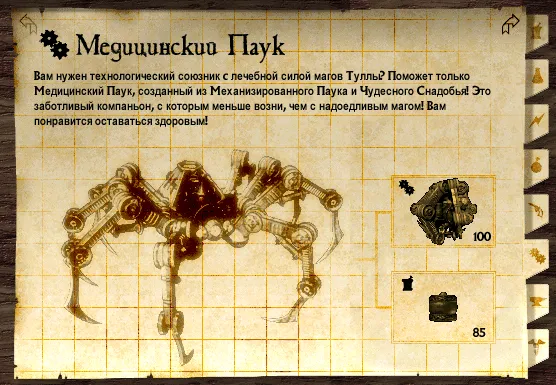
The factory, owned by the master of repair, is located northwest of where we enter the city. Maxim will train the hero in repair if he brings him a camera found at the crash site. But it’s better to ask him about what happened at the factory first and agree to gather evidence. In this case, Maxim will reward him with the Medical Spider schematic and teach repair for free.
Firearms
Characteristic: perception.
Used: when handling pistols and rifles.
Apprentice. The shooting speed of the pistol and rifle increases by 5. Trained by Dr. Roberts, Misty Hills.
Expert. The penalty for aimed shots (long-range) is reduced by a third. Trained by Dr. Roberts, Misty Hills, and Herkemer Oggdoddler, Black Root.
Master. No distance penalty. Trained by William Thorndrop, Ashbury.
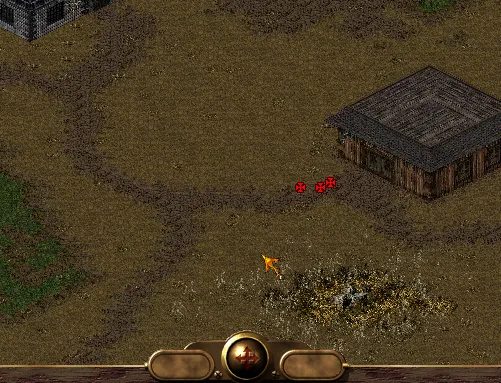
The master of firearms stands by the barn near the prison in Ashbury. Talk to him, and he will tell you that, repenting for his criminal past, he vowed never to inflict violence again, even cutting off his index and middle fingers to never again take up a weapon. When urged to make the hero a master of firearms, he will refuse. Do not leave, wait for a halfling with a letter to Thorndrop: his old enemy, who wants to take revenge for his slain brother, has taken his wife hostage and demands that William show up for a meeting. Agree to help and go down the path to the right, to the necessary barn. There sits a whole gang of bandits with rifles and shotguns (level 10-30). We kill them and loot their corpses. Keep in mind that their weapons and armor are quite big, so it’s advisable to free up your inventory beforehand to avoid unnecessary back and forth.

Return to Thorndrop and report that the halflings have been saved, then insist that he makes you a master of firearms. Reluctantly, he will agree to this and then go to atone for his sins.
Lockpicking
Characteristic: agility.
Used: to open locked doors and chests using lockpicks.
Apprentice. The character picks locks twice as fast. Trained by Lloyd Gurloff, Misty Hills; any thief from the Underworld if you are a member of it.
Expert. No penalty for lighting. Trained by Adam Maxwell, Caladon, and Garrett Olmstead, Black Root.
Master. The penalty for the difficulty of the lock is halved. Trained by J. T. Morgan, Caladon.
The master of lockpicking sits in a maximum-security prison in Caladon. You can ask a guard about him, or you can go straight to Roseborough, to J. T. Morgan's mother. Talk to her and offer to help her son escape in exchange for him teaching you the mastery of lockpicking. She will give the hero a set of special lockpicks to take to Morgan, and advise you to go to the prison at night.
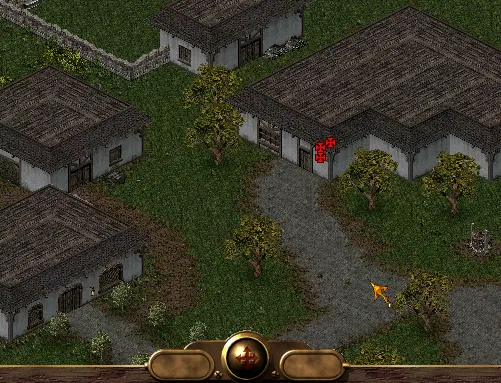
Wait for night, secretly pick the lock to the prison door, and jump into the hatch. It’s better to leave companions outside to avoid having them die while triggering traps. Watch your surroundings and try to avoid being near guards; stealth skill or invisibility will be very useful here. You can approach the cell where our master is held through either the right or left corridor – however, no one prevents you from checking all the rooms and filling your pockets with various junk. Mostly food, arrows, and potions, but if you go down the right side, you might find a magical shield in one of the guards' chests.
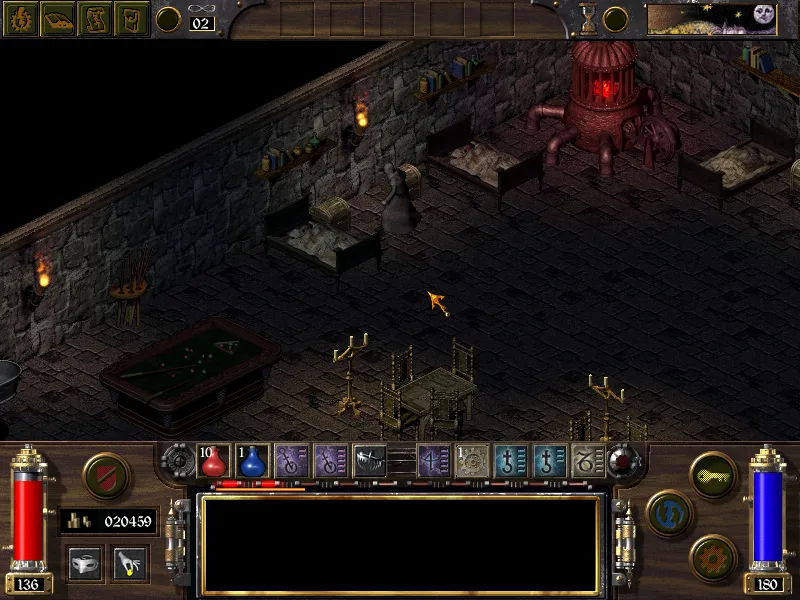
Guards patrol better in front of the prisoner's cell, so wait until they move far enough away, pick the lock, and go inside. There, speak to J. T. Morgan and ask him to teach you the mastery of lockpicking. He will say that by breaking in to see him, you’ve already proven you are a master at this, and that you don’t need his training.
Disarming Traps
Characteristic: perception.
Used: allows disarming detected traps.
Apprentice. No penalty for lighting. Trained by a blacksmith in any city.
Expert. On critical success, the character receives part of the trap (for example, poison, batteries, arrows). Trained by Adam Maxwell, Caladon, and Train Ironheart, Clan Wheel.
Master. On failure (excluding critical failure), the character gets a second disarming attempt. Trained by Daniel MacPherson, Caladon.

Find MacPherson in Caladon at Dragon Turn, 23 and talk to him. Ask him to teach you the mastery of disarming traps, and he will challenge the hero to navigate a self-mined maze. It’s best to ask companions to wait outside so they don’t die from detonating the mines.
Descend into the hatch in the corner of the room. We need to get through the passage nearby, but it is only accessible from the other side, so we will have to take a detour. Those who don’t mind the time but feel bad about missing resources that can be obtained from disarmed traps can run around the upper and left corridors, but the most straightforward route to the goal is the right corridor.
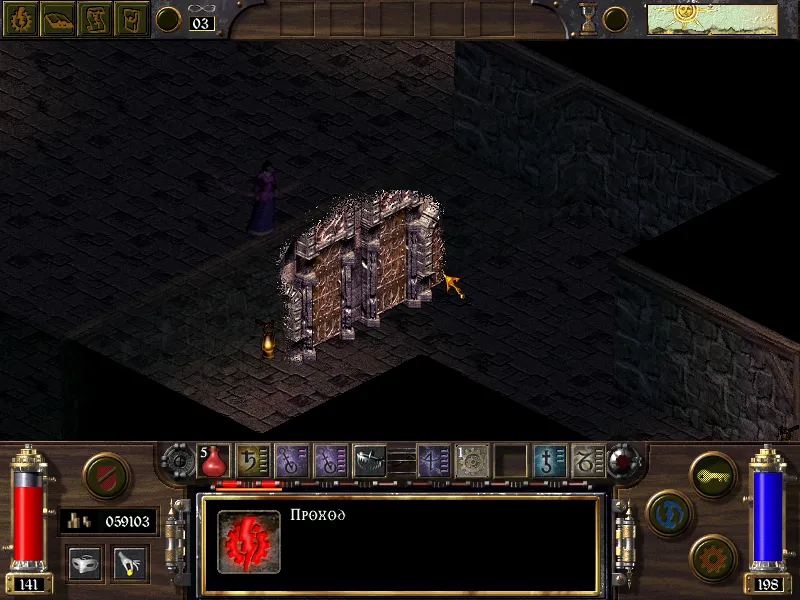
Without a sufficiently leveled trap detection skill, there is simply no point in being here. Unless you are a bulky figure with a good stash of healing items. However, if you have at least expert rank in detection, there should be no problems. Traps are scattered along the path, before the doors and on the doors themselves. The corridors here are not very convoluted but structured so that after traversing two other corridors, the hero will nonetheless end up at the third one, which is the only one leading to the desired passage. The shortest path is to the right and then down.
Once the challenge is completed, speak with the master of disarming traps, and he will reward you with the status of master and gift you master trap points.

Conclusion
Finally, I note that for each individual skill, a total of 15 points are spent (not counting penalties or bonuses to characteristics). Studying related skills, that is, those governed by the same characteristic, saves 10 points for each second such skill. Additionally, some skills are nearly meaningless without each other, such as lockpicking and stealth, or detection and disarming traps. Therefore, it makes sense to approximately plan in advance which skills are needed and which characteristics to raise if you plan to seriously pursue them.
Thanks for the offline post editor — Midest.