Party Leveling
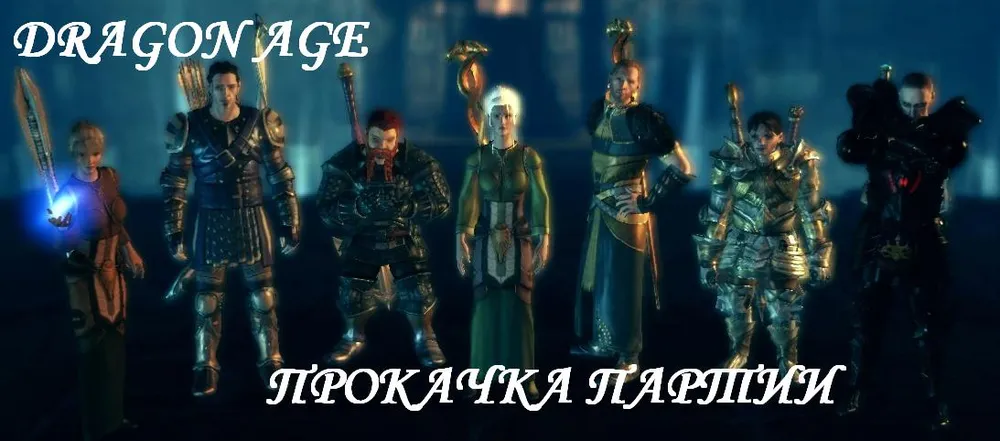
Dragon Age: Origins is a party-based (hardcore) role-playing game. However, it's the first role-playing game in a long time where gameplay isn’t just an addition to the role-playing elements, story, and atmosphere. The developers achieved a very delicate balance where the right and wrong actions of the player have significant differences in effect. That’s why this guide was created, containing brief guides on the main roles in a party and tactics for playing them. Thanks to this, beginners can understand how to avoid pitfalls when leveling their character and how to assemble a team to not struggle with bosses for too long.
For detail enthusiasts, we recommend checking the Guide – there are plenty of character leveling options there.
All classic party RPGs and MMORPGs in PvE (Player versus Environment, meaning players against monsters) are built on four foundations: Tank, Healer, Damage Dealer, and Controller.
Tank – a character who takes all the damage from the enemy, their goal is to protect their party members at the cost of their own life.
Healer – a character whose main goal is healing. If the game is based on those very three pillars, the damage that the tank takes is usually much greater than their health pool. Therefore, a healer in a party is an irreplaceable ally.
Damage Dealer – a character that deals the main damage to enemies. Their primary goal is to do this quickly.
Controller – a character who temporarily disables enemies in various ways so that the damage dealer can quickly deal with them while they are incapacitated, or to give the tank a brief respite.
To start:
**GAMER-RUSSIAN GLOSSARY:**
* Agro – monster hate. The more agro a character has, the more likely they will be targeted.
* To Agro – to attract the attention of a mob and either voluntarily or involuntarily provoke their aggression.
* To Agro a mob onto oneself, preventing them from aggroing other party members – this is the main task of the tank.
* Agro-control – essentially preventing this very aggro.
* AOE (area of effect) – damage zone; an AOE spell is a spell that works over an area. In Dragon Age, it always has a ground marker. Do not confuse it with multi-target spells. Examples include fireball, cone of cold.
* Aura – in Dragon Age, an ability that requires activation, consuming mana over time, but providing various buffs to the entire party (possibly debuffs to enemies).
* Buff – a temporary positive effect applied to oneself or allies.
* Large AOEs – spells with a very large area of effect. Examples include Storm of the Century.
* Backstab (back stab) – a blow to the back that automatically counts as a critical hit. Mainly found with rogues, as backstabs are more beneficial to them.
* Branch – a group of spells/abilities unified by "element" or "skill" (common meaning), usually consists of 2, 3, or 4 entries.
* GG – main character.
* Damage (damage) – damage.
* Damage Dealer, DD (Damager, Damage Dealer) – the one who deals damage.
* Debuff – a temporary negative effect applied to enemies or placed on the player’s team by enemies.
* Disable (disable) – to incapacitate, and in gaming terminology, an ability that removes the target(s)' ability to attack/move/cast spells. Anything that does not limit movement is not a disable but a debuff. Everything that does limit is a disable.
* Dispel – the act of removing buffs/debuffs.
* DA:O – this is not from Chinese philosophy; it's an abbreviation of the first letters of the English title Dragon Age: Origins.
* DPS – from English DPS – damage per second.
* Imbalanced – unbalanced; exceptionally powerful compared to everything else presented in the game, for example, imbalanced weapons.
* Cast – spell; to cast – to invoke, to conjure.
* Crit – critical strike.
* CD, cooldown – the recharge time of a spell/ability.
* Loot, drops – everything that drops from mobs.
* Mana cost (mana cost) – the mana cost, and here also stamina.
* Melee (melee) – close combat.
* Melee unit – a close combat unit.
* Mobs – non-narrative opponents (those that cannot be negotiated with) that come in single and large groups to ruin your hero's life (in DA:O, the main mobs are the Blightspawn, but hostile humans, elves, mages, animals, possessed beings, and corpses of all types also appear).
* Multi-target – spells that work on more than one target. For example, chain lightning, explosive shot.
* Nuke (nuke) – direct damage done by magic.
* Nuker – the same as a caster, damager, or battle mage (do not confuse with the specialization "Battle Mage"). A mage who can use battle spells, unlike healers, provides substantial support to the party in battle. In DA:O, Morrigan is usually leveled as a nuker.
* Passive – a skill that works constantly after leveling up and doesn’t require activation.
* Party – a group. In DA:O, it can consist of four members, plus, if the rogue has the specialization "Ranger" leveled, they can summon a fifth companion (wolf, bear, spider), and if the mage has the spell "Bring Dead Back" – they can summon a zombie (together with the spell "Magical Power," it will be stronger).
* Perk – a fictional concept from the computer game world. A perk is a special trait, a personality element, a distinctive feature of a game character. In DA:O, these are skills.
* Pet (Pet) – summoned creature.
* Range (range) – ranged combat.
* Rogue (rogue) – a thief.
* Support (support) – support, a support character. Usually, a support = healer.
* Setup (set up) – a specific party/team composition.
* Spec – specialization.
* Spell (spell) – a spell or ability.
* Stats – character attributes.
* Line – four spells/abilities arranged in a row, where right spells/abilities require all the spells/abilities to their left to study them.
* Tank – a character with a large health pool and good defense who takes the main hits while other players deal damage. A tank usually works in tandem with a healer; otherwise, they won’t last long, and the point of their actions will be lost.
* Heal (heal) – to heal, healing.
* Healer (healer) – a healer, primarily engaged in distant support of a squad by healing and applying beneficial spells. Although making a healer without at least one offensive spell is practically suicidal. In DA:O, a classic healer is Wynne.
HEALER
***Role*** - an endless replacement for band-aids and a gift in the form of positive effects
Candidates - Wynne
Why not the main character? Well, let’s agree, it’s a bit unreasonable to make yourself the healer when Wynne is already fully geared for healing and possesses the required specialization that you won't acquire without Wynne during your first playthrough. But if you have already completed the game and the pesky old woman has become quite tedious for you, you may leave this role to the main character. But it's still more convenient with Wynne.
Characteristics – since healing is not significantly enhanced by leveling magic power, and it is more important to heal longer than to heal stronger, we mostly take Willpower. Magic Power is only taken for obtaining any spells.
Crafts – no crafts are needed at all. Specifically for healers – none. There should be at least one herbalist in the party, and who that will be – Wynne, Morrigan, or the Main Character – does not matter. A second level of combat mastery can be taken as it provides a boost to mana recovery, and all other points can be put into tactics, so that we do not distract ourselves too much on the healer during difficult moments of the game.
Clothing – any that increases willpower and mana pool can be worn, it can be on magic power or mana regeneration in battle.
And the most important thing – Spells
In order - what Wynne has initially leveled up is practically completely useful, except for one line - Earth in the Elemental Magic branch. Why? This is so-called a sidestep, in case you don’t want to make Wynne a healer (which is strange). Earthquake and Stone Fist – that’s not our task in the party, and the armor is an extremely specific spell that we’ll discuss later.
I won’t get ahead of myself; I'll say that if the Fist may still be useful, as well as the Magical Arrow, then the other two points are a loss.
Otherwise, we have a Creation Branch:
Line Auras - taken

A) Heroic Assault. Depending on the type of your damage dealer, it can be very useful. It also compensates for attack reduction effects on party members when dispersing is impossible.
There's no tactic for the principle "when your ally attacks in melee (and not when they are attacked)", so either set the tactic to always or manually.
B) Heroic Aura – a great thing, protects against ranged attacks, should be cast on the tank in the presence of many archers, and should be refreshed when possible.
Tactic – attacked with ranged weapons, can only apply to the tank, can apply to all.
C) Heroic Defense – saves from melee attacks. Similar to Heroic Aura, but not against archers, but against melee attackers.
Tactic – attacked with melee weapons, mainly for the tank.
D) Speed Aura – a controversial matter, opposite of Heroic Aura, meaning it gives attack speed but with a penalty to attack. If your main damage dealer suffers from a lack of attack, you better not level this at all. Although running across the map faster helps with the Speed Aura.
No tactics available.
Line Healing

- you will need absolutely all of it, and often one spell won't be enough. Tactic – healing can remain ≤50%, and regeneration for the tank is better to set ≤75%, as it heals gradually.
Cleansing – you decide for yourself. If it's used for actively mana-consuming mages, you can set it to 75, others will do with 50.
Group Cleansing – cast only manually.
Line Runes

- a great line, very useful as it imposes effects, simply in another way. Essentially, apart from the runes line and aura line, there are no other ways to boost the party.
A) Paralysis Rune – a mid-level spell. If you have extra mana, it can be used to incapacitate one enemy. This rune can center towards the target, which means if you click correctly – you won't miss.
B) Defensive Rune – gives bonuses to mental resilience, defense, and deflection of ranged attacks. It’s better to cast this under the tank.
C) Repulsion Rune – can be useful to prevent enemies from reaching your healing party members. By itself, it often pushes back and does not touch allies, and if you cast Repulsion and Paralysis runes in such a way that they intersect at least partially, then an explosion will occur at the place of application of the paralysis rune, paralyzing everyone in a huge radius. It does affect allies, so escape with the entire party and far away.
D) Neutralization Rune – should be placed under enemy mages; it can sometimes be used as a dispel. However, it being a mana drain suggests it's aimed at enemy emissaries (mages).
The trouble is that since mages aren't often found in the game, the rune can be very useful but rarely used.
If you've already taken the rune line, it's possible the party won't need to level the Paralysis line further than the second spell (though you could take the third).
But the controller will be below.
Line Nature

Essentially, this is an additional line in the Creation branch. If the first flicker may still be useful, although an extra magic power is dubious for the healer, then the puddle is rarely usable, we'll touch on it later. The flower is useful, but getting to it takes a long time, and after it, the swarm is not for the healer.
What you really need is in
Spirit Branch:
Line Anti-Magic

The first spell is practically useless as the healer shouldn’t take any damage – there’s a tank for that. Plus, mana is precious.
However, dispel has only a couple of analogues and is an extremely important spell. Here it should be noted:
The whole truth about dispelling.
Quote:
The developers did not think long about how to make Dispelling, so they did it in a crude way – Dispelling completely clears your line of "buffs". At first glance – what’s wrong? But auras and passives are also accounted in buffs! And what happens is, you lose absolutely everything. How to manage auras and passives that need to be reactivated – you reactivate them again, dear sir. Some classes, living off buffs, can kill themselves with this. There’s a recharge time for all auras and passives; although the latest patch reduced it, it’s still unpleasant. The developers forgot to make checks for aura/pasive presence and refresh them like in all other RPGs. And while refreshing aura of another character is not so difficult – well, they can just activate them again; refreshing all passives is very unpleasant. Quite a significant miscalculation.
Abilities for dispelling – Dispelling Magic, Anti-Magic Burst, Neutralizing Rune, and Area Cleansing (Templar).
It's also noteworthy that Area Dispel effects also remove all runes on the ground (the Neutralizing Rune will not dispel itself, of course).
But still, dispelling remains a very important ability, and it opens access to the Anti-Magic Barrier.
The Anti-Magic Barrier – applies a shield on the target that completely blocks ALL NON-physical damage. Only damage. It also blocks the application of pinpoint spells. And only the Ice Cone and Fireball can affect the target in the barrier, but without causing damage. In other cases, instead of standard resilience, it will say "Spell Immunity".
An extremely important ability should definitely be one in a team – why I’ll explain later.
After that, healer spells end, and if you have spare points, you can invest in any other spells that will be highlighted below.
Specializations - naturally, Spiritual Healer.

The only unnecessary spell in it is the last as healing usually isn’t needed for everyone but the tank; for everyone else, there is single-use "Group Healing" that usually suffices. And for single target healing, it’s better to use simple "Healing" and "Regeneration" – they are much more cost-effective in terms of mana.
The second specialization... is not needed. Any one that fits any other mage's needs will also suit the support. But perhaps the simplest option is to only go with 1 specialization. Still, the healer needs a lot of spell points. The second specialization can be taken solely for the stats which it gives as a bonus to the specialization.
CONTROLLER
***Role*** - to turn the battle into a massacre of enemies in the order of arrival.
Candidates - Morrigan.
And again – why not the main character? The answer is the same as with support – it’s illogical to turn the main character into what Morrigan already is. Plus, she has spells better dispersed. Only if this cynical witch has become annoying to you, do make the main character a Controller and don’t take Morrigan into the party.
So what is control at all - it entails taking enemies "out of the game". Usually, this means total incapacity to move, attack, and cast spells. Control can also be called disable. The controller's duties also include imposing debuffs – curses that lower attack, defense, movement speed, and more.
Characteristics – since the most annoying thing for a mage in the game is "Adaptability" we invest only in Magic Power. You will be surprised at how much less often a controller (not combining DD functions) needs to drink mana than a healer.
Crafts – again, we need nothing. But if the controller is Morrigan and not the main character, her herbs will already be significantly developed at the start, logically, among the entire party, she should finish homework to the end. By the way, Morrigan already took combat preparation for 2 points, which gives additional mana regeneration in battle.
Clothing – any that increases magic power and elemental damage (from fire is the best, fireball is our everything). Also occasionally can wear willpower – this is mana reserve and her mana regeneration in battle.
Spells - First, we straight up reject everything that the support takes, and especially what the support deems useless even for themselves.
So what do we have?
Elemental Branch
Mostly it’s a DD branch, but we need a couple of spells here.
Line Fire
C) Fireball! Why the exclamation mark? Because this is your primary spell. Moreover, it combines both control and hefty damage. This is one of those cases when a harmful resistance only works on holidays – fireball can knock down even Orange Bosses. The exception is Unbrakeability, but here everything is clear. Add a little mana cost and cooldown – and you get a wonderful spell.
Don’t believe me – you will see for yourself when you obtain the Fire Form in the dreams realm, and after that, it’s impossible not to level up Fireball immediately and for all non-support characters.
Preceding spells to the Fireball in the fire line don’t interest us much – cone of fire is weak, fiery weapon is standard, and replaced by telekinetic.
Line Earth

- a strange line. The first spell is specific and unnecessary for the controller, we will talk about it later. It is now time to talk in detail about how magic deals damage on a single target.
Tale of how mages used to kill single targets:
Quote:
The thing is that only 4 spells deal direct damage to a single target – Magic Arrow, Ice Grasp, Lightning, and Stone Fist. All of them can be taken early in the game and seem to be “cheap”. However, apart from them, nothing in the game can deal direct damage to one target. Therefore, the mage must first definitely* impose Vulnerability Curse on the target, which greatly increases all magic damage, and subsequently time their casting in a sequence of the above spells. If you take any 3 of them and do them in turn, you will have a few seconds between the application of the 3rd and the cooldown of the 1st. And if you take all 4, you can chain-click them without stopping. Surprisingly, even though these are the first and seemingly “cheap” spells and despite the niche “resistance”, a mage is the most reliable DD for single targets. The most reliable and strong. The only minus is you will have to burn mana like a madman. All AOE deal the same single target damage as these first spells, just the plus of AOE is that you have a lot of targets at once. The downside to the 4 spell approach is that you will constantly aggro the boss away from the tank due to the immense damage, and regaining it is difficult. Therefore your choice is whether to take all 4 spells or not. Practice shows that 3 spells rarely pull aggro.*
And a little more on single targets specifically for the controller – when only the Boss remains, there’s no one left to control. That is, the controller becomes a regular DD for a single target. Morrigan already has Ice Grasp and Lightning for that. If the controller is the main character – you have Magic Arrow available. However, taking Morrigan 3rd spell is necessary in most cases; otherwise, you will stand idly for a long time. The 4th – is at your discretion.
This is regarding the fist.
Let’s move on.
Earthquake – relates to Large AOEs. We’ll discuss them later, for now, I will say you should not take them.
But I cannot avoid the next detour.
A tale about strong disables:
Quote:
There are 4 of them in the game - Crushing, Petrification, Paralysis, and Nightmare. Why strong - because they completely turn the target off from combat, while they can still be attacked (unlike Force Field). Therefore you will find that at high difficulty levels, they will work against Orange Monsters. On yellows, maybe once in a while. They consume a lot of mana, using them against whites is pointless, and on yellows, you will constantly see “resistance.” Therefore leveling these spells is generally a question. I wouldn’t recommend it, although it depends on the person. You should take Paralysis and Nightmare, but we’ll talk about that later, they aren’t “final” in lines.
Thus, within this line, just get the Fist and leave it at that.
Line Ice

A) Ice Grasp, which is the only one of the 4 single-target nukes that also acts as a full disable, is very useful and already leveled.
B) Ice weapon – again, telekinetic is better – but it gives access to the Ice Cone.
And since more than one detour has fallen upon the controller, let’s have one more
Guide to drawing cones on the floor with chalk or paints:
Quote:
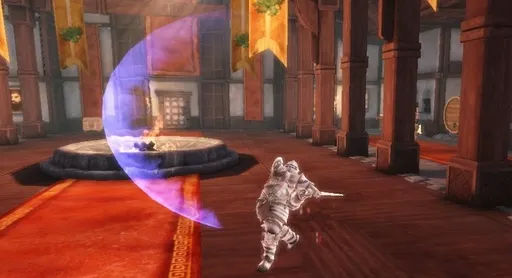
There are three cones in the game – fire, ice, and lightning. The first is not needed at all apart from the start of the game, but all have nuances. Each spell has a cast time, as do the warriors - attacks. If you give a new order before this time has expired, the spell will be canceled. Some spell’s cooldown activates in this process (fact - chain lightning), while others do not (fact - fireball). So. If single-target nukes home in, a delay in the ice cone cast can be fatal. Pressing pause and highlighting enemies running towards you in the center of the cone, you may find that they were actually running towards another party member when you let go of pause, and thus ran by while the mage waved their staff. Therefore, you have to catch the runners “on the sneak,” as in shooters. The exception is Ice Cone. It casts even slower than lightning or fire, but as a trade-off it freezes those targets that were in the marker at the moment of mouse click, instead of those that ran by during the casting. Absurd situations arise – an ally was ordered to run out, however they missed, freezing alongside enemies… behind the spellcaster. Be cautious.
But let’s return to Ice Cone – together with Fireball, this is one of the main spells any non-support mage must have. It also rarely receives resistance, working quite reliably on bosses, even dragons, though freeze time on bosses is shorter. Regular targets generally stay frozen as long as their cooldown goes! Thus, catching many enemies that we currently don’t care about can keep them in place for as long as the mana lasts.
The only downside is that it’s a Cone. Compared to, for example, the range of archers – consider the spell a close-combat spell. By the way, it also usually freezes those who approached your tank or other allies. Don’t even think of running up to the archers from two screens away to freeze them – you won’t make it.
D) Blizzard – a Large AOE, we will cover it later, don’t take it.
Spirit Branch
Line Mana Drain

By structure, the entire line is focused on fighting mages. In order:
A) The spell extends our mana at the expense of enemy mages, with small cooldown, no mana cost, all is good, but mages do not often appear, hence the line’s main issue.
B) Mana Burn – theoretically, it burns all mana, but in practice, after this, emissaries somehow manage to heal back. Complex difficulty. Unclear. Fact.
C) Magical Power – a truly useful thing, but is it worth the effort of climbing two points?
D) Collision of Mana – deals high damage to mages, as damage equals all burned mana. Some bosses will likely show contempt= resistance. However, despite its usefulness, the small number of genuinely dangerous mages may move to not spending 4 points on this matter.
Line Necromancy

A) Walking Bomb, this is divine. Requires finesse to apply, but when all spells hit for 40-50 damage, the bomb detonates for a whopping 130. It greatly facilitates the clearing of groups of enemies. How to use:
When an enemy has health left for any nuke, pause the game. If the spell you are planning to finish off the enemy with is Ice Grasp, the scheme is as follows – click on the bomb to cast it and just as it hits the enemy, hit pause and activate the Grasp. If there's no resistance, the target will explode. However, if the spell is Cone or any other single-target nuke, pause the game, select the target for the bomb, and the moment the bomb (small white oval) leaves the spellcaster's hands, pause the game and direct any other spell. It will look spectacular – just as the bomb hits, the other spell catches up with it and the bomb blows up. Nuances – the bomb “lies” in the target for a short time, so it needs to detonate quickly. Therefore, never neglect the dances described above. The bomb has reasonable cooldown, use it properly.
B) Death Vortex – when activated, a vortex appears around the character (barely noticeable, blue). Once every second or two, it decomposes one corpse, giving you mana in the vortex's radius. A useful spell, whether to level up or not – it’s up to you. It opens access to:
C) Infectious Walking Bomb – the same bomb, just doesn’t require activation dances. It finishes off automatically. It’s best to throw it on a target that is dying.
D) Summon Skeleton – an extra hand (even if dead) that can hold a sword is always useful. To level or not – it's up to your discretion.
Line Mind

A) Mind Blast – already taken by Morrigan. A useful spell if they reach the mage. Using it as "ran up - stunned - ran back" is not advised except in emergencies – you will pull aggro.
B) Force Field – A wonderful spell one must take; it has a ton of applications, but is wonderful in that it works on Orange (although less effectively in duration). With it, you will rarely see resistance. It completely removes a target from the game for a long time but makes them fully invulnerable. The applications are more than you think. More below.
C) Telekinetic Weapon – the best “enchant weapons” from the three options. One should always be in the party. Preferably not with a support.
D) Crushing Prison – a strong disable that has been discussed above. I do not recommend it, but on request.
Entropy Branch
Line Paralysis

- a very useful line for the controller.
A) Weakness – a standard debuff, as well as Loss of Orientation in the Sleep line.
B) Paralysis – similar to Nightmare, just not such a fashionable combo. Still worth taking.
C) Poisonous Vapors – it’s doubtful you want to run close to enemy melee fighters applying penalties on them, but if you trust your tank's aggro – it’s quite believable. It’s also a good idea when being chased.
D) Mass Paralysis – mass control that allows you to kick targets. What more happiness do you need?
Line Curses

- you must take the first two curses.
A) Vulnerability Curse cast on a strong target combined with “Life Drain” is a pretty good thing, as is being used with single-target nukes.
B) Infectious Curse should be cast in every battle, preferably on a white target (so it doesn’t resist) and on one you won’t touch for a long time. After all, the curse spreads from the target and when the target dies, the effect will end.
C) Deflecting Curse – essentially a debuff but a VERY strong one. If it successfully applies to the target, its critical hits become regular hits, while regular hits turn into misses. If it goes off on a boss, the boss (only to melee characters) remains helpless.
D) Deadly Curse makes every hit on the target critical, which is very good against bosses – it should concern all damage dealers except a Rogue-melee, why I’ll explain below.
Line Sleep

A) Loss of Orientation – a decent debuff; use it on a strong target once they’ve been out of all controls. It’s picked for more important spells.
B) Terror – an excellent control that can even work on an orange target. It disables the target very long (the stronger the target, the shorter the time). One must pick it.
C) Sleep – the MAIN spell of the controller because it almost never meets “resistance,” except for orange ones, but it works reliably on them. It allows you to execute that very queue – whoever you woke, you crush. It has an enormous AOE. And most importantly – Sleep + Terror – there are several spell combinations in the game, but most are boring (e.g., smacking the frozen one), and this has a truly huge practical purpose. If you manage to put an “orange” to sleep, you can quickly cast Vulnerability Curse (for greater damage) on the target while everyone is asleep, and then immediately cast the nightmare. The target will receive huge damage (around level 15, it was 140 damage from Spirit magic, without the curse). And it will NEVER reflect the Terror. And a boss that is 100% guaranteed to be in control is, you know, a big win claim. It’s very likely that you will have time to stamp it down before everyone wakes up. That’s a very important feature. Miracle combo.
D) Nightmare – Although it appears after sleeping, it is a reduced version of it in everything – unreliable, has a smaller AOE, longer cooldown. However, if out of 5 enemies at least two of them get behind you, it means they will find a “partner” for dueling and already 4 will be out of battle continuously taking damage. The remaining 5th will stand in a stun. A useful spell, must take.
Line Life Drain

A) The spell is already in Morrigan; play the game “self-Wynne.” Sometimes useful, can be taken if the controller is the main character.
B) Mana Draind from corpses. Here you’ll have to run across the battlefield to gather corpses. An unsuccessful parody of the game mentioned earlier.
C) Death Curse – prevents the target from healing and deals minuscule damage. Healing among enemies in the game mainly appears towards the end and very seldom. A rather foolish spell. But when it is placed on you – if you don’t dispel, you will in most cases be 100% dead.
D) Death Cloud – Large AOE. Why not level it will be written later.
So in general a useless line.
That’s it for what the Controller can take; there’s still the common magical line, but I will be brief – everything except Magic Arrow in it is nonsense. Apart from Magical Defense; it will find usage in the game but later on.
Specializations – there is no perfect specialization for a controller in the game, but a decent option is Blood Magic.

This specialization can be useful for both DD and Controller, whereas others will be as useful as for any other mage. Better not take them as well; we are lacking points as it is.
TANK
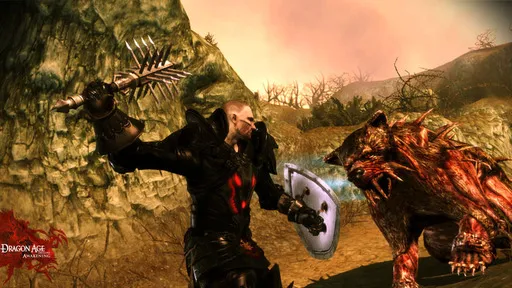
***Role*** - to take hits for the whole squad.
Candidates – This is where things get complicated as the controller and healer were described earlier. In general – Alistair/Loghain, naturally the main character, it’s also possible to take Sten.
Characteristics - The main characteristic of the tank... Constitution. Only the game doesn’t give the chance to level it up. A lot of strength is needed for armor and abilities, also some shield skills require agility. We’ll just take Constitution for “whatever remains.”
Crafts – Combat training to the max and preferably Survival to the max. If the tank is the only melee character in the party - you can learn Poisons instead of Survival.
Clothing – ideally maximum bonus to armor and health is required, very important items with bonuses to incoming healing are useful for survival.
Abilities - The main role of a tank is aggro generation, not survival. The tankiest dude is useless in a party if no one hits him. Thus, any tank takes All Taunts (= provocations).
There are two of them in the game – Intimidation and Provocation, in standard warrior abilities. You need to get to both of them, spending one point each. For this reason, Sten does not fall behind Alistair as a tank – he has all aggro taken at the outset. But for now, let’s break down the mechanics of aggro generation.
Instructions for Handling Monster Rage:
Quote:
First, monsters throw themselves at whoever they see first. It's not a huge aggro generation, but dropping it is harder than getting it, so always run around the map world as the tank, centering the camera on them. Then they will receive aggro at the beginning of the battle. After, aggro can be obtained in three ways – Taunts (artificial means), damage to enemies, and healing, do not forget about this. If you heal more health than you inflicted, they might rush at Wynne.
As combat usually starts with control, the Tank should hit anyone immediately. They deal little damage, but aggro flows fast due to Intimidation. When everyone shakes off, you should immediately use provocation. The tank's main goal is to keep aggro while not dying. Nothing more is required of them. Aggressive acts can easily pull aggro away. But if the tank regularly hits and has Intimidation and provocation activated - then it’s a regular occurrence, monsters won’t be deciding to leave such a tank. By the way, if you notice frequent misses from the tank, cast Wynne’s Heroic Assault on them and enhance their strength. A tank who misses a lot won't generate much aggro.
Don’t forget that the heavier the armor, the more aggro you’ll grab.
For this reason, Sten has the right to tank just as Alistair does. But there’s also one more thing - namely, the purpose of Shields. This needs separate consideration.
Protect Me with a Shield:
Quote:
A shield provides a modest (to put it mildly) but nonetheless some boost to overall armor and reflects ranged attacks. Essentially, if one doesn’t take abilities from the shield, all a shield can do is reflect archer attack. If you level up shield abilities, the tank will also be hit less from the flanks, which is useful. But in situations where there are no archers, and the flanks are not attacked (hint - battle with Orange or Boss) a shield is mostly useless. Don’t forget - damage=aggro. Thus, it’s more practical to equip a two-handed sword for a second weapon for a tank. Leveling isn’t necessary. But it wouldn’t hurt, since there are few tank abilities in the game.
This is the second reason that Sten can be a Tank. And although there isn't a single skill that completely fits the tank, the closest one is Knight: we reduce enemy attack (live longer), raise defense and offense for allies and self (plus to aggro generation and survivability), and knock down enemies, which generates more aggro and a breather. Nothing directly, but everything is useful.
They should also mention the Butcher

We extract life from corpses (survivability), make a little extra taunt, which also strengthens our two usual ones (a miracle!), deal damage to everyone around (debatable) and hit harder the less health remains.
Everything is wonderful. However, the combo "Butcher + Knight" – it is not quite a tank. This is a semi-damage dealer. So, either adapt the party for such a guy, or seek a second pair for the knight.
Berserk is not worth taking, as all its abilities are aimed at increasing damage.
Lastly, there’s the Templar.
This gentleman half-supports, but he has the ability to stun all AOE (and if they are mages, to humiliate them) and has a great mental resilience so as to not be caught in sleeps or paralysis. For a classic tank, we take the connection “Templar + Knight.”
So, three roles are covered, and only one versatile role remains.
DAMAGE DEALER

***Role*** - kill everything while the others are occupied with party members.
Candidates - everyone except Wynne and probably the dog (more on her separately). This is why more will be said about the damage dealer than about the others.
Crafts, Characteristics, Clothing, and Skills – depend on the type of damage dealer.
Option one, the simplest one –
TWO-HANDED SWORD
This type of damage dealer is very popular with newcomers due to the biggest pops.
Candidates – GG-warrior, Sten, Ogren.
Characteristics - STRENGTH! and nothing else. A bit of agility can help in defense.
Crafts - Combat mastery, then Traps, Poisons, Survival at will.
Clothing - Wear armor that best fits the bonuses rather than the thickest (explained in aggro generation). What we need is – Attack, Damage. Armor piercing is unnecessary; this will be examined more in detail below.
Abilities and Skills
Besides standard warrior abilities, we have one branch, consisting of three lines.
But first – any warrior damage dealer must take the Exit from Combat (third skill of the second warrior line).

The taunt works the other way – removes aggro. It’s paramount that they hit the tank and not us.
However, note – due to thick armor we can temporarily act as a tank, but mainly only on bosses. It’s not the best choice, but if you lose aggro significantly, then it’s not fatal.
It’s also advisable to take the last skills from either line of warriors to regenerate the scant endurance; it's very important, whilst removing misses is great. And increasing critical chance in crowds delights.
(Native) Two-Handed Weapons Branch
Line Stuns

We take the whole line. Sheathing strike – additional control, not unnecessary. Unyielding – really amazing if aggro is lost or if the boss can stun everyone, not just the tank. The chance to stun can also work against the boss. Useful. Adjustable crit is also essential.
Line Armor Breakers

Equally crucial. The first spell – a debuff; better not spend endurance on it. Slashing golems also gets easier (the second spell) but breaking armor… Damn imbalance (from imbalance - unbalanced). This ability reduces armor TO ZERO. So if you have 10 or 40 armor, TO ZERO. Based on how I (in nightmarish dreams) received damage, raise armor degradation, because monster stats can’t be viewed. For long-living enemies, it should be hung on and applied when cooldown comes around.
In light of this, why the 4th spell (which reduces armor even further) is needed is quite unclear, but it will make it easier to slay regulars. By all means, take it.
Line Mighty Strikes

And although activating mighty strikes is a controversial decision due to attack penalties that aren’t entirely removed by the third skill, it’s worth it to reach the single multi-target strike at all costs. Especially considering the nominal damage with two-handed weapons.
Specializations: - Berserk without a doubt. For 4 points, you gain damage increase without penalties and one very strong strike; we’ll discuss it later in tactics.
The 2nd – any if there remain points for its development. Knight will improve performance in hits and strengthen the position of the second tank. Templar is always a benefit, but no more than 1 in a party, Butcher – more tank, likely the damager shouldn’t take it and waste 4 points on just one useful but risky spell - high damage at low health.
The second option, the easiest for hardcore players:
NUKER

Only available to mages naturally.
Candidates - GG.
Characteristics - Magic Power!! Preferably not to take anything else, though a little willpower to manage a few spells at once will work.
Crafts - Not demanding, Traps, Survival, Poisons - optional. Though taking traps isn’t the best since you need to walk near enemies (though the battle mage can handle that, we’ll get to him later). Poisons can also work for the battle mage on their weapons and for grenades if no one else is left. You can take combat craft twice for mana recovery.
A few words about the mage - the largest AOE damage, the largest single-target damage (look at the summary) but requires careful leveling, a plethora of blue bottles, and smart control.
Clothes - exhaustion is our enemy, robes are our friends. We take things with elemental damage boost bonuses (various gloves and rings +20% fire damage, etc.), and magic strength. Sometimes, you can grab extra mana reserve or mana regeneration in combat.
Abilities - everything listed previously in Support and Controller we take solely and purely when we have spare points. But they will exist in any case; most likely you will have a Damager with small control.
Elemental Branch
1st spell - Fireball. Already described; taken for damage.
2nd spell - Cone of Lightning + Cone of Cold. One freezes the crowd surrounding the tank (the tank should be encircled in an anti-magic barrier), the other diminishes.
3rd spell
Line Lightning
And especially Chain Lightning (G). Excellent damage, but with nuances:
- Requires casting time;
- the target you focus on with chain lightning has resistance, the entire spell will be lost;
- If there are insufficient targets for the spell to bounce, it may end prematurely or incompletely;
- It may hit allies.
4th spell - for single targets, use 3 or 4 nuke spells on single targets requiring the curse (if of course that mob doesn’t have “resistance”).
5th spell -
Creation Branch
Line Nature

A) Magical Glow – enhances our magical power (that is, increases damage). It’s useful to activate when you’ve already used 50% mana.
B) Mud is going to be explained shortly; it’s worth taking to reach distant spells but can also be thrown at annoying archers before Fireball. Look, once they rise, they will still be hit by the fireball. Don’t overly expect that.
C) Magic Flower – increases mana regeneration, which will be scarce; taking the flower beats tinkering around with willpower levels. No points will remain for a controller on that; it has already been outlined for a healer. Therefore, let’s take it.
D) Swarm – huge single-target damage (rare exception to the 4 nuke rule); potential multi-target (if the yellow was killed, but whites still exist). It’s useful; we’ll take it.
6th spell – take Walking Bomb (Spirit Branch, Necromancy line), if you don’t have it in your party yet.
Time to talk about Large AOEs.
The Tale of Unseen Clouds:
Quote:
*Developers logic is ironclad – if such a large structure can hit many enemies (theory) then let it hit weakly.
Great. The result – any thrown cloud (Large AOE) at a group of archers (which can be hit in this way at no more than 4 because others stand across the battlefield, yet you realize the Large AOE isn’t that large), doesn’t kill that group of archers over the course of action and is generally weak; according to the logic, clouds need to be thrown at those far away. But it strikes weakly. To throw in such a way that it hits melee guys – adds extra problems for your tank and healer. Anyway, you might just take one. The rest duplicate it. And since you’ve already taken Storm (an electric cloud), the choice is clear. That these clouds can drop monsters (Earthquake and Mud) and do strange things to them (Blizzard) won’t help you at high levels of difficulty. Moreover, these cloud types are shorter-lived than standard clouds.*
Oh yes, why six. Here’s the lineup - Electric Cloud, Fire Cloud, Earth Cloud, Snow Cloud. Deadly and Mud. What’s the deal with Mud? You can set it on fire. Only it burns very weakly, but often. Just very weak. Well, 2-5 damage – when a magic projectile does 50-60, that’s not funny. There’s also the option of throwing a bunch of clouds at one spot. But then you're in there. A lot of mana will cost. Ability points will also cost even more. It’s easier to take an extra sleep, and then bombard the sleeping targets with Fireball. As they say, Profit, both mana-wise and damage-wise. It is also said that the clouds have a good pulling effect (see it in the Tactics section). Should you find use for it, one cloud is already available (electric one). The ideal – Storm of the Century. Beyond that, you don’t need more.
In principle, those are all the spells needed for a Nuker. The rest – are in specs or control, after all, one can never have too much control.
All enemies in the game have increased vulnerability to some types of magic, as well as resistance and complete immunity.[td]\
- Dragons and demons of wrath – immunity to fire magic, vulnerability to cold;
- All other demons – vulnerability to electricity and nature magic;
- Spiders – vulnerability to electricity;
- The Blightspawn – vulnerability to spirit and nature magic;
- Blood mages – vulnerability to spirit magic;
- Golems – vulnerability to ice and electric magic;
- Templars – increased resistance to direct damage spells.
Specializations – one fits us - Blood Magic. For 4 points we have an alternative resource for spell application, its replenishment (ideally then take two spells from the Life Drain line, the Entropy branch); good AOE damage+control and strong single target disable + damage.
The last spell, a single-target control for bosses in the Maleficarum line will perform at its best as damage since the game will not always allow the orange ones to be under control.
Other specs – Spiritual Healer – isn’t needed.
Separately about Shape Shifter.

A mage can turn into a warrior at the end of battle (otherwise, that’s ridiculous). If regularly your main character (as well as this pertains to controller Morrigan who already has this or Wynne who could take it) gets left alone to win a battle – it might be helpful. But don’t expect to perform adequately as a warrior with the Shapeshifter. Nevertheless, you can expect to it as a battle mage.
Option three
BATTLE MAGE
Only accessible to mages, as this is a single spec.
Candidates – any mage.
Features - fully being a Battle Mage is only possible during the second breakthrough, if you unlocked this specialization during the first.
Otherwise, there’s another option:
A mage who does everything in combat, and when mana runs out, throws on Heavy Armor from the bag and dashes into melee for mopping mobs. Lazy mages simply roam in heavy armor and shrug off 30-40% exhaustion saying, "But we’ll be rushing into battle faster!"
Crafts – as with a mage, not important. But it would do well to take survivability.
Characteristics – if you aim to be a pure battle mage – do not invest a single point away from Magic Power.
Clothing – we wear the heaviest armor because being exhausted will turn into an attack bonus. The best sword to take is the Spellweaver (found in caves on the way to the Ashes of Andraste), providing a boost to spell power. The Earthwalker sword is also good – it has 3 slots for runes and solid damage. Overall, we want attack wherever possible. At the beginning of the game, it is actually more beneficial to proceed with daggers that suit your agility (do not invest points into agility!). As it turns out in practice, damage per second with two-handed, one-handed, or daggers are the same, just daggers have better armor penetration.
Spells
Here’s where your major focus lies.
Line battle magic

A) Battle Magic – Permanent – allows us to require the power of magic from the equipment instead of strength. We’ll be able to equip anything, immediately.
B) The second skill passively (upon activation) changes the damage formula from “Strength + Agility” to “Magic Power + Agility.” The second of these we don’t have, but the first is plenty. It changes the damage calculation formula from weapons from Strength to Magic Power, allowing greater exhaustion gain as well as a bonus to attack.
This means it charges 50 mana (though it’s not mentioned) and gives you 50% fatigue from the outset instead of 5%. So much so that fatigue is your baseman target.
So what did we receive from our single point: the most “cool” armor and weapons (Exceptions – bows and knives). Hitting as a Two-Handed warrior. Ability to cast half as much spells in this mode. So far we have not quite leveled out.
Then, we will take a passable, but useful attack and defense boost in the battle mage stance and take....
The Flickering Shield. It is sensible to say Holy Shit! It provides ALL resistances to ALL forms of magical damage at 75% each. Example – In one area, the entire party will continuously receive magic damage from spirit. Everyone (and the tank) receives 11-13, the battle mage receives 2 damage. Feel the difference. It additionally gives 100 mental and physical resistance. A battle mage, apart from harmful, arrogant, and generally rude Ogres can't be knocked down or stunned.
You will have 0 mana after 10 seconds’ activation, and it consumes your mana slowly. This isn’t a joke and isn’t a developer’s mistake – after activation, approximately after 10 seconds, your mana will be 0.
C) The last spell allows dodging an attack without requiring an attack- defense check (Dodge, if we judge by other games with attacks, checks on the dodge occur before verification of attack-defense, which is quite useful) and regenerates mana, almost nonsense, as there's flickering shield to devour it. Only, if you're not tanking the boss, then you can dodge and gain mana with Battle Magic.
But nonetheless, let's return to melee. We also take Magical Protection and Stone Skin mentioned above. The first enhances your defenses modulated on spell power, while the latter - armor.
What do we end up with when all this is activated (again – Battle Magic (with two upgrades), Flickering Shield, Armor, Protection, Telekinetic Weapon)?
We receive Chuck Norris, who two minutes ago was running in robes, now gets (at a certain stage in the game) instead of 30-40 damage received that the tank got, only 20 from the boss. Hits with one sword like as with two-handed (however without the stances in two-handed). Ignores stuns, paralysis, and other magic nukers. Should we all rush to level up our Battle Mages? Not quite. One issue remains – the attack. It’s still lacking. Even with 100% fatigue. Activate Heroic Assault on yourself and lower the enemy’s defenses with every possibility – thus, you can stay alive. However, what really kills a battle mage is other debuffs on attack (Weakness, the Curse, enemy knights) - you can forget about attack rolls. Because dispelling other debuffs has the effect of removing all your buffs, don’t forget about them. And they make from 5 to 8. And how much you will then stand to put everything back up again (and with flickering shield having the heinous cooldown)?
Option four
DUAL-WIELD FIGHTER
Why a fighter is because the rogue is fit for a different role. You could create a Rogue-duelist-melee-fighter with dual weapons, but it won’t qualify as a fighter due to being improper. The explanation will be outlined in the rogue section.
Candidates – GG-warrior.
Crafts – Combat Preparation to the max, then whatever your heart desires.
Characteristics - strength and agility, ideally in half measures. A little more agility for abilities.
Clothes – if armor-clad issues are considerable, look for items that help with armor-piercing. Generally, everything is straightforward – maximum damage; clothes are looked at based on “green” bonuses rather than heaviness. However, if you’re in heavy armor, during boss fights, you’ll show only tiny differences compared to tanks – a common feature of both fighters is DD. They are more reliable than other DDs, live longer, less reliant on constant observation.
Abilities - As with dual-wielders, we desire native branches maxed out. The only distinction here is that dual-wielder may have more significant hits due to higher agility.
Line of Weapons in Each Hand
Line 4 Passives

Learn them to the max – if you don’t, then penalties will show due to variety of hit rates.
Line Debuffs

A) Double Strike – More hits come with more damage.
B) Counter Attack – Crit + Stun. Miracle! Take it.
C) Crippling Strike – Crit + removal of protection (and even reduced agility and running speeds) off of the enemy. Very tasty.
D) Punisher – optional.
Line AOE Damage

A) The first very ability, a flourish with two weapons – is a sheer miracle. Not only does damage apply to all who fit somewhere in the 150 degrees in front of the warrior (unfortunately not 180), but also additionally increases damage! The two-handed weapon before this pushes through goodness knows how long, while it maintains its usual damage.
B) Triple Hit – to my mind, does not justify the endurance cost.
C) Meanwhile, Surge... Be cautious; this consumes stamina ridiculously and urges the cost of mana down when it recharges. This greatly increases the attack rate. An excellent ability.
D) Whirlwind – hits all around, but at such a price, even though regular damage. We’re not tanks, to be surrounded. Plus, it’s an additional floor feature.
Specializations – Everything regarding two-handed warriors is compatible with dual-wielders.
The fifth option
ARCHER
***Candidates*** – GG-rogue, Leliana.
Why is a rogue better than a warrior? Simply put - a rogue can pick locks. The warrior specs – a Berserker fits, while the rest are unsuitable; in contrast, Rogue comes with dual advantages. Not to mention the rogue gets one-third more from the crafts - makes poisons whilst getting combat training and if needed, Persuasion.
Crafts – not demanding; poisons are welcomed, but mainly for grenades and can help with melee in relation to getting out of close range.
Characteristics – agility. The replacement of strength with trickery in attacks isn’t necessary, as solely arrows must be shot for maximum damage (flowing from trickery is not advised for locks!).
Clothing – strictly agility, only agility.
Abilities – Among those standard rogue abilities, we require only lockpicking skills if nobody is fit for it in a party; however, you may want to take the line of lethality (switch in the damage formula and channel the health for damages regarding mastery).
Line of Archery
Line Precise Shots

Honestly, a bit illogical.
A) Melee Attack, befuddling, we are not tanks or even warriors.
B) Precise Shot, nonetheless useful, snipping recovery allows improvements in shooting plus all parcels menued on ranged targets, whether any interesting changes will happen becomes unclear yet. But the grouping of distance/speed improvements could become an advantage for some; just as the actual speed of the attack is essentially slower than that observed at the table.
C) Protective Shot – the same rubbish.
D) Master Archer – bolstering different talents and allowing for heavy armor shooting without penalties. A pretty interesting prospect – and do heavy armor breathe heavily? So they must remain.
In general, regard for that, I would not squander points on protective shots (where there is a bridge forced) decidedly too low – only Precise Shots should suffice.
There’s one consideration, however: The archer has the right to survive more life, generally runs smarter because monsters usually do not hesitate to run after them. After remodelling through the shot distance configurations, it becomes easier for them; however, one must retain caution with all vulnerabilities as AOE does impact wider range areas on the tank than just lanes lined with mile-wide forces.
Line Special Shots

A) A Pinch Shot, looks like decent control, always useful, but it seldom works.
B) Maiming shot - decreases attack and defense of the target – useful, more often hits.
C) Critical shot – work this one out, good damage.
D) Killing Shot – as experienced individuals say, inflicts immense damage, way more than Critical Shot, but nothing in the description indicates this. Hence leveling this one is advisable.
Line Bullets

A) Rapid Fire removes criticals. Well, the archer has much agility. Thus many criticals are possible. That’s when in Sten’s famous phrase, “One of the two offers is wrong.” Rapid Fire is indeed overrated.
B) Exploding Shot – a debuff on armor, useful. Additionally, hurls the target off feet. Unusually pleasant.
C) Suppressive Shot - enhances tank life by reducing enemy strike. It can be useful when hitting tanks, particularly with the combined advantage of accurate shots if you have previously turned on precision attacks.
D) And Breaking Shot! That’s divine. It works with such a vastly good area, inflicts serious damage, and possesses awesome precision. The plan is quite well with everything for each target – with the odd pairing of consistency in the game along with parties as it relates too.
Specializations – The Assassin and Duelist, of course, in melee combat (though this shall be updated at the duelist later). There are two remaining ones: Bard and Scout. So we’ll take those.

Bard – the only useful song for the third party, giving bonuses to attack, defense, and crit chance. Despite any lack of precision, issues with party members will still be non-existent, so precise strikes should fit together. And the last attempt to manage those sounds, belonging to the rest of the archery marks carried out by crit-happy agents to prove themselves just as martyrs for folks of the mundanity.
Scout – permitting to summon a Wolf or Bear or Spider and the last spell enhances all three.

Who to choose?
A) The Wolf has health like the tank, equal damage ability, and also lowers enemies’ armor. A miracle pet.
B) The Bear is hefty; it strikes well, but it’s not on par with a tank’s aggro-generation.*
C) The Spider looks pale in comparison to their level.
How do we do? Make any 50 energy shot, summon the wolf. If it dies, summon the bear. In fact, this type of Scouts works as huge assistance by pulling every summoning turn in the new soldiers.
D) Enhanced Beast – Each creature acquires an extra capability, but noticeable differences in stats (damage with the wolf and health with wolf and bear) were perceived poorly. Therefore, if you have extra points to spare, treat yourself rigging the wolf with named abilities would virtually make this beast the graceful peak of modesty for easy transportation as soon after its level and potential diminish. A bear gains a powerful blow plus additional attack styles for ranged attacks.
However, if an order is made to gather army members, a direct encouragement to gain the summoned creatures will increase effectiveness in querying levels of attack.
In essence, this is the factory for all summoning services.
The final words on an assassin and their atmospheric quality: much is stacked against them, might one choose too many considerations here.
The goal has to center around making the right choices and leveraging them to get a solid DPS available for helping out on focused areas.
In essence, despite other classes combined, the rogue is more a hunting-style role at baseline than something more engaging.
So to gamble on improving former relationships will spur any existing enemies in chains or let loose the savage side of existing quests while aiding their determined confidence to strike out and encroach on the victory easily.
A more spread role should also assume positions far ranged to help balance by swapping tactics when traversal world improves quests.*
Now let’s move on to summarized tactics.
Tactics

After examining the characters separately, we need to form from this mishmash a party.
To start with, Classics
Setup 1) Tank - Healer - Damager - Controller.
Why? This triad is tried and tested over time, plus characters make up for the mass of battles.
How will it work? Start by contradicting the traditions with control. Namely, starting off with sleep. If sleep is not available, go to point two. Those who fall outside the range of sleeping – fireball. The tank dives into the crowd of fallen enemies, performs provocation and begins to hit any of them, ideally, a white one, to avoid missed assaults. The damage dealer waits for 1-2 tank strikes (it could be an ability) and only then begins the fight. Strong targets should be trapped in force fields if the combo of Terror + Sleep hasn’t worked. If it has worked, only the tank's target changes. The healer stands very far back, ideally behind walls, as all their healing spells shouldn't fly into reaching abilities, therefore it’s advantageous to hide them away in a pocket corner.
The Ballet of the Fireball:
Quote:
*This function is remarkably banal, but many (unfortunately) neglect it. The golden button "H" from the English layout or the right icon under the face of the lower character, the fourth in the party. After pressing this button, no one will move at all, every tactic halts. Since the battle initiates sequentially, i.e., while everyone sleeps all are running (the rubber frame --> click right), the controller casts sleep. Once everyone is up, they await the fireball on the archers. Once the fireball lands, the tank aggro should be engaged along with additional buffing offensive strikes for a few turns. Keep personal lines and wait for the healing strategy to switch to the tank, or set those accordingly during this routine.
The guidance is straightforward, while everyone believes external summons here serve this functional role by removing all underlying aggro – however do be cautious of these lordships talent level for literal and necessary points as planned fighters under their command must always remain aware!
Hope this appears useful even after those few who resolve such matters. Experiences not belaboring overall effectiveness under careful situational hands may well only prove hard-won lessons on distracting force potentials effectively during combat situations in these questing days ahead!
Rest assured the molding gauge of success should indeed prove promise as long as each story fractal unfolds professionally as levels and talents fit!
Good luck! Source